No edit summary |
|||
| (17 intermediate revisions by 13 users not shown) | |||
| Line 8: | Line 8: | ||
|location = [[The Four Dragons Casino]], [[The Strip]] |
|location = [[The Four Dragons Casino]], [[The Strip]] |
||
|target = [[Caligula's Palace]] |
|target = [[Caligula's Palace]] |
||
| − | |fail = [[Wasted]]<br>[[Busted]]<br>[[Guppy]] dies<br>[[Zero]] dies<br>Time runs out |
+ | |fail = [[Wasted]]<br>[[Busted]]<br>[[Guppy]] dies<br>[[Woozie]] dies<br>[[Zero]] dies<br>Time runs out<br>Triads die. |
|reward = [[Money|$100,000]]<br>[[Respect]] |
|reward = [[Money|$100,000]]<br>[[Respect]] |
||
| ⚫ | |||
| − | |unlocks = [[A Home in the Hills]] |
||
| ⚫ | |||
}} |
}} |
||
| − | {{Quote|OK. This is it. Play it cool, |
+ | {{Quote|OK. This is it. Play it cool, Carl.| [[Zero]]}} |
| − | '''Breaking the Bank at Caligula's''' is the final mission in [[Grand Theft Auto: San Andreas]] given to [[protagonist]] [[Carl Johnson]] by [[San Fierro Triads]] leader [[Wu Zi Mu]] from [[The Four Dragons Casino]], located along [[The Strip]] in [[Las Venturas]], [[ |
+ | '''Breaking the Bank at Caligula's''' is the final mission in [[Grand Theft Auto: San Andreas]] given to [[protagonist]] [[Carl Johnson]] by [[San Fierro Triads]] leader [[Wu Zi Mu]] from [[The Four Dragons Casino]], located along [[The Strip]] in [[Las Venturas (3D Universe)|Las Venturas]], [[San Andreas (3D Universe)|San Andreas]]. |
==Mission== |
==Mission== |
||
| − | + | Carl arrives at [[The Four Dragons Casino]], dressed as a Caligula's employee, to meet [[Wu Zi Mu|Woozie]] and the crew in preperation for the heist. The team get into a [[Securicar]] and head towards [[Caligula's Palace]], whilst Carl makes his own way there. On the way, Zero asks Carl if he can hear him on his earpiece, with Carl replying that he can. |
|
| − | Carl |
+ | Carl enters the casino and uses [[Millie Perkins|Millie's]] swipe card to gain access to the lower floors of the casino. Carl heads into the generator room, where he throws a [[Tear Gas]] canister into an air vent, which lands outside the safe and knocks out two security guards. |
| − | [[Zero]] activates the [[Satchel Charges|charges]] at the [[Sherman Dam |
+ | [[Zero]] activates the [[Satchel Charges|charges]] Carl [[Dam and Blast|placed]] at the [[Sherman Dam]], which blacks out the casino. Carl uses [[Night Vision|night vision goggles]] and makes his way to the service bay. He uses a [[Forklift]] to open the garage door and allow Woozie and the team to enter. The team head towards the safe whilst fighting their way through the security guards. Once at the safe, Zero announces that someone (whilst continually cursing [[Berkley]]) is trying to restore the power using the backup generators. Carl heads back to the generator room and blows up the backup generators. |
| − | The |
+ | The Triads open the safe using satchel charges and enter to steal the money. Whilst the Triads are in the safe, Carl protects them from incoming Mafioso. Once the team have collected the money, Carl leads the team back to the Securicar whilst fighting the security guards. During the firefight, the power is restored and Zero once again curses Berkley. When the team reach the service bay, they load the money into the Securicar and leave the casino escorted by two members using [[HPV-1000|police bikes]]. |
| + | |||
| + | Carl, acting as the decoy, must make his way to the casino roof. He does so, fighting off more Mafioso, and enters the roof to find the casino surrounded by police. Carl collects a [[Parachute]] and jumps off the roof. Once he lands, he escapes from the police and meets the team at the [[Verdant Meadows]] airstrip. At the airstrip, Zero admits to Carl that he informed Berkley about the heist, with Carl retaliating by punching Zero in the face. Woozie orders Carl to "calm down" before asking Carl to drive him back to the Four Dragons Casino. Following the mission, an angry [[Salvatore Leone]] phones Carl and makes various threats to Carl and his family. Carl taunts Salvatore about the heist and hangs up. |
||
| − | Carl is left alone, because he is the decoy. He fights his way through more mafia thugs, and catches an elevator to the roof. He then makes his way across the slanted roof, in where there is a parachute waiting. He straps up, jumps off the roof, and lands on the roof of [[The Clown's Pocket]], just north of Caligula's. Carl then gets into a [[Police Maverick]] and flies to [[Verdant Meadows]], in where the team is waiting. Once there, Carl punches Zero, who is responsible for making the heist a little harder, and takes Woozie back to the Four Dragons Casino. A furious [[Salvatore Leone]] calls making threats against Carl, CJ taunts Salvatore before the call ends. |
||
==Mission objectives== |
==Mission objectives== |
||
In order to complete the mission the player must: |
In order to complete the mission the player must: |
||
| Line 47: | Line 47: | ||
*Follow the rooftops and collect the parachute |
*Follow the rooftops and collect the parachute |
||
*Parachute off and escape in the helicopter |
*Parachute off and escape in the helicopter |
||
| − | *Escape to the safe house |
+ | *Escape to the safe house. |
| − | ==Post mission phone call== |
||
| − | '''Carl Johnson''': 'Ssup? |
||
| − | |||
| − | '''Salvatore Leone''': You two-bit, backstabbing, piece of eggplant shit! |
||
| − | |||
| − | '''Carl Johnson''': Salvatore! Nice to hear from you, too! |
||
| − | |||
| − | '''Salvatore Leone''': You're dead! Your friends are dead! Your family's dead! I'm gonna fuck you up, and your children and your grandchildren! |
||
| − | |||
| − | '''Carl Johnson''': Well, it's been nice talking to ya, but I got some money needs spending on some expensive trash, so if you'll excuse me. |
||
| − | |||
| − | '''Salvatore Leone''': You're dead! DEAD! |
||
| − | |||
==Note== |
==Note== |
||
| − | If Carl fails the parachute jump to the helicopter, the mission is not a failure; instead, Carl simply needs to jack a vehicle and drive it to Verdant Meadows, while being pursued by the enemy helicopters. If |
+ | If Carl fails the parachute jump to the helicopter, the mission is not a failure; instead, Carl simply needs to jack a vehicle and drive it to Verdant Meadows, while being pursued by the enemy helicopters. If the player has a wanted level of three-stars or fewer, they can escape the police by outrunning them. |
==Reward== |
==Reward== |
||
| − | The rewards for this mission are |
+ | The rewards for this mission are $100,000 and an increase in [[respect]]. The [[Croupier Outfit]] Carl wears becomes available from his wardrobe, although it serves no purpose after this mission. |
==Trivia== |
==Trivia== |
||
| − | The [[Forklift]] is a unique yellow |
+ | *The [[Forklift]] is a unique yellow color but is unobtainable without cheats/hacks. |
| − | *When the Triads jump on the police bikes, |
+ | *When the Triads jump on the police bikes, their character model is replaced by the standard police biker, resulting in the Triads suddenly turning African-American. |
| − | *Carl steals four bikes in [[Cop Wheels]], but only two |
+ | *Carl steals four police bikes in [[Cop Wheels]], but only two bikes are used in the heist. |
*It is extremely hard to land the parachute onto the roof of The Clown's Pocket with conventional means. Most players make the mistake of jumping off the roof then pulling the chute straight away and end up landing short of the roof, requiring them to make their own way back. The trick to making it onto the roof is jumping off the roof of Caligula's Palace and holding forward on the analog stick, or W if they're on a PC, for a few moments, rather than pulling the parachute immediately. |
*It is extremely hard to land the parachute onto the roof of The Clown's Pocket with conventional means. Most players make the mistake of jumping off the roof then pulling the chute straight away and end up landing short of the roof, requiring them to make their own way back. The trick to making it onto the roof is jumping off the roof of Caligula's Palace and holding forward on the analog stick, or W if they're on a PC, for a few moments, rather than pulling the parachute immediately. |
||
| + | * The skydiving in this mission is different. When jumping from the roof, if you hold the forward button, you will glide instead of the usual skydiving. After doing this different skydiving, whenever you jump off a building or a vehicle with a parachute and immediately hold the forward button, you will skydive in the same exclusive manner. However, if you do not immediately hold the forward button and do it after a few seconds, you will skydive in the traditional manner (tested in the PC version). |
||
| − | *It |
+ | *It is possible to jump into the vent that Carl throws the tear gas into. If the player does so, they will appear in the [[Hidden Interiors Universe]]. |
| + | *Despite Carl promising to split his share of the heist with [[Millie Perkins]], there is no evidence he does so. |
||
*No matter what [[Haircut|hair style]] you have before the mission, when you start the mission it will be the default one at the start of the game. After the mission is completed, Carl's hairstyle and clothing reverts to what it was before the mission started. The clothing isn't returned if it was changed during the mission, it will remain as in the mission. |
*No matter what [[Haircut|hair style]] you have before the mission, when you start the mission it will be the default one at the start of the game. After the mission is completed, Carl's hairstyle and clothing reverts to what it was before the mission started. The clothing isn't returned if it was changed during the mission, it will remain as in the mission. |
||
| − | *As with previous missions in the Heist strand, the game writers assumed the player will have completed the Zero missions by this point |
+ | *As with previous missions in the Heist strand, the game writers assumed the player will have completed the Zero missions by this point. Any player who has not yet done so may be confused by the references to Berkeley. |
| − | *The mission is noticeably similar to the [http://en.wikipedia.org/wiki/Ocean%27s_Eleven_%282001_film%29 2001 film Ocean's Eleven],as by looking into the characters and their plot, one can suggest the it might be an inspiration of the mission itself. |
+ | *The mission is noticeably similar to the [http://en.wikipedia.org/wiki/Ocean%27s_Eleven_%282001_film%29 2001 film Ocean's Eleven], as by looking into the characters and their plot, one can suggest the it might be an inspiration of the mission itself. |
| − | *This mission has the longest name of any in [[Grand Theft Auto: San Andreas|the game]] |
+ | *This mission has the longest name of any in [[Grand Theft Auto: San Andreas|the game]], with a total of 27 characters and the second longest in the [[3D Universe]] ([[The Portland Chainsaw Masquerade]] in [[Grand Theft Auto: Liberty City Stories]] is the longest, with 29 characters). The mission has the third longest name in the series behind [[Grand Theft Auto IV]]'s [[I Need Your Clothes, Your Boots, and Your Motorcycle]], which has 43 characters. |
*Players following the BradyGames Official Strategy Guide may be puzzled by its recommendation that Carl obtain [[adrenaline]] to assist in this and other heist-related missions; the book even shows numerous pick-up locations around the city. The guide was evidently based upon an early version of the game, as the final version omits this pick-up. |
*Players following the BradyGames Official Strategy Guide may be puzzled by its recommendation that Carl obtain [[adrenaline]] to assist in this and other heist-related missions; the book even shows numerous pick-up locations around the city. The guide was evidently based upon an early version of the game, as the final version omits this pick-up. |
||
| − | *The |
+ | *The explosives used to blow up the safe door do not harm the player. |
| − | * |
+ | *This mission is not required to complete the storyline, and can be completed after the final mission. |
==Gallery== |
==Gallery== |
||
| Line 92: | Line 81: | ||
==Video Walkthrough== |
==Video Walkthrough== |
||
| − | |||
[[File:GTA San Andreas - Walkthrough - Mission 91 - Breaking the Bank at Caligula's (HD)|thumb|left|554 px]] |
[[File:GTA San Andreas - Walkthrough - Mission 91 - Breaking the Bank at Caligula's (HD)|thumb|left|554 px]] |
||
| + | {{Clr}} |
||
| + | ==Navigation== |
||
| + | {{Navboxes |
||
| + | |title= Navigation |
||
| + | |list1= |
||
| + | {{GTA|state=collapsed}} |
||
| + | {{Gtasa missions|state=collapsed}} |
||
| + | }} |
||
[[de:Breaking the Bank at Caligula's]] |
[[de:Breaking the Bank at Caligula's]] |
||
Revision as of 19:14, 25 January 2015
Breaking the Bank at Caligula's is the final mission in Grand Theft Auto: San Andreas given to protagonist Carl Johnson by San Fierro Triads leader Wu Zi Mu from The Four Dragons Casino, located along The Strip in Las Venturas, San Andreas.
Mission
Carl arrives at The Four Dragons Casino, dressed as a Caligula's employee, to meet Woozie and the crew in preperation for the heist. The team get into a Securicar and head towards Caligula's Palace, whilst Carl makes his own way there. On the way, Zero asks Carl if he can hear him on his earpiece, with Carl replying that he can.
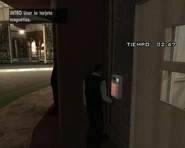
Carl enters the casino and uses Millie's swipe card to gain access to the lower floors of the casino. Carl heads into the generator room, where he throws a Tear Gas canister into an air vent, which lands outside the safe and knocks out two security guards.
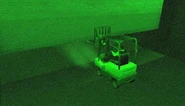
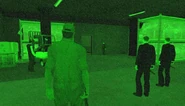
Zero activates the charges Carl placed at the Sherman Dam, which blacks out the casino. Carl uses night vision goggles and makes his way to the service bay. He uses a Forklift to open the garage door and allow Woozie and the team to enter. The team head towards the safe whilst fighting their way through the security guards. Once at the safe, Zero announces that someone (whilst continually cursing Berkley) is trying to restore the power using the backup generators. Carl heads back to the generator room and blows up the backup generators.
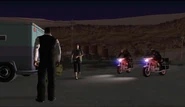
The Triads open the safe using satchel charges and enter to steal the money. Whilst the Triads are in the safe, Carl protects them from incoming Mafioso. Once the team have collected the money, Carl leads the team back to the Securicar whilst fighting the security guards. During the firefight, the power is restored and Zero once again curses Berkley. When the team reach the service bay, they load the money into the Securicar and leave the casino escorted by two members using police bikes.
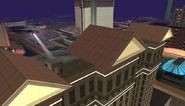
Carl, acting as the decoy, must make his way to the casino roof. He does so, fighting off more Mafioso, and enters the roof to find the casino surrounded by police. Carl collects a Parachute and jumps off the roof. Once he lands, he escapes from the police and meets the team at the Verdant Meadows airstrip. At the airstrip, Zero admits to Carl that he informed Berkley about the heist, with Carl retaliating by punching Zero in the face. Woozie orders Carl to "calm down" before asking Carl to drive him back to the Four Dragons Casino. Following the mission, an angry Salvatore Leone phones Carl and makes various threats to Carl and his family. Carl taunts Salvatore about the heist and hangs up.
Mission objectives
In order to complete the mission the player must:
- Enter the Mafia Casino
- Find and open the swipecard door
- Toss a smoke grenade into the air vent
- Find the swipecard door and open it
- Head down to the service bay
- Use the forklift to open the roller door
- Clear the corridors of security so the team can reach the vault
- Follow the team down to the vault
- Destroy the back up generators
- Head downstairs and check on the team
- Enter the Safe
- Kill the Mafia whilst the team gets the cash
- Lead the team safely back to the van
- Get to the service elevator - remember, you are the decoy
- Get onto the roof
- Follow the rooftops and collect the parachute
- Parachute off and escape in the helicopter
- Escape to the safe house.
Note
If Carl fails the parachute jump to the helicopter, the mission is not a failure; instead, Carl simply needs to jack a vehicle and drive it to Verdant Meadows, while being pursued by the enemy helicopters. If the player has a wanted level of three-stars or fewer, they can escape the police by outrunning them.
Reward
The rewards for this mission are $100,000 and an increase in respect. The Croupier Outfit Carl wears becomes available from his wardrobe, although it serves no purpose after this mission.
Trivia
- The Forklift is a unique yellow color but is unobtainable without cheats/hacks.
- When the Triads jump on the police bikes, their character model is replaced by the standard police biker, resulting in the Triads suddenly turning African-American.
- Carl steals four police bikes in Cop Wheels, but only two bikes are used in the heist.
- It is extremely hard to land the parachute onto the roof of The Clown's Pocket with conventional means. Most players make the mistake of jumping off the roof then pulling the chute straight away and end up landing short of the roof, requiring them to make their own way back. The trick to making it onto the roof is jumping off the roof of Caligula's Palace and holding forward on the analog stick, or W if they're on a PC, for a few moments, rather than pulling the parachute immediately.
- The skydiving in this mission is different. When jumping from the roof, if you hold the forward button, you will glide instead of the usual skydiving. After doing this different skydiving, whenever you jump off a building or a vehicle with a parachute and immediately hold the forward button, you will skydive in the same exclusive manner. However, if you do not immediately hold the forward button and do it after a few seconds, you will skydive in the traditional manner (tested in the PC version).
- It is possible to jump into the vent that Carl throws the tear gas into. If the player does so, they will appear in the Hidden Interiors Universe.
- Despite Carl promising to split his share of the heist with Millie Perkins, there is no evidence he does so.
- No matter what hair style you have before the mission, when you start the mission it will be the default one at the start of the game. After the mission is completed, Carl's hairstyle and clothing reverts to what it was before the mission started. The clothing isn't returned if it was changed during the mission, it will remain as in the mission.
- As with previous missions in the Heist strand, the game writers assumed the player will have completed the Zero missions by this point. Any player who has not yet done so may be confused by the references to Berkeley.
- The mission is noticeably similar to the 2001 film Ocean's Eleven, as by looking into the characters and their plot, one can suggest the it might be an inspiration of the mission itself.
- This mission has the longest name of any in the game, with a total of 27 characters and the second longest in the 3D Universe (The Portland Chainsaw Masquerade in Grand Theft Auto: Liberty City Stories is the longest, with 29 characters). The mission has the third longest name in the series behind Grand Theft Auto IV's I Need Your Clothes, Your Boots, and Your Motorcycle, which has 43 characters.
- Players following the BradyGames Official Strategy Guide may be puzzled by its recommendation that Carl obtain adrenaline to assist in this and other heist-related missions; the book even shows numerous pick-up locations around the city. The guide was evidently based upon an early version of the game, as the final version omits this pick-up.
- The explosives used to blow up the safe door do not harm the player.
- This mission is not required to complete the storyline, and can be completed after the final mission.
Gallery
Video Walkthrough

GTA San Andreas - Walkthrough - Mission 91 - Breaking the Bank at Caligula's (HD)

