DocVinewood (talk | contribs) No edit summary |
No edit summary Tag: Source edit |
||
| (129 intermediate revisions by 69 users not shown) | |||
| Line 2: | Line 2: | ||
|name = Dead Man Walking |
|name = Dead Man Walking |
||
|image = DeadManWalking-Mission-GTAV.png |
|image = DeadManWalking-Mission-GTAV.png |
||
| + | |||
| − | |size = 270px |
||
| − | |game = V |
+ | |game = {{games|V=y}} |
| + | |type = V |
||
| − | |for = [[Dave Norton]] |
||
| + | |for = {{For|game=V|davem}} |
||
| ⚫ | |||
| + | |location = |
||
| ⚫ | |||
| + | *[[Los Santos County Coroner Office]], [[Strawberry]] |
||
| + | *[[Murrieta Oil Field]], [[El Burro Heights]] <small>(end)</small> |
||
|protagonists = [[Michael De Santa]] |
|protagonists = [[Michael De Santa]] |
||
| + | |fail = [[Wasted]]<br>[[Busted]]<br>Fail to wake up before the doctors cut Michael open<br>Visiting Franklin while wanted level is active<br>[[Franklin Clinton|Franklin]] dies |
||
| − | |fail = [[Wasted]]<br>[[Busted]] |
||
| + | |reward = [[Dave Norton]] as a [[Rockstar Editor|Director Mode]] character. <small>(Enhanced version only)</small> |
||
| − | |unlocks = [[Three's Company]]<br>[[Did Somebody Say Yoga? |
+ | |unlocks = [[Three's Company]]<br>[[Did Somebody Say Yoga?]] |
|unlockedby = [[Fame or Shame (mission)|Fame or Shame]] |
|unlockedby = [[Fame or Shame (mission)|Fame or Shame]] |
||
| + | |todo = *Search the morgue for the '''<span style="color:#62ba62">body.</span>''' |
||
| + | *Escape from the '''<span style="color:#dece71">building.</span>''' |
||
| + | *Escape through the '''<span style="color:#dece71">window.</span>''' |
||
| + | *Lose the Cops. |
||
| + | *Go to the '''<span style="color:#dece71">oil derricks.</span>''' |
||
| + | |target = Confirm [[Ferdinand Kerimov]]'s death by sneaking into the [[Los Santos County Coroner Office|morgue]] as a dead person and investigate the corpses for Kerimov's name while dealing with guards and cops |
||
}} |
}} |
||
| + | {{Quote|Agent Dave Norton puts Michael in a difficult situation.|''GTA V'' description at Rockstar Games Social Club}} |
||
| ⚫ | {{Dialogue3|Michael|What do you need?|Dave|This guy. Ferdinand Kerimov. The Agency claims he's dead. We at The Bureau think they're full of crap. We think he's being debriefed some place.|So?|Apparently, he has information which will put me and my superiors out of circulation. Those Agency fuckers have got the coroner's office locked down. We need you to verify the body.| [[Dave Norton]], briefing [[Michael De Santa]].}} |
||
| + | [[File:DeadManWalking-GTAV-Dialogue.ogg|noicon]] |
||
| ⚫ | |||
| ⚫ | {{Dialogue3|Michael|What do you need?|Dave|This guy. Ferdinand Kerimov. The Agency claims he's dead. We at The Bureau think they're full of crap. We think he's being debriefed some place.|So?|Apparently, he has |
||
| − | |||
| ⚫ | |||
==Description== |
==Description== |
||
| − | Dave asks Michael to meet him at the [[Galileo Observatory]]. During the meeting, Michael confesses that he |
+ | Dave asks Michael to meet him at the [[Galileo Observatory]]. During the meeting, Michael confesses that he [[The Jewel Store Job|robbed the Vangelico store]] with [[Franklin Clinton|Franklin]] and dares Dave to arrest him, to allow Dave to gain extra credit with the [[Federal Investigation Bureau|FIB]]. |
| − | Dave refuses. Instead, he asks Michael for a favor. |
+ | Dave refuses. Instead, he asks Michael for a favor. [[Ferdinand Kerimov]], an informant and suspected terrorist, has been declared dead by the [[International Affairs Agency|IAA]], but the FIB believe he's being "debriefed" somewhere. Dave wants Michael to enter the [[Los Santos County Coroner Office|morgue]] in [[Strawberry]] and confirm that Kerimov is indeed dead. Because the IAA has the morgue secured, Michael must sneak in. Dave facetiously remarks that Michael should have no trouble "[[Prologue|playing dead]]", before knocking him out with a [[Nightstick|truncheon]]. With Michael slipping out of consciousness, Dave quickly informs him to call him when he regains consciousness. |
| − | In the morgue, Michael |
+ | In the morgue, Michael regains consciousness in a body bag. The bag is soon unzipped and two [[County of Los Santos Department of Coroner|medical examiners]] begin preparing Michael's body for autopsy. Michael surprises the examiners, choking one while the [[Pete|other]] runs away. A guard soon appears who Michael can take down with a sneak attack. Michael then checks the corpses in the morgue. He discovers one with Kerimov's name on the toe tag, but the body is of a black woman, and is obviously not Kerimov. Michael calls Dave to relay the news. Dave tells Michael he must escape the morgue. |
| − | At this point, more guards appear. Michael must shoot his way through the first floor and up to the second where he retrieves his clothes and weapons. From there, Michael must shoot out a window and jump into a dumpster below. Michael must then evade the cops, after which he calls [[Franklin]] and asks him to meet at the oil derricks. Once there, Michael urges Franklin to flee Los Santos, |
+ | At this point, more guards appear. Michael must shoot his way through the first floor and up to the second where he retrieves his clothes and weapons. From there, Michael must shoot out a window and jump into a [[dumpster]] below. Michael must then evade the [[Los Santos Police Department (HD Universe)|cops]] (using either a [[Felon]], a [[Baller]], or another vehicle), after which he calls [[Franklin Clinton|Franklin]] and asks him to meet at the [[Murrieta Oil Field|oil derricks]] in [[El Burro Heights]]. Once there, Michael urges Franklin to flee Los Santos, warning him that the FIB will soon put Franklin's life in danger. Franklin states that Michael has helped him, and so he will help Michael. Michael thanks Franklin for his loyalty. Franklin leaves and the mission ends. |
| − | ==Mission |
+ | ==Mission Objectives== |
*Search the morgue for the body. |
*Search the morgue for the body. |
||
*Escape from the building. |
*Escape from the building. |
||
*Escape through the window. |
*Escape through the window. |
||
| − | *Shoot out the window and escape. |
+ | * Shoot out the window and escape. |
*Lose the cops. |
*Lose the cops. |
||
*Go to the oil derricks. |
*Go to the oil derricks. |
||
| − | ==Gold Medal Objectives== |
+ | ==Gold Medal Objectives == |
*Accuracy - Finish with a shooting accuracy of at least 70%. |
*Accuracy - Finish with a shooting accuracy of at least 70%. |
||
| + | **Using a low damage weapon will score more hits, upping the accuracy stat. |
||
*Headshots - Kill 14 enemies with a headshot. |
*Headshots - Kill 14 enemies with a headshot. |
||
| + | **Michael's special ability may greatly aid the player on this objective. Headshots can quickly refill the special ability bar. |
||
*Time - Complete within 09:30. |
*Time - Complete within 09:30. |
||
| + | **Skip the cutscenes. The Felon is useful for a quick escape. Shoot the window once Michael is out of the dumpster and use the rear exit of the coroner's office to avoid the police. |
||
| − | *Focused Killer - Kill 4 enemies using |
+ | *Focused Killer - Kill 4 enemies using Michael's special ability. |
| ⚫ | |||
| + | **Kill most enemies with the special ability. It also helps for the headshot objective. |
||
| ⚫ | |||
| + | **Take cover throughout the mission and don't pick up weapons and armor until all enemies are dead on the last floor. |
||
| + | **Having armor prior to the mission will reduce the damage taken. If playing as part of the story there's one near the Observatory. |
||
==Aftermath== |
==Aftermath== |
||
| + | *Dave will send an email to Michael after this mission. He apologizes for putting heat on Michael back at the morgue, but then calls him out for going back to his life of crime even when asked not to, causing him to break out of his informal witness protection. Dave mentions he will continue to support Michael the best he can, but he will have to "play ball". Michael can sarcastically reply to Dave, treating the email as spam. |
||
| + | *[[Trevor Philips|Trevor]] will get an email from [[Ron Jakowski|Ron]] after this mission. Ron misses Trevor's presence in [[Sandy Shores]] and informs him that all kinds of crazies have been sniffing about their [[Trevor Philips Enterprises|operations]], which makes it hard for him to operate as an acting CEO, proposing Trevor to come back and help him. He also shows concern about Trevor's wellbeing in Los Santos, informing him of many events: [[The Lost MC|The Lost]] being in trouble after Trevor's [[Friends Reunited|last visit]], the O'Neil's [[Crystal Maze|sudden disappearance]] and their [[Predator (mission)|probable reappearance]] in future, and some [[Los Santos Triads|Chinese]] sniffing about Trevor's whereabouts in town, which Ron suspects may be caused by [[Crystal Maze|the deal]] which fell through. |
||
| + | *Trevor will also get an email from [[Brad Snider|Brad]] as well. Brad refuses to accept Michael's resurrection and reaffirms his death, claiming the person as an imposter, as he saw pictures of Michael's funeral and invites Trevor to visit him in [[Bolingbroke Penitentiary|prison]]. Trevor rejects the offer in response. After some time, Brad will sadly reply to Trevor's response, stating that he misses Trevor, while also calling him his brother. |
||
| + | **According to the mission [[By the Book]], the whole irony of the imposter claim is that it is actually Dave who is impersonating Brad the whole time, as Brad has been dead for almost a decade. |
||
===[[Bleeter]] Posts=== |
===[[Bleeter]] Posts=== |
||
| + | {{Bleet |
||
| ⚫ | |||
| + | |bleeterimage =lsmorticianpete |
||
| ⚫ | |||
| + | |bleetername =lsmorticianpete |
||
| ⚫ | |||
| + | }} |
||
| + | {{Bleet |
||
| + | |bleeterimage =mandybrocoli |
||
| + | |bleetername =mandybrocoli |
||
| ⚫ | |||
| + | }} |
||
| + | |||
| + | ==Gallery == |
||
| + | <gallery position="center"> |
||
| + | Dead_Man_Walking_GTAV_Truncheon.png|The unique truncheon used to knock Michael out. |
||
| + | Dead_Man_Walking_GTAV_ME_Incapacitated.png|Morgue worker incapacitated. |
||
| + | Dead_Man_Walking_GTAV_Corpses.png|Corpses to be identified. |
||
| + | Dead_Man_Walking_GTAV_Escape.png|Escape route. |
||
| + | </gallery> |
||
| ⚫ | |||
| − | *If you don't wake up when the doctors are examining you, they will cut you open with a bonesaw, killing you. |
||
| − | *While the doctors are examinating Michael, if the player does not move the camera and let the doctors continue talking, they will stop the conversation after some point and will only continue talking if the player move the camera, otherwise they will keep examinating Michael in silence and will not even kill him. |
||
| ⚫ | * |
||
| ⚫ | |||
| + | ==Video Walkthroughs == |
||
| − | ==Videos== |
||
| − | <gallery hideaddbutton="true"> |
+ | <gallery hideaddbutton="true" position="center"> |
| − | File: |
+ | File:GTA_5_-_Mission_23_-_Dead_Man_Walking_100%25_Gold_Medal_Walkthrough|Dead Man Walking Mission Walkthrough |
| + | File:GTA_5_-_Mission_23_-_Dead_Man_Walking_First_Person_Gold_Medal_Guide_-_PS4|First Person Walkthrough |
||
| + | File:GTA_5_PC_-_Mission_23_-_Dead_Man_Walking_Gold_Medal_Guide_-_1080p_60fps|PC 60FPS Walkthrough |
||
</gallery> |
</gallery> |
||
| + | {{#ev:youtube|tr9m3c1vEyM|275px|center|GTA Series Videos - GTA 5 PS5 - Dead Man Walking<br>[Gold Medal Guide - 4K 60fps]}} |
||
| ⚫ | |||
| + | *[[Shawn Fonteno]], Franklin's voice actor, stated in his book ''Game Changer'' that following his end of mission scene with [[Ned Luke]], Michael's voice actor, Ned started crying and everyone in the room began to clap for them both. When Fonteno questioned Luke about what was going on, he responded ''"Damn, Solo, you nailed that. You've come a long way. Your words hurt. They hit my heart"''. Fonteno went on to say this was because everyone knew about the difficult journey he had been on to reach this point, as he had no formal acting training and was completely self-taught.<ref>The book ''Game Changer'' by Shawn Fonteno - Pages 5-6</ref> |
||
| + | *"Dead man walking!" is a phrase that originated in American prisons to announce that an execution is about to take place. |
||
| + | *If Michael doesn't "wake up" when the doctors are examining him, they will eventually cut him open with a bonesaw, killing him and failing the mission. During this time, moving the camera around will result in some unique dialogue between the doctors about how his corpse is "reanimating". |
||
| ⚫ | *A possible plot hole exists during the initial [[cutscene]] of this mission. Dave knocks Michael out and ''after'' doing this, tells Michael to call him when he gets to the morgue. However, Michael would be near-unconscious by this point and wouldn't have been able to hear Dave's instructions. It is possible that Michael could have either heard Dave as he was slipping into unconsciousness, or he assumed that ending up in the morgue was part of Dave's plan, though he expresses surprise when he phones Dave later in the mission. |
||
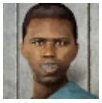
| + | **There is also an inconsistency with the two medical staff - Michael incapacitates the African-American and the other one escapes, while the post-mission [[Bleeter.biz|Bleet]] is from [[Pete]], who is the African-American one. |
||
| + | *Dave uses a unique truncheon to knock Michael out during the initial cutscene, which is not seen outside of it and cannot be obtained by the player. |
||
| ⚫ | |||
| + | *In ''{{WP|Max Payne 2}}'' and ''{{WP|Max Payne 3}}'', there are arcade modes also called '''Dead Man Walking''' and '''Dead Men Walking''' respectively. |
||
| + | *The guard that searches for Michael wears the same outfit as [[Steve Haines]]. |
||
| + | *Regardless of which vehicle Michael uses to escape from the police, once his wanted level is cleared the radio will automatically tune into [[Los Santos Rock Radio]] and "Radio Ga Ga" by Queen will always play. |
||
| + | * Franklin can be seen at the oil derricks talking on his phone when Michael calls him. |
||
| + | *If Michael injures one of the medics inside the coroners office but doesn't kill him, the medic may pull out a [[Pistol]] and die shortly afterwards. |
||
| + | *If the IAA agents with the [[Pump Shotgun]]s and [[SMG]]s are shot and injured, they will pull out standard [[Pistol]]s. The ones with the [[Combat Pistol]]s will still hold them when injured. |
||
| + | |||
| + | ==Navigation== |
||
| + | {{Navboxes |
||
| + | |title= Navigation |
||
| + | |list1= |
||
| + | {{GTA|state=collapsed}} |
||
| + | {{Gtav missions|state=collapsed}} |
||
| + | }} |
||
[[de:Totgesagte leben länger]] |
[[de:Totgesagte leben länger]] |
||
| + | [[es:Muerto viviente]] |
||
| − | [[Category:Missions]] |
||
| + | [[fr:Trompe-la-mort]] |
||
| + | [[pl:Dzień żywego trupa]] |
||
| + | [[pt:A Volta dos que não Foram]] |
||
| + | [[ru:Dead Man Walking]] |
||
[[Category:Missions in GTA V]] |
[[Category:Missions in GTA V]] |
||
| + | |||
| + | <references /> |
||
Latest revision as of 09:44, 24 March 2024
- Michael: "What do you need?"
- Dave: "This guy. Ferdinand Kerimov. The Agency claims he's dead. We at The Bureau think they're full of crap. We think he's being debriefed some place."
- Michael: "So?"
- Dave: "Apparently, he has information which will put me and my superiors out of circulation. Those Agency fuckers have got the coroner's office locked down. We need you to verify the body."
- — Dave Norton, briefing Michael De Santa.
Dead Man Walking is a mission in Grand Theft Auto V, given to protagonist Michael De Santa by FIB agent Dave Norton. Fellow protagonist Franklin Clinton also makes an appearance in the final cutscene of the mission.
Description
Dave asks Michael to meet him at the Galileo Observatory. During the meeting, Michael confesses that he robbed the Vangelico store with Franklin and dares Dave to arrest him, to allow Dave to gain extra credit with the FIB.
Dave refuses. Instead, he asks Michael for a favor. Ferdinand Kerimov, an informant and suspected terrorist, has been declared dead by the IAA, but the FIB believe he's being "debriefed" somewhere. Dave wants Michael to enter the morgue in Strawberry and confirm that Kerimov is indeed dead. Because the IAA has the morgue secured, Michael must sneak in. Dave facetiously remarks that Michael should have no trouble "playing dead", before knocking him out with a truncheon. With Michael slipping out of consciousness, Dave quickly informs him to call him when he regains consciousness.
In the morgue, Michael regains consciousness in a body bag. The bag is soon unzipped and two medical examiners begin preparing Michael's body for autopsy. Michael surprises the examiners, choking one while the other runs away. A guard soon appears who Michael can take down with a sneak attack. Michael then checks the corpses in the morgue. He discovers one with Kerimov's name on the toe tag, but the body is of a black woman, and is obviously not Kerimov. Michael calls Dave to relay the news. Dave tells Michael he must escape the morgue.
At this point, more guards appear. Michael must shoot his way through the first floor and up to the second where he retrieves his clothes and weapons. From there, Michael must shoot out a window and jump into a dumpster below. Michael must then evade the cops (using either a Felon, a Baller, or another vehicle), after which he calls Franklin and asks him to meet at the oil derricks in El Burro Heights. Once there, Michael urges Franklin to flee Los Santos, warning him that the FIB will soon put Franklin's life in danger. Franklin states that Michael has helped him, and so he will help Michael. Michael thanks Franklin for his loyalty. Franklin leaves and the mission ends.
Mission Objectives
- Search the morgue for the body.
- Escape from the building.
- Escape through the window.
- Shoot out the window and escape.
- Lose the cops.
- Go to the oil derricks.
Gold Medal Objectives
- Accuracy - Finish with a shooting accuracy of at least 70%.
- Using a low damage weapon will score more hits, upping the accuracy stat.
- Headshots - Kill 14 enemies with a headshot.
- Michael's special ability may greatly aid the player on this objective. Headshots can quickly refill the special ability bar.
- Time - Complete within 09:30.
- Skip the cutscenes. The Felon is useful for a quick escape. Shoot the window once Michael is out of the dumpster and use the rear exit of the coroner's office to avoid the police.
- Focused Killer - Kill 4 enemies using Michael's special ability.
- Kill most enemies with the special ability. It also helps for the headshot objective.
- Unmarked - Complete with minimal damage to health and armor.
- Take cover throughout the mission and don't pick up weapons and armor until all enemies are dead on the last floor.
- Having armor prior to the mission will reduce the damage taken. If playing as part of the story there's one near the Observatory.
Aftermath
- Dave will send an email to Michael after this mission. He apologizes for putting heat on Michael back at the morgue, but then calls him out for going back to his life of crime even when asked not to, causing him to break out of his informal witness protection. Dave mentions he will continue to support Michael the best he can, but he will have to "play ball". Michael can sarcastically reply to Dave, treating the email as spam.
- Trevor will get an email from Ron after this mission. Ron misses Trevor's presence in Sandy Shores and informs him that all kinds of crazies have been sniffing about their operations, which makes it hard for him to operate as an acting CEO, proposing Trevor to come back and help him. He also shows concern about Trevor's wellbeing in Los Santos, informing him of many events: The Lost being in trouble after Trevor's last visit, the O'Neil's sudden disappearance and their probable reappearance in future, and some Chinese sniffing about Trevor's whereabouts in town, which Ron suspects may be caused by the deal which fell through.
- Trevor will also get an email from Brad as well. Brad refuses to accept Michael's resurrection and reaffirms his death, claiming the person as an imposter, as he saw pictures of Michael's funeral and invites Trevor to visit him in prison. Trevor rejects the offer in response. After some time, Brad will sadly reply to Trevor's response, stating that he misses Trevor, while also calling him his brother.
- According to the mission By the Book, the whole irony of the imposter claim is that it is actually Dave who is impersonating Brad the whole time, as Brad has been dead for almost a decade.
Bleeter Posts
 |
@lsmorticianpete | |||
| So I'm about to slice and dice at the morgue when the dude wakes up and goes psycho! Had to run for my life! Who says I got a boring job now! | ||||
 |
@mandybrocoli | |||
| You hear about that shootout at the coroners in South LS? Apparently IAA was involved. What's your call - terrorists or zombies? | ||||
Gallery
")
")
")
")
Video Walkthroughs
")
")
")
Trivia
- Shawn Fonteno, Franklin's voice actor, stated in his book Game Changer that following his end of mission scene with Ned Luke, Michael's voice actor, Ned started crying and everyone in the room began to clap for them both. When Fonteno questioned Luke about what was going on, he responded "Damn, Solo, you nailed that. You've come a long way. Your words hurt. They hit my heart". Fonteno went on to say this was because everyone knew about the difficult journey he had been on to reach this point, as he had no formal acting training and was completely self-taught.[1]
- "Dead man walking!" is a phrase that originated in American prisons to announce that an execution is about to take place.
- If Michael doesn't "wake up" when the doctors are examining him, they will eventually cut him open with a bonesaw, killing him and failing the mission. During this time, moving the camera around will result in some unique dialogue between the doctors about how his corpse is "reanimating".
- A possible plot hole exists during the initial cutscene of this mission. Dave knocks Michael out and after doing this, tells Michael to call him when he gets to the morgue. However, Michael would be near-unconscious by this point and wouldn't have been able to hear Dave's instructions. It is possible that Michael could have either heard Dave as he was slipping into unconsciousness, or he assumed that ending up in the morgue was part of Dave's plan, though he expresses surprise when he phones Dave later in the mission.
- Dave uses a unique truncheon to knock Michael out during the initial cutscene, which is not seen outside of it and cannot be obtained by the player.
- One of the alarms that can be heard during the escape is the same used in The Lost and Damned mission Off Route, when Johnny Klebitz steals a Prison Bus.
- In Max Payne 2 and Max Payne 3, there are arcade modes also called Dead Man Walking and Dead Men Walking respectively.
- The guard that searches for Michael wears the same outfit as Steve Haines.
- Regardless of which vehicle Michael uses to escape from the police, once his wanted level is cleared the radio will automatically tune into Los Santos Rock Radio and "Radio Ga Ga" by Queen will always play.
- Franklin can be seen at the oil derricks talking on his phone when Michael calls him.
- If Michael injures one of the medics inside the coroners office but doesn't kill him, the medic may pull out a Pistol and die shortly afterwards.
- If the IAA agents with the Pump Shotguns and SMGs are shot and injured, they will pull out standard Pistols. The ones with the Combat Pistols will still hold them when injured.
- ↑ The book Game Changer by Shawn Fonteno - Pages 5-6