No edit summary |
(→Team Deathmatches: no need for it) Tag: Visual edit |
||
| (48 intermediate revisions by 23 users not shown) | |||
| Line 1: | Line 1: | ||
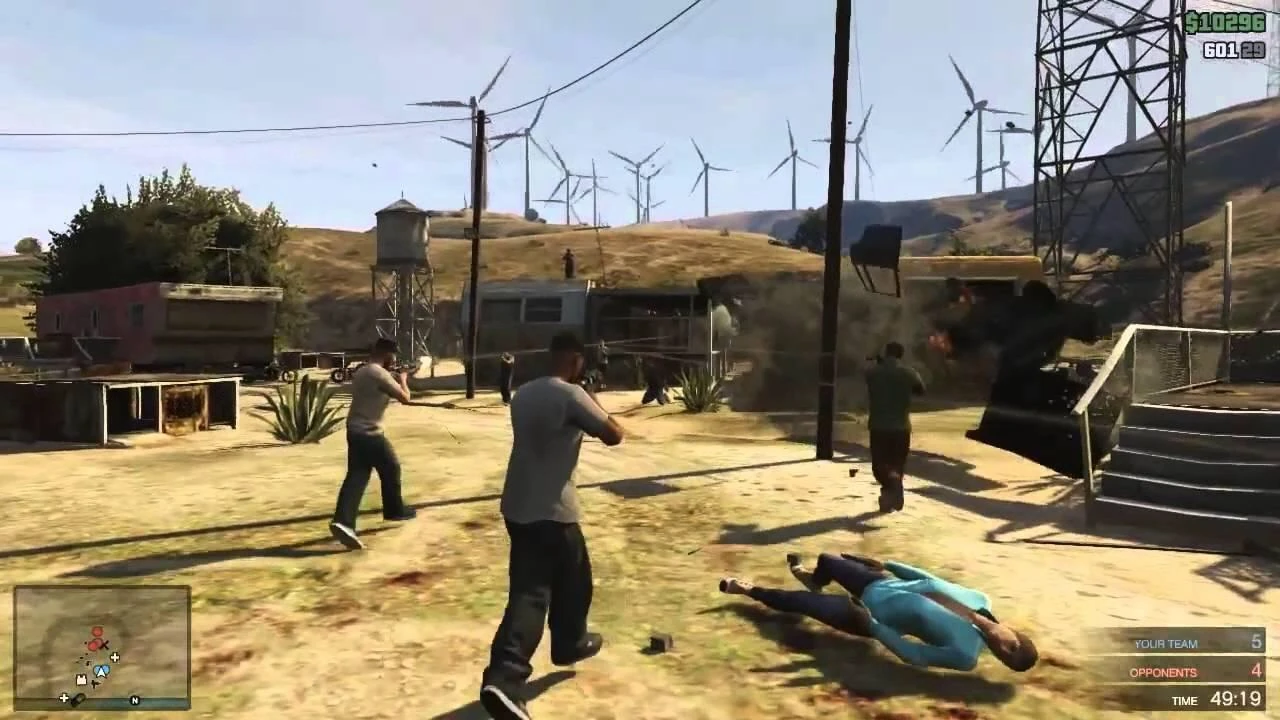
| + | [[File:Deathmatch-GTAO.jpg|thumb|right|265px|A deathmatch in ''GTA Online.'']] |
||
| − | {{expand}} |
||
| − | {{outofdate}} |
||
| + | '''Deathmatch''' is a [[Multiplayer in GTA IV|multiplayer]] game mode in ''[[Grand Theft Auto IV]]'' and ''[[Grand Theft Auto Online]]'' consisting of two to sixteen players. |
||
| ⚫ | |||
| − | In other shooting multiplayer games, Deathmatch is also known as '''Free For All '''or '''FFA'''. |
||
| + | ==Deatmatches in GTA IV Multiplayer and its Episodes== |
||
| ⚫ | |||
| + | {{Quote|Deathmatch. It's kill or be killed, capitalism style. Kill the other players as many times as you can. The player with the most cash when the game ends wins. Remember to graciously loot the cash dropped by dead players.|In-game description.}} |
||
| + | ===Description=== |
||
| + | |||
| ⚫ | The standard free-for-all in many online shooting games, players' only goal is to kill as many opposing players as possible. Players can also pick up money from deceased players. The player with the most money at the end of the match wins. There must be at least 2 players in the match, and no more than 16. The players can play a similar Deathmatch in both GTA IV's [[Free Mode]] and Party Mode. While no specific score is capped, Free Roam unlocks the whole city, lots of vehicles and guns. Party mode follows a similar principal. From both Free Roam and Party Mode, Deathmatch can be found. |
||
| + | |||
| ⚫ | |||
The objective make the most money by the end of the match by killing other players. Each match will either have a time limit or a money limit. |
The objective make the most money by the end of the match by killing other players. Each match will either have a time limit or a money limit. |
||
| − | ==Variables== |
+ | ===Variables=== |
The Host can change a number of factors including |
The Host can change a number of factors including |
||
* A Time limit or a money limit |
* A Time limit or a money limit |
||
| Line 19: | Line 23: | ||
* The Respawn time and the amount of distance from other players when the player spawns |
* The Respawn time and the amount of distance from other players when the player spawns |
||
| − | ==Scoring== |
+ | ===Scoring=== |
[[Money]] is awarded in Deathmatch by following ways: |
[[Money]] is awarded in Deathmatch by following ways: |
||
| − | *Each |
+ | *Each kill grants you $100 |
| − | *Each |
+ | *Each suicide (kill yourself by explosives, fall damage or pedestrians) subtracts $100 from your money. If you have less than $100, your money will go to zero. |
| − | *You can |
+ | *You can pick up money from fallen players. The money ranges around $10 to $30. |
*Your reward at the end of the match consists of the players you have killed, the money you have picked up and the suicides you have made. For instance, if you kill 7 players, pick up $62 money and suicide once, your reward will be $662. |
*Your reward at the end of the match consists of the players you have killed, the money you have picked up and the suicides you have made. For instance, if you kill 7 players, pick up $62 money and suicide once, your reward will be $662. |
||
| − | ==Achievements/Trophies== |
+ | ===Achievements/Trophies=== |
| − | * |
+ | *'''Let Sleeping Rockstars Lie''': Kill a Rockstar Employee. This can usually be done when you do your first Deathmatch. |
| + | *'''Cut Your Teeth''': Earn $1000 or more when on rank 0 to get rank 1. |
||
| − | *Getting your first $1,000 will earn you your first rank promotion and '''"Cut Your Teeth"''' achievement. |
||
| + | *'''Top of the Food Chain''': Kill 20 people or more with a Pistol in one game. Can be done when Weapon Choice is 'Pistols' |
||
| − | *Killing 20 players in a single ranked match will give you the '''"Top of the Food Chain"''' achievement. |
||
| + | *'''Wanted''': Get to Rank 10 in Multiplayer. |
||
| + | ===(IV and TLAD)=== |
||
| + | These are the maps for the main game and its first DLC, The Lost and Damned. |
||
| + | ====<span style="font-size:17px;">Maps</span>==== |
||
| + | *[[Liberty City (HD Universe)|Liberty City]] - Not your best choice, but [[Rockstar Games|Rockstar]] had to put it in. The whole city will go into madness when 16 or 32 (PC) people are shooting. |
||
| + | *[[Algonquin]]: A big island for a big shootout. Will [[Star Junction]]'s lights go out from gunfire? |
||
| + | *[[Alderney]]: Another big island for a big shootout. Nothing to popular here to destroy with the [[Rocket Launcher|RPG]]. |
||
| + | *[[Dukes]] / [[Broker]]: Two boroughs put together for many people to have a reasonable Deathmatch. |
||
| + | *[[Bohan]]: This borough is better than the others because of its size. [[SMG]]'s are a good choice here, but look out for gangs. |
||
| + | *[[Happiness Island]]: A small island for a big shootout. [[Statue of Happiness|Lady Happiness]] will have a lot of [[blood]] on her clothes after a Deathmatch. |
||
| + | *[[Colony Island]]: A small island for a shootout. Why couldn't the [[Old Hospital]] not be old?. |
||
| + | *[[Charge Island]]: A reasonable sized island. Get the [[baseball bat]] for a day at the bloody park. |
||
| + | *[[Alderney State Correctional Facility]]: The guards have somewhat disappeared, so what a better way to celebrate than to kill the other inmates (i.e. your foes). |
||
| + | *[[Francis International Airport, Dukes|Francis International Airport]]: LC has allowed us entrance to the airport. People from [[Los Santos (HD Universe)|Los Santos]] and [[Vice City (HD Universe)|Vice City]] probably wish they didn't board the plane. |
||
| − | ==Weapons== |
+ | ====Weapons==== |
| + | *Melee - Your [[Fist]]s, [[Knife]], [[Baseball Bat]] and [[Pool Cue]] (TLAD) |
||
| − | ''*-Only available in TLAD **-Only available in TBOGT'' |
||
| ⚫ | |||
| ⚫ | |||
| ⚫ | |||
| ⚫ | |||
| ⚫ | |||
| ⚫ | |||
| ⚫ | |||
| ⚫ | |||
| ⚫ | |||
| + | *Projectiles- Includes the [[Grenades]] and [[Molotov Cocktail|Molotovs]]. The [[Pipe Bombs]] (TLAD) |
||
| ⚫ | |||
| ⚫ | |||
| ⚫ | |||
| ⚫ | |||
| ⚫ | |||
| + | *Fists and Knife are back-up weapons that you automatically get and use when you have no other weapon. |
||
| + | <small>1 - Only available in TLAD</small> |
||
| + | <small>2 - Only available in The Ballad of Gay Tony</small> |
||
| ⚫ | |||
| ⚫ | |||
| ⚫ | In [[The Ballad of Gay Tony]], all locations are set up in small areas, such as the Libertonian Museum or the construction site, entire islands wont host Deathmatches anymore. Also, spawns are random, respawn invincibility has been removed, people respawn with full health and full armor (Except when players begin the game, they spawn without armor), and no gun remains that can have the trigger tapped on multiplayer. |
||
| ⚫ | |||
| ⚫ | |||
| ⚫ | |||
| ⚫ | |||
| ⚫ | |||
| ⚫ | |||
| ⚫ | |||
| ⚫ | |||
| − | *Projectiles- Includes the [[Grenades]]([[Pipe Bomb]] in TLAD) and [[Molotov Cocktail|Molotov Cocktails]]. |
||
| ⚫ | |||
| ⚫ | |||
| ⚫ | |||
| ⚫ | |||
| ⚫ | |||
| ⚫ | |||
| ⚫ | |||
| + | *'''Trespass''' is set in the abandoned [[Sprunk Factory]]. With such high roofs and several floors, there is tons of space to hide. In a game set at this location, get onto the roof or catwalk, it provides a good vantage point. |
||
| ⚫ | |||
| + | *'''Auld Reekie''' is set around the [[Waste Management Plant|warehouse]] in [[Waste Not Want Knots]]. Try to avoid being caught in the middle, and stay out of the warehouse. Try to get on the roof to get a good vanatge point especially with the [[Advanced MG]] in your hands. |
||
| ⚫ | |||
| − | *''' |
+ | *'''Ziggurat''' is set at the construction site near [[Higgins Helitours Heliport|Helitours]]. It is the largest map in TBOGT and an [[M249|Advanced MG]] is very good on this map. If you got the [[Advanced Sniper]], get on the [[crane]]s. The [[knife]] can also work well for whatever reason. |
| − | *''' |
+ | *'''Xero In''' is set in the [[Abandoned Factory|abandoned factory]] in [[Hostile Negotiation]]. There are about 4 floors and [[SMG]]s are useful in this conflict. |
| − | *''' |
+ | *'''Academically Challenged''' is set at [[Vespucci University]]. This map is perfect for small games. The size of the map makes the [[Advanced MG]] a good weapon. |
| − | *''' |
+ | *'''Global Domination''' is set at the [[Civilization Committee]] building, and is one of the larger maps. A sniper is very useful on this map, as is the [[Assault SMG]]. |
| ⚫ | |||
| − | *'''Academically Challenged''' is set at Vespucci University. This map is perfect for small games. The size of the map makes the Advanced MG a good weapon. |
||
| − | *'''Global Domination''' is set at the Civilization Commitee building, and is one of the larger maps. A sniper is very useful on this map, as is the [[Assault SMG]]. |
||
| ⚫ | |||
| − | ===Weapons=== |
+ | ====Weapons==== |
*'''[[Pistol .44]]'''- Despite the slow rate of fire, small magazine capacity, and long reload, the extreme power and great range makes this an acceptable weapon. |
*'''[[Pistol .44]]'''- Despite the slow rate of fire, small magazine capacity, and long reload, the extreme power and great range makes this an acceptable weapon. |
||
| ⚫ | |||
| ⚫ | |||
| ⚫ | |||
| ⚫ | *'''[[Sticky Bombs]]'''- These are an oddity, as these are useful as in they can stick to objects and detonate remotely, rather than on a fuse, but have the same explosive force as grenades or pipe bombs. They can be used for trickery, as in placing sticky bombs on a vehicle, giving it to an enemy, and as soon as they get in, blow it up. |
||
| ⚫ | |||
| ⚫ | |||
| + | ==Deathmatches in GTA Online== |
||
| + | ===Description=== |
||
| + | Deathmatches return in [[Grand Theft Auto Online|GTA Online]], the multiplayer of [[Grand Theft Auto V]] with three different types of match available, Standard, Team and Vehicle deathmatches, although any deathmatch map can be played as a standard deathmatch or as a team deathmatch, despite [[Rockstar Games|Rockstar]] labelling them differently in the menu and in free-roam. |
||
| ⚫ | |||
| + | Up to 16 players can play in a Deathmatch. Deathmatches can be created using the [[Content Creator]]. |
||
| ⚫ | |||
| + | An attritional (no re-spawning) variation on the deathmatch game is also available, see [[Last Team Standing]]. |
||
| ⚫ | |||
| + | The jobs are accessed from [[Free Mode]] by either walking into their corona or selecting them from the [[Pause Menu]] where thay can be activated from the map or the Online Jobs list or from post-job voting menus. |
||
| ⚫ | *'''[[Sticky Bombs]]'''- These are an oddity, as these are useful as in they can stick to objects and detonate remotely, rather than on a fuse, but have the same explosive force as |
||
| + | ===Objective=== |
||
| + | Matches are scored on number of kills only. Money is no longer used as a scoring method. |
||
| + | ===Variables=== |
||
| + | : The match host can set a number of variables when starting the job |
||
| + | *Match Type: Standard or Team Deathmatch |
||
| + | *Number of Teams: 2, 3 or 4 where the map supports this variable |
||
| + | *Time Limit: 5, 10, 15, 20, 30, 45, 60 minutes |
||
| + | *Target Score: Off (unlimited), 10, 15, 20, 25, 30, 35, 40 (Number of kills for the win, if set to Off, the match will play until the set time limit) |
||
| + | *Online IDs: On/Off (HUD display option) |
||
| + | *Opponent Healthbar: On/Off (HUD display option) |
||
| + | *Time of Day: Current, Morning, Noon, Night |
||
| + | *Weather: Current, Clear, Raining |
||
| + | *Traffic: On/Off |
||
| + | *Lock Weapons: Forced + Pickups, Forced only, Owned + Pickups |
||
| + | *Radio: Station selection |
||
| + | *Forced Weapon: Only if locked option selected, only if the map supports the variable. |
||
| + | ===Weapons=== |
||
| + | The map will usually have re-spawning weapons available to be picked up and there may also be a forced weapon that all players start with. If the host elects to, players can bring in their own unlocked and equipped weapons from [[Free Mode]]. |
||
| + | <span style="font-size:17px;">List of Deathmatch Maps in GTA Online</span> |
||
| ⚫ | |||
| + | ====<span style="font-size:15px;">Deathmatches</span>==== |
||
| + | *[[Bluffs (Deathmatch)|Bluffs ]] |
||
| + | *[[Compound (Deathmatch)|Compound ]] |
||
| + | *[[Concrete (Deathmatch)|Concrete ]] |
||
| + | *[[Del Perro (Deathmatch)|Del Perro ]] |
||
| + | *[[Elysian Island (Deathmatch)|Elysian Island ]] |
||
| + | *[[Hospital (Deathmatch)|Hospital ]] |
||
| + | *[[Morgue (Deathmatch)|Morgue ]] |
||
| + | *[[Movie Set (Deathmatch)|Movie Set]] |
||
| + | *[[Pavilion (Deathmatch)|Pavilion ]] |
||
| + | *[[Property Values (Deathmatch)|Property Values ]] ''(added in the [[Valentine's Day Massacre Special]])'' |
||
| + | *[[Richman Mansion (Deathmatch)|Richman Mansion]] |
||
| + | *[[Salvage (Deathmatch)|Salvage ]] |
||
| + | *[[Suppressing Fire (Deathmatch)|Suppressing Fire ]] |
||
| + | *[[Vineyard (Deathmatch)|Vineyard ]] |
||
| + | ====Team Deathmatches==== |
||
| + | *[[Ace Liquor (Deathmatch)|Ace Liquor]] |
||
| + | *[[Back Alley (Deathmatch)|Back Alley ]] |
||
| + | *[[Beachfront (Deathmatch)|Beachfront ]]''(added in the [[Beach Bum Content Update]])'' |
||
| + | *[[Biolab (Deathmatch)|Biolab ]] |
||
| + | *[[Boatyard (Deathmatch)|Boatyard ]] |
||
| + | *[[Canals (Deathmatch)|Canals ]] |
||
| + | *[[Cape Catfish (Deathmatch)|Cape Catfish ]]''(added in the [[Beach Bum Content Update]])'' |
||
| + | *[[Cargo (Deathmatch)|Cargo ]] |
||
| + | *[[Chamberlain Hills (Deathmatch)|Chamberlain Hills ]] |
||
| + | *[[Chasing Shots (Deathmatch)|Chasing Shots ]] |
||
| + | *[[Commune (Deathmatch)|Commune ]] |
||
| + | *[[Construction (Deathmatch)|Construction ]] |
||
| + | *[[Crossfire (Deathmatch)|Crossfire ]] |
||
| + | *[[Derelict Motel (Deathmatch)|Derelict Motel]] |
||
| + | *[[Downtown (Deathmatch)|Downtown]] |
||
| + | *[[El Burro Heights (Deathmatch)|El Burro Heights ]] |
||
| + | *[[Farmland (Deathmatch)|Farmland ]] |
||
| + | *[[Gentry Manor (Deathmatch)|Gentry Manor ]] |
||
| + | *[[Getaway (Deathmatch)|Getaway ]] |
||
| + | *[[Governmental (Deathmatch)|Governmental ]] |
||
| + | *[[Grit (Deathmatch)|Grit ]] |
||
| + | *[[Hangar (Deathmatch)|Hangar ]] |
||
| + | *[[Legal Eagle (Deathmatch)|Legal Eagle]] ''(added in [[The Business Update]])'' |
||
| + | *[[Mansion (Deathmatch)|Mansion ]] |
||
| + | *[[Maze (Deathmatch)|Maze ]] |
||
| + | *[[North Rockford (Deathmatch)|North Rockford ]] |
||
| + | *[[Observatory (Deathmatch)|Observatory ]] |
||
| + | *[[Paleto Beach (Deathmatch)|Paleto Beach ]] ''(added in the [[Beach Bum Content Update]])'' |
||
| + | *[[Palomino Highlands (Deathmatch)|Palomino Highlands ]] ''(added in the [[Beach Bum Content Update]])'' |
||
| + | *[[Panic Attack (Deathmatch)|Panic Attack]] ''(added in the [[Independence Day Special]])'' |
||
| + | *[[Pier (Deathmatch)|Pier ]] |
||
| + | *[[Pillbox Hill (Deathmatch)|Pillbox Hill ]] |
||
| + | *[[Procopio Beach (Deathmatch)|Procopio Beach ]]''(added in the [[Beach Bum Content Update]])'' |
||
| + | *[[Puerto Del Sol (Deathmatch)|Puerto Del Sol ]]''(added in the [[I'm Not a Hipster Update]])'' |
||
| + | *[[Pump Action (Deathmatch)|Pump Action ]] |
||
| + | *[[Railyard (Deathmatch)|Railyard ]] |
||
| + | *[[Rancho Projects (Deathmatch)|Rancho Projects]] |
||
| + | *[[Refinery (Deathmatch)|Refinery ]] |
||
| + | *[[Reflex (Deathmatch)|Reflex ]] |
||
| + | *[[Road Tripping (Deathmatch)|Road Tripping ]]''(added in the [[Independence Day Special]])'' |
||
| + | *[[Scrapyard (Deathmatch)|Scrapyard ]] |
||
| + | *[[Shotgun Wedding (Deathmatch)|Shotgun Wedding]] ''(added in the [[Valentine's Day Massacre Special]])'' |
||
| + | *[[Supply (Deathmatch)|Supply ]] |
||
| + | *[[Symmetry (Deathmatch)|Symmetry ]] |
||
| + | *[[Terminal (Deathmatch)|Terminal ]] |
||
| + | *[[Trailer Park (Deathmatch)|Trailer Park ]] |
||
| + | *[[Vespucci Beachfront (Deathmatch)|Vespucci Beachfront]] ''(added in the [[Beach Bum Content Update]])'' |
||
| + | *[[Vespucci Shoreline (Deathmatch)|Vespucci Shoreline ]]''(added in the [[Beach Bum Content Update]])'' |
||
| + | *[[Vinewood Kills (Deathmatch)|Vinewood Kills ]] |
||
| + | *[[Wrath (Deathmatch)|Wrath]] |
||
| + | |||
| + | ====Vehicle Deathmatches==== |
||
| + | *[[Buzz Kill (Deathmatch)|Buzz Kill ]] |
||
| + | *[[Corporate Shell-out (Deathmatch)|Corporate Shell-out ]]''(added in [[The Business Update]])'' |
||
| + | *[[Desert Storm (Deathmatch)|Desert Storm ]] |
||
| + | *[[Fort Zancudo (Deathmatch)|Fort Zancudo ]] |
||
| + | *[[Senora Airstrip (Deathmatch)|Senora Airstrip ]] |
||
| + | *[[Shellshocked (Deathmatch)|Shellshocked ]]''(added in the [[Beach Bum Content Update]])'' |
||
| + | *[[Vulture Capital (Deathmatch)|Vulture Capital]] ''(added in [[The Business Update]])'' |
||
| + | ==Trivia== |
||
| ⚫ | |||
| + | * |
||
== See also == |
== See also == |
||
* [[Liberty City Survivor]] (LC Survivor), [[Multiplayer in GTA Liberty City Stories|GTA Liberty City Stories]] and [[Multiplayer in GTA Chinatown Wars|GTA Chinatown Wars]] equivalents. |
* [[Liberty City Survivor]] (LC Survivor), [[Multiplayer in GTA Liberty City Stories|GTA Liberty City Stories]] and [[Multiplayer in GTA Chinatown Wars|GTA Chinatown Wars]] equivalents. |
||
| + | [[Category:Multiplayer]] |
||
| + | [[Category:Game Modes]] |
||
[[Category:Multiplayer in GTA IV]] |
[[Category:Multiplayer in GTA IV]] |
||
| + | [[Category:Multiplayer in GTA V]] |
||
| + | [[Category:Deathmatch| ]] |
||
Revision as of 19:14, 21 January 2015
A deathmatch in GTA Online.
Deathmatch is a multiplayer game mode in Grand Theft Auto IV and Grand Theft Auto Online consisting of two to sixteen players.
Deatmatches in GTA IV Multiplayer and its Episodes
Description
The standard free-for-all in many online shooting games, players' only goal is to kill as many opposing players as possible. Players can also pick up money from deceased players. The player with the most money at the end of the match wins. There must be at least 2 players in the match, and no more than 16. The players can play a similar Deathmatch in both GTA IV's Free Mode and Party Mode. While no specific score is capped, Free Roam unlocks the whole city, lots of vehicles and guns. Party mode follows a similar principal. From both Free Roam and Party Mode, Deathmatch can be found.
Objective
The objective make the most money by the end of the match by killing other players. Each match will either have a time limit or a money limit.
Variables
The Host can change a number of factors including
- A Time limit or a money limit
- Auto Aim allowed or disallowed
- The area the players will play in
- The type of weapons available to players
- The Weather and time of day
- Either the map will show blips of all players, far players, near player, or no blips at all
- The Respawn time and the amount of distance from other players when the player spawns
Scoring
Money is awarded in Deathmatch by following ways:
- Each kill grants you $100
- Each suicide (kill yourself by explosives, fall damage or pedestrians) subtracts $100 from your money. If you have less than $100, your money will go to zero.
- You can pick up money from fallen players. The money ranges around $10 to $30.
- Your reward at the end of the match consists of the players you have killed, the money you have picked up and the suicides you have made. For instance, if you kill 7 players, pick up $62 money and suicide once, your reward will be $662.
Achievements/Trophies
- Let Sleeping Rockstars Lie: Kill a Rockstar Employee. This can usually be done when you do your first Deathmatch.
- Cut Your Teeth: Earn $1000 or more when on rank 0 to get rank 1.
- Top of the Food Chain: Kill 20 people or more with a Pistol in one game. Can be done when Weapon Choice is 'Pistols'
- Wanted: Get to Rank 10 in Multiplayer.
(IV and TLAD)
These are the maps for the main game and its first DLC, The Lost and Damned.
Maps
- Liberty City - Not your best choice, but Rockstar had to put it in. The whole city will go into madness when 16 or 32 (PC) people are shooting.
- Algonquin: A big island for a big shootout. Will Star Junction's lights go out from gunfire?
- Alderney: Another big island for a big shootout. Nothing to popular here to destroy with the RPG.
- Dukes / Broker: Two boroughs put together for many people to have a reasonable Deathmatch.
- Bohan: This borough is better than the others because of its size. SMG's are a good choice here, but look out for gangs.
- Happiness Island: A small island for a big shootout. Lady Happiness will have a lot of blood on her clothes after a Deathmatch.
- Colony Island: A small island for a shootout. Why couldn't the Old Hospital not be old?.
- Charge Island: A reasonable sized island. Get the baseball bat for a day at the bloody park.
- Alderney State Correctional Facility: The guards have somewhat disappeared, so what a better way to celebrate than to kill the other inmates (i.e. your foes).
- Francis International Airport: LC has allowed us entrance to the airport. People from Los Santos and Vice City probably wish they didn't board the plane.
Weapons
- Melee - Your Fists, Knife, Baseball Bat and Pool Cue (TLAD)
- Weak - Includes Pistol and Micro-SMG
- Medium - Includes MP5, Desert Eagle, Pump Shotgun, AK47 and Sniper Rifle
- Powerful - Includes MP5, Desert Eagle, PSG-1, M4 and Remington (Combat) Shotgun.
- Pistols - Includes the Glock Pistol and Desert Eagle (IV). The Auto 9mm (TLAD)
- SMG's - Includes the Micro-SMG (Uzi) and MP5.
- Assault Rifles - The Assault (AK-47) and Carbine (M4) Rifles.
- Shotguns - The Pump and Combat Shotgun (IV). The Sawed-Off and Street Sweeper (TLAD).
- Sniper Rifles - Includes both Sniper Rifles.
- Launchers- The RPG-7 on and the Grenade Launcher on IV and TLAD
- Projectiles- Includes the Grenades and Molotovs. The Pipe Bombs (TLAD)
- Biker Weapons1- Includes the Auto 9mm, Grenade Launcher, Sawn-Off Shotgun and Street Sweeper.
- Episodic Weapons2- Includes all weapons from The Ballad of Gay Tony
- Automatic Weapons2- Includes the Assault Rifle, Advanced MG, Gold SMG and Assault SMG.
- Explosives2- Includes the Sticky Bombs, Explosive Shotgun, Advanced Sniper and Grenade Launcher.
- Sticky Bombs2- Includes only the Sticky Bombs.
- Fists and Knife are back-up weapons that you automatically get and use when you have no other weapon.
1 - Only available in TLAD 2 - Only available in The Ballad of Gay Tony
The Ballad Of Gay Tony
In The Ballad of Gay Tony, all locations are set up in small areas, such as the Libertonian Museum or the construction site, entire islands wont host Deathmatches anymore. Also, spawns are random, respawn invincibility has been removed, people respawn with full health and full armor (Except when players begin the game, they spawn without armor), and no gun remains that can have the trigger tapped on multiplayer.
Maps
- Trespass is set in the abandoned Sprunk Factory. With such high roofs and several floors, there is tons of space to hide. In a game set at this location, get onto the roof or catwalk, it provides a good vantage point.
- Auld Reekie is set around the warehouse in Waste Not Want Knots. Try to avoid being caught in the middle, and stay out of the warehouse. Try to get on the roof to get a good vanatge point especially with the Advanced MG in your hands.
- Ziggurat is set at the construction site near Helitours. It is the largest map in TBOGT and an Advanced MG is very good on this map. If you got the Advanced Sniper, get on the cranes. The knife can also work well for whatever reason.
- Xero In is set in the abandoned factory in Hostile Negotiation. There are about 4 floors and SMGs are useful in this conflict.
- Academically Challenged is set at Vespucci University. This map is perfect for small games. The size of the map makes the Advanced MG a good weapon.
- Global Domination is set at the Civilization Committee building, and is one of the larger maps. A sniper is very useful on this map, as is the Assault SMG.
- Battle Station is set at a the Lynch Street Subway Station in the middle of Dukes, and is an OK map. SMGs are good for this one and its also one of the only maps were a player can win with only a knife.
Weapons
- Pistol .44- Despite the slow rate of fire, small magazine capacity, and long reload, the extreme power and great range makes this an acceptable weapon.
- Gold SMG- This gun has an incredibly high rate of fire that is perfect for combat or drive by shootings. The reload is a problem though.
- Assault SMG- This is not a bad gun, but it can not be used during drive-bys has slower firerate than the Gold SMG. On foot, however, this is better than the Gold SMG.
- Advanced MG- This is arguably the best gun in the game. The rate of fire, power, accuracy, and magazine capacity of this weapon can turn 1 player into a moving turret.
- Sticky Bombs- These are an oddity, as these are useful as in they can stick to objects and detonate remotely, rather than on a fuse, but have the same explosive force as grenades or pipe bombs. They can be used for trickery, as in placing sticky bombs on a vehicle, giving it to an enemy, and as soon as they get in, blow it up.
- Automatic/Explosive Shotgun- While automatic shotgun is similar to Combat Shotgun, the explosive shotgun is a whopper. It will destroy cars, people, helicopters, or pretty much anything that can attack you.
- Advanced Sniper- This is the likely the best sniper rifle in the game. It has explosive rounds, making helicopters that much easier to bring down. It's also very effective against people and vehicles
Deathmatches in GTA Online
Description
Deathmatches return in GTA Online, the multiplayer of Grand Theft Auto V with three different types of match available, Standard, Team and Vehicle deathmatches, although any deathmatch map can be played as a standard deathmatch or as a team deathmatch, despite Rockstar labelling them differently in the menu and in free-roam.
Up to 16 players can play in a Deathmatch. Deathmatches can be created using the Content Creator.
An attritional (no re-spawning) variation on the deathmatch game is also available, see Last Team Standing.
The jobs are accessed from Free Mode by either walking into their corona or selecting them from the Pause Menu where thay can be activated from the map or the Online Jobs list or from post-job voting menus.
Objective
Matches are scored on number of kills only. Money is no longer used as a scoring method.
Variables
- The match host can set a number of variables when starting the job
- Match Type: Standard or Team Deathmatch
- Number of Teams: 2, 3 or 4 where the map supports this variable
- Time Limit: 5, 10, 15, 20, 30, 45, 60 minutes
- Target Score: Off (unlimited), 10, 15, 20, 25, 30, 35, 40 (Number of kills for the win, if set to Off, the match will play until the set time limit)
- Online IDs: On/Off (HUD display option)
- Opponent Healthbar: On/Off (HUD display option)
- Time of Day: Current, Morning, Noon, Night
- Weather: Current, Clear, Raining
- Traffic: On/Off
- Lock Weapons: Forced + Pickups, Forced only, Owned + Pickups
- Radio: Station selection
- Forced Weapon: Only if locked option selected, only if the map supports the variable.
Weapons
The map will usually have re-spawning weapons available to be picked up and there may also be a forced weapon that all players start with. If the host elects to, players can bring in their own unlocked and equipped weapons from Free Mode.
List of Deathmatch Maps in GTA Online
Deathmatches
- Bluffs
- Compound
- Concrete
- Del Perro
- Elysian Island
- Hospital
- Morgue
- Movie Set
- Pavilion
- Property Values (added in the Valentine's Day Massacre Special)
- Richman Mansion
- Salvage
- Suppressing Fire
- Vineyard
Team Deathmatches
- Ace Liquor
- Back Alley
- Beachfront (added in the Beach Bum Content Update)
- Biolab
- Boatyard
- Canals
- Cape Catfish (added in the Beach Bum Content Update)
- Cargo
- Chamberlain Hills
- Chasing Shots
- Commune
- Construction
- Crossfire
- Derelict Motel
- Downtown
- El Burro Heights
- Farmland
- Gentry Manor
- Getaway
- Governmental
- Grit
- Hangar
- Legal Eagle (added in The Business Update)
- Mansion
- Maze
- North Rockford
- Observatory
- Paleto Beach (added in the Beach Bum Content Update)
- Palomino Highlands (added in the Beach Bum Content Update)
- Panic Attack (added in the Independence Day Special)
- Pier
- Pillbox Hill
- Procopio Beach (added in the Beach Bum Content Update)
- Puerto Del Sol (added in the I'm Not a Hipster Update)
- Pump Action
- Railyard
- Rancho Projects
- Refinery
- Reflex
- Road Tripping (added in the Independence Day Special)
- Scrapyard
- Shotgun Wedding (added in the Valentine's Day Massacre Special)
- Supply
- Symmetry
- Terminal
- Trailer Park
- Vespucci Beachfront (added in the Beach Bum Content Update)
- Vespucci Shoreline (added in the Beach Bum Content Update)
- Vinewood Kills
- Wrath
Vehicle Deathmatches
- Buzz Kill
- Corporate Shell-out (added in The Business Update)
- Desert Storm
- Fort Zancudo
- Senora Airstrip
- Shellshocked (added in the Beach Bum Content Update)
- Vulture Capital (added in The Business Update)
Trivia
See also
- Liberty City Survivor (LC Survivor), GTA Liberty City Stories and GTA Chinatown Wars equivalents.