m (Adding missing 'px' suffix to video pixel width) |
MonkeyBot188 (talk | contribs) m (→top: template update, replaced: {{Infobox mission/draft → {{Infobox mission) |
||
| (87 intermediate revisions by 53 users not shown) | |||
| Line 1: | Line 1: | ||
| + | {{Crossover|[[Collector's Item]]|[[Not So Fast]]}} |
||
| − | {{spoiler}} |
||
| ⚫ | |||
| − | |||
| ⚫ | |||
| ⚫ | |||
| ⚫ | |||
| ⚫ | |||
| − | |game=IV |
||
| ⚫ | |||
| − | |size=300px |
||
| − | |caption=[[Niko Bellic]] meeting [[Ray Boccino]] |
||
| − | |for=Ray Boccino |
||
| − | |target=Diamond deal |
||
| − | |location=Libertonian Museum, Middle Park |
||
| − | |reward= |
||
| ⚫ | |||
| ⚫ | |||
| − | |fail=[[Niko Bellic]] or [[Isaac Roth]] Dies<br> [[Johnny Klebitz]] killed before the deal}} |
||
| + | |game = {{games|IV=y}} |
||
| + | |type = IV |
||
| + | |for = {{For|game=IV|ray}} |
||
| + | |target = [[Diamonds]] |
||
| + | |location = [[Drusilla's]], [[Little Italy]], [[Algonquin]], [[Liberty City (HD Universe)|Liberty City]] |
||
| + | |fail = [[Wasted]]<br>[[Busted]]<br>[[Johnny Klebitz|Johnny]] dies or is atttacked<br>[[Isaac Roth|Isaac]] dies |
||
| + | |reward = [[Money|$]]9,500<br/>[[Desert Eagle]] unlocked in the [[Underground Gun Shops]]<br/>[[Impossible Trinity]] [[Achievements and Trophies in GTA IV|achievement]] |
||
| ⚫ | |||
| ⚫ | |||
| + | |todo = *Meet '''<span style="color:#396464">Johnny</span>''' at the side entrance to the Libertonian. |
||
| + | *Escape the '''<span style="color:#C6BF8A">Libertonian.</span>''' |
||
| + | *Lose Isaac's crew. |
||
| + | *Flee the museum before the cops arrive in full force. {{H:title|If the player is still near the museum by the time all enemies are killed.|[?]}} |
||
| + | }} |
||
{{quote|Gorgeous, huh? Like condensed money.|[[Isaac Roth]], about the [[Diamonds]].}} |
{{quote|Gorgeous, huh? Like condensed money.|[[Isaac Roth]], about the [[Diamonds]].}} |
||
| + | '''Museum Piece''' is a mission in ''[[Grand Theft Auto IV]]'' given to [[protagonist]] [[Niko Bellic]] by Italian mobster [[Ray Boccino]] from the [[Drusilla's]] restaurant in [[Little Italy]], [[Algonquin]], [[Liberty City (HD Universe)|Liberty City]]. |
||
| + | ==Description== |
||
| − | + | Ray wants Niko to sell the load of diamonds they obtained in the earlier [[Meltdown (GTA IV)|mission]] to a [[Isaac Roth|buyer]] at a deal in a museum. [[Johnny Klebitz]] will [[Collector's Item|be there]] as well with Niko to provide support and take his cut of $1 million back to [[The Lost MC]]. However, the deal goes horribly wrong upon an [[Not So Fast|interruption]]. |
|
==Description== |
==Description== |
||
| − | Ray meets Niko at Drusilla's and they talk in the kitchen after Ray hangs up his phone. Ray yells at Niko for not calling him sooner since he needs him to sell the diamonds. Niko tells Ray that he will only do it if he promises to find [[Florian Cravic]] for him, to which Ray reluctantly agrees. He then sends Niko to |
+ | Ray meets Niko at Drusilla's and they talk in the kitchen after Ray hangs up his phone. Ray yells at Niko for not calling him sooner since he needs him to sell the diamonds. Niko tells Ray that he will only do it if he promises to find [[Bernie Crane|Florian Cravic]] for him, to which Ray reluctantly agrees. He then sends Niko to [[The Libertonian]] museum in midtown [[Algonquin]] to meet up with [[Johnny Klebitz]], a member of [[The Lost MC]] who had already participated in [[Blow Your Cover|another deal]] with Niko, so they can sell the diamonds to the [[Jewish Mob]] representatives, [[Isaac Roth]] and [[Mori Green]]. During the deal, [[Luis Fernando Lopez]], a guy who is a buddy of [[Tony Prince]], ambushes the trade and kills Mori. Isaac takes the diamonds while Johnny grabs the [[money]], Luis tries to take back the diamonds from Isaac, and Niko is forced to shoot his way through Isaac's henchmen to exit the museum empty-handed. After getting out, killing Isaac's men that were lying in wait outside and escaping police pursuers, Niko calls Ray and informs him of the what went on in the museum. A furious Ray tells Niko to meet him later so they can deal with Johnny. |
| − | ==Mission |
+ | ==Mission Objectives== |
In order to complete the mission the player must: |
In order to complete the mission the player must: |
||
| − | *Meet Johnny at the side entrance to the Libertonian |
+ | *Meet '''<span style="color:#396464">Johnny</span>''' at the side entrance to the Libertonian. |
| − | *Escape the Libertonian |
+ | *Escape the '''<span style="color:#C6BF8A">Libertonian</span>'''<span style="color:#C6BF8A">.</span> |
| − | *Lose Isaac's crew |
+ | *Lose Isaac's crew. |
==Enemies== |
==Enemies== |
||
*[[Jewish Mob]] |
*[[Jewish Mob]] |
||
| − | *[[Ancelotti Family]] |
||
==Walkthrough== |
==Walkthrough== |
||
| ⚫ | After the initial [[Cutscenes|cutscene]], [[Niko Bellic|Niko]] heads over to [[The Libertonian|the Libertonian museum]] in [[Middle Park]], [[Algonquin]]. He meets [[Johnny Klebitz]] at the side entrance to the Libertonian. They meet the buyer, [[Isaac Roth]] with his men inside. A cutscene shows the diamond deal ambushed by [[Luis Fernando Lopez]]. Johnny takes the money and flees, and Luis steals the diamonds from Isaac, while Niko has to shoot his way out of the museum. |
||
| − | * An [[Sub Machine Gun|SMG]] would be useful in this situation as it can quickly neutralize some of the goons. Thus, it is revealed that Niko uses one during the mission from both [[Collector's Item|Johnny]] and [[Not So Fast|Luis]]' point of view. |
||
| − | *A good strategy is to use Dwayne's special ability and get 2 of his goons to back you up. |
||
| − | *Also if you are planning to drive to the museum, it is also a good idea to leave the car door open and leave the engine running. |
||
| ⚫ | Niko remains in cover and takes out any [[Jewish Mob]] members. He then fights his way through the enemies and when he is at the end of the lane, he turns left and left again to go down the stairs. He shoots the enemies coming up the stairs and gets in cover near the bottom of the stairs. A [[Body Armor|armor]] pickup can be obtained once Niko gets to the bottom of the stairs in a small, low booth. |
||
| ⚫ | After the initial cutscene, |
||
| ⚫ | He kills the rest of the Jewish mobsters and goes out of the door (South of the North Entrance). He follows the path and gets out of the museum, eliminating anyone who tries to block in the way. Once the player gets outside, they can immediately shoot down the drivers of the cars parked outside and must lose the potential [[Wanted Level in GTA IV|wanted level]]. Isaac's Crew will give chase in their cars, attempting to kill Niko, Niko will call Ray and explain what happened once losing the enemies (the achievement/trophy [[Impossible Trinity]] is gained on completion). |
||
| ⚫ | |||
| − | |||
| ⚫ | |||
| − | |||
| ⚫ | |||
| − | <center> |
||
| ⚫ | |||
| − | </center> |
||
==Deaths== |
==Deaths== |
||
*[[Mori Green]] - Killed by Luis in order to retrieve the diamonds. |
*[[Mori Green]] - Killed by Luis in order to retrieve the diamonds. |
||
*Isaac's crew - Killed by Niko in order to escape. |
*Isaac's crew - Killed by Niko in order to escape. |
||
| + | |||
| − | *[[Johnny Klebitz]] (optional) - Can be killed by Niko, although it does not affect the story. |
||
| ⚫ | |||
| ⚫ | |||
| + | |||
| ⚫ | |||
| ⚫ | |||
| + | MuseumPiece-GTAIV-MeetingJohnny.jpg|Johnny says: "Let's hope this goes a little better than before, yeah?" |
||
| + | MuseumPiece-GTAIV-MoriGreen.jpg|Isaac: "Isaac, look at these." in excitement. |
||
| ⚫ | |||
| + | MuseumPiece-GTAIV-LuisAmbush.jpg|Luis blows the deal. |
||
| ⚫ | |||
| ⚫ | |||
| ⚫ | |||
==Trivia== |
==Trivia== |
||
| ⚫ | |||
| − | * This mission is seen again as [[Collector's Item]] in [[The Lost and Damned]], this time from Johnny's point of view and again as [[Not So Fast]] in [[The Ballad of Gay Tony]], this time from Luis' point of view. Apart from [[I Luv LC]], this mission (and Collector's Item/Not So Fast) are the only ones to involve all three protagonists at once. |
||
| ⚫ | |||
| − | * Johnny is seen running out of the museum with no weapons. |
||
| + | *A small part of the dialogue between Ray and Niko in the opening cutscene is featured in the second trailer for the game, ''That Special Someone''. |
||
| − | *[[Johnny Klebitz]] can be killed by Niko after he reaches the North exit, although it doesn't effect the story. the mission'll fail only if Johnny's killed before he reaches his exit |
||
| ⚫ | |||
| ⚫ | |||
| ⚫ | *The [[Desert Eagle]] is first introduced ''without |
||
| ⚫ | |||
| − | *If Isaac is killed, the mission will fail (text displayed will say "Isaac is dead."). |
||
*Before descending to the bottom floor, the player can shoot at the hanging dinosaur bones, if done properly, the bones will fall onto unsuspecting mobsters below. |
*Before descending to the bottom floor, the player can shoot at the hanging dinosaur bones, if done properly, the bones will fall onto unsuspecting mobsters below. |
||
| − | *After successful completion of this mission, the Xbox 360 Achievement/PS3 Trophy [[Achievements in GTA IV|Impossible Trinity]] is unlocked. In The Ballad of Gay Tony, completing the mission will unlock the Diamonds Forever achievement. |
+ | *After successful completion of this mission, the Xbox 360 Achievement/PS3 Trophy [[Achievements and Trophies in GTA IV|Impossible Trinity]] is unlocked. In ''The Ballad of Gay Tony'', completing the mission will unlock the Diamonds Forever achievement. |
| − | *The achievement Impossible Trinity refers to the three protagonists of the GTA IV Era coming together in one place at the same time. |
+ | **The achievement ''Impossible Trinity'' refers to the three protagonists of the ''GTA IV'' Era coming together in one place at the same time. |
| − | *During this mission and Collector's Item, Luis is not seen during gameplay. He would not be seen anyway as he snatches the diamonds and escapes upwards, before Niko and Johnny are out. |
+ | *During this mission and [[Collector's Item]], Luis is not seen during gameplay. He would not be seen anyway as he snatches the diamonds and escapes upwards, before Niko and Johnny are out. |
| + | *After escaping the museum, the instructions will state the player to "Lose Isaac's Crew", though they are actually Mafia goons for the [[Ancelotti Crime Family|Ancelottis]] – this is because the bodyguard's model is named "<code>m_y_goon_01</code>". One of them is also used as [[Jimmy Pegorino]]'s bodyguard, as seen in the cutscene of the mission "[[Pest Control]]". |
||
| − | *Outside the North entrance, a [[Hellfury]] can be seen, as Johnny's getaway vehicle. This is because the [[Hexer |Hexer]] had not been included in the final version of GTA IV. |
||
| ⚫ | |||
| − | *If you are quick enough and follow Johnny out his exit, he becomes a random pedestrian and walks around instead of escaping. It is possible to kill Johnny without failing the mission when this happens. |
||
| − | *Even if you kill Johnny, Niko will still mention him during the phone call with Ray after the mission is completed. |
||
| − | *If you go back to where the deal took place, you will see three corpses, however, instead of Mori Green, there will just be an old fat Jewish man in his place. This model can also be seen as a random pedestrian around [[Liberty City]]. |
||
| − | *After escaping the museum, the instructions state to "Lose Isaac's Crew", although if you kill the pursuers and look at their bodies, they are actually Ancelotti goons. |
||
| ⚫ | |||
| − | *This mission, [[Collector's Item]], and [[Not So Fast]] are the only missions where all three protagonists appear at once in the entire GTA IV Era. |
||
*The mission can be completed by taking the subway. If the player runs on a straight line after exiting the Libertonian (having killed the thugs guarding the exit), he will find the subway entrance to the Middle Park Station. Isaac's crew will only follow Niko down there if he takes too long to catch a train (which most likely will come just as he arrives at the platform). Since the subway follows its own path instead of that of the streets above, it can be seen as a shortcut, and the mission will be completed before the train arrives at the next station. |
*The mission can be completed by taking the subway. If the player runs on a straight line after exiting the Libertonian (having killed the thugs guarding the exit), he will find the subway entrance to the Middle Park Station. Isaac's crew will only follow Niko down there if he takes too long to catch a train (which most likely will come just as he arrives at the platform). Since the subway follows its own path instead of that of the streets above, it can be seen as a shortcut, and the mission will be completed before the train arrives at the next station. |
||
| − | *This is the last time Niko and Johnny have crossed paths. |
+ | *This is the last time Niko and Johnny have crossed paths, and the second time Niko and Luis have crossed paths. |
| ⚫ | |||
| − | *This is the second time Niko and Luis have crossed paths. |
||
| + | *The cop who will appear soon after the shootout will be armed with a [[Combat Shotgun]] instead of a [[Pump Shotgun|regular Shotgun]]. This also happens during [[The Snow Storm]]. |
||
| − | *Before you talk to Johnny when walking around him he will always look at you except when you're behind him. |
||
| + | *Niko can steal Johnny's [[Hellfury]] and park it at a [[Safehouses in GTA IV|safehouse]] without failing the mission. |
||
| ⚫ | |||
| + | *After completing the mission, Niko can call Roman to talk about how he is working with the [[Ray Boccino|Mafia]] and the [[Johnny Klebitz|Lost MC]] on the diamond deal and how “this [[Luis Fernando Lopez|Dominican looking guy]] shot the place up“. |
||
| − | |||
| + | *If the player fails this mission by killing Johnny, Ray will get angry at Niko by telling him that the "whole biker gang will hunt him down". However in [[Collector's Item]], if the player kills Niko, Ray will tell Johnny that he has never liked Niko. |
||
| ⚫ | |||
| ⚫ | |||
| − | Johnny and niko.jpg|Niko and Johnny meet for the deal. |
||
| ⚫ | |||
| ⚫ | |||
| ⚫ | |||
| ⚫ | |||
| + | ==Navigation== |
||
| + | {{Gtaiv missions}} |
||
[[de:Museum Piece]] |
[[de:Museum Piece]] |
||
[[es:Museum Piece]] |
[[es:Museum Piece]] |
||
[[pl:Museum Piece]] |
[[pl:Museum Piece]] |
||
| + | [[pt:Museum Piece]] |
||
| + | [[ru:Museum Piece]] |
||
[[Category:Missions in GTA IV]] |
[[Category:Missions in GTA IV]] |
||
| − | [[Category:Missions]] |
||
Latest revision as of 19:36, 24 February 2024
Museum Piece is a mission in Grand Theft Auto IV given to protagonist Niko Bellic by Italian mobster Ray Boccino from the Drusilla's restaurant in Little Italy, Algonquin, Liberty City.
Description
Ray wants Niko to sell the load of diamonds they obtained in the earlier mission to a buyer at a deal in a museum. Johnny Klebitz will be there as well with Niko to provide support and take his cut of $1 million back to The Lost MC. However, the deal goes horribly wrong upon an interruption.
Description
Ray meets Niko at Drusilla's and they talk in the kitchen after Ray hangs up his phone. Ray yells at Niko for not calling him sooner since he needs him to sell the diamonds. Niko tells Ray that he will only do it if he promises to find Florian Cravic for him, to which Ray reluctantly agrees. He then sends Niko to The Libertonian museum in midtown Algonquin to meet up with Johnny Klebitz, a member of The Lost MC who had already participated in another deal with Niko, so they can sell the diamonds to the Jewish Mob representatives, Isaac Roth and Mori Green. During the deal, Luis Fernando Lopez, a guy who is a buddy of Tony Prince, ambushes the trade and kills Mori. Isaac takes the diamonds while Johnny grabs the money, Luis tries to take back the diamonds from Isaac, and Niko is forced to shoot his way through Isaac's henchmen to exit the museum empty-handed. After getting out, killing Isaac's men that were lying in wait outside and escaping police pursuers, Niko calls Ray and informs him of the what went on in the museum. A furious Ray tells Niko to meet him later so they can deal with Johnny.
Mission Objectives
In order to complete the mission the player must:
- Meet Johnny at the side entrance to the Libertonian.
- Escape the Libertonian.
- Lose Isaac's crew.
Enemies
Walkthrough
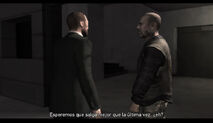
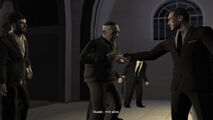
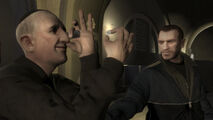
After the initial cutscene, Niko heads over to the Libertonian museum in Middle Park, Algonquin. He meets Johnny Klebitz at the side entrance to the Libertonian. They meet the buyer, Isaac Roth with his men inside. A cutscene shows the diamond deal ambushed by Luis Fernando Lopez. Johnny takes the money and flees, and Luis steals the diamonds from Isaac, while Niko has to shoot his way out of the museum.
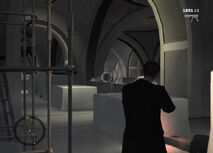
Niko remains in cover and takes out any Jewish Mob members. He then fights his way through the enemies and when he is at the end of the lane, he turns left and left again to go down the stairs. He shoots the enemies coming up the stairs and gets in cover near the bottom of the stairs. A armor pickup can be obtained once Niko gets to the bottom of the stairs in a small, low booth.
He kills the rest of the Jewish mobsters and goes out of the door (South of the North Entrance). He follows the path and gets out of the museum, eliminating anyone who tries to block in the way. Once the player gets outside, they can immediately shoot down the drivers of the cars parked outside and must lose the potential wanted level. Isaac's Crew will give chase in their cars, attempting to kill Niko, Niko will call Ray and explain what happened once losing the enemies (the achievement/trophy Impossible Trinity is gained on completion).
Deaths
- Mori Green - Killed by Luis in order to retrieve the diamonds.
- Isaac's crew - Killed by Niko in order to escape.
Video Walkthrough
Gallery
Trivia
- There is no ladder where Isaac hides; in TBoGT, Luis escapes to the roof by climbing a ladder.
- The Desert Eagle is first introduced without cheating, because many Jewish Mobsters apparently hold them. This is because the Desert Eagle is an israeli weapon.
- A small part of the dialogue between Ray and Niko in the opening cutscene is featured in the second trailer for the game, That Special Someone.
- If the player wanders back to where the deal took place (during the mission), they can find Isaac Roth hiding behind some crates, bad-mouthing Ray Boccino and mourning the loss of Mori Green, though in Not So Fast, Luis Lopez knocks out Isaac and takes the diamonds right from his hand.
- Before descending to the bottom floor, the player can shoot at the hanging dinosaur bones, if done properly, the bones will fall onto unsuspecting mobsters below.
- After successful completion of this mission, the Xbox 360 Achievement/PS3 Trophy Impossible Trinity is unlocked. In The Ballad of Gay Tony, completing the mission will unlock the Diamonds Forever achievement.
- The achievement Impossible Trinity refers to the three protagonists of the GTA IV Era coming together in one place at the same time.
- During this mission and Collector's Item, Luis is not seen during gameplay. He would not be seen anyway as he snatches the diamonds and escapes upwards, before Niko and Johnny are out.
- After escaping the museum, the instructions will state the player to "Lose Isaac's Crew", though they are actually Mafia goons for the Ancelottis – this is because the bodyguard's model is named "
m_y_goon_01". One of them is also used as Jimmy Pegorino's bodyguard, as seen in the cutscene of the mission "Pest Control". - Most of the mobsters are replaced with policemen in The Ballad of Gay Tony, which leads to a continuity error.
- The mission can be completed by taking the subway. If the player runs on a straight line after exiting the Libertonian (having killed the thugs guarding the exit), he will find the subway entrance to the Middle Park Station. Isaac's crew will only follow Niko down there if he takes too long to catch a train (which most likely will come just as he arrives at the platform). Since the subway follows its own path instead of that of the streets above, it can be seen as a shortcut, and the mission will be completed before the train arrives at the next station.
- This is the last time Niko and Johnny have crossed paths, and the second time Niko and Luis have crossed paths.
- If players walk to where Luis Lopez escapes, the window is open, and he may say something about Mori. He cannot be seen though.
- The cop who will appear soon after the shootout will be armed with a Combat Shotgun instead of a regular Shotgun. This also happens during The Snow Storm.
- Niko can steal Johnny's Hellfury and park it at a safehouse without failing the mission.
- After completing the mission, Niko can call Roman to talk about how he is working with the Mafia and the Lost MC on the diamond deal and how “this Dominican looking guy shot the place up“.
- If the player fails this mission by killing Johnny, Ray will get angry at Niko by telling him that the "whole biker gang will hunt him down". However in Collector's Item, if the player kills Niko, Ray will tell Johnny that he has never liked Niko.


