TheLuca2001 (talk | contribs) No edit summary |
mNo edit summary |
||
| (35 intermediate revisions by 6 users not shown) | |||
| Line 1: | Line 1: | ||
| + | [[File:Sunshine_Autos_Import.jpg|thumb|"Delivered like a pro. Complete the list and there will be a bonus for you."<br/>and<br/>"All the cars, nice. Here's a little something."<br/><small>Vehicle successfully delivered messages.</small>]] |
||
| ⚫ | The '''Sunshine Autos Import Garage''' is a mission and side mission for the [[Sunshine Autos]] asset in [[Grand Theft Auto: Vice City]] |
||
| ⚫ | The '''Sunshine Autos Import Garage''' is a mission and side mission for the [[Sunshine Autos]] asset in [[Grand Theft Auto: Vice City]] which is located underground within the [[A+B Auto]] garage which is near the [[Vice Street Racer]] race selection map, to the right when traveling down the main Sunshine Autos ramp. The garage becomes available for importing vehicles after Sunshine Autos is purchased by [[Tommy Vercetti|the player]]. The garage will only open when you arrive at the door with a needed car on the current list and the garage becomes inaccessible when all lists have been completed. Four lists to complete of wanted vehicles will be posted to the right of the garage door and each vehicle imported successfully will redline that list. Completing the first list will acquire the asset to progress through the story, award a prize vehicle in the showroom and provide income. Completion of all four lists is required to achieve [[100% Completion in GTA Vice City|100% completion]].[[File:Kruton9000-GTAVC.jpg|thumb|A [[Kruton 9000]] in [[A+B Auto]]s Sunshine Autos Import Garage.]] |
||
| − | [[File:Sunshine_Autos_Import.jpg|thumb|The message after the player delivered a vehicle.]] |
||
| + | * Prerequisite: Purchase of the [[Cherry Popper Ice Cream Factory]] in order to spawn a [[Mr. Whoopee]]. List 4 can be completed only after Cherry Popper is bought - the only asset which depends upon another asset. Fortunately, income from completion of the first three lists can finance the Cherry Popper purchase. |
||
| − | ==List 1== |
||
| ⚫ | |||
| ⚫ | |||
| + | * Nearby are four storage bays with a capacity of eight total vehicles. They are useful to temporarily keep upcoming cars for the next list. |
||
| ⚫ | |||
| ⚫ | |||
| ⚫ | |||
| + | * A [[Kruton 9000]] computer can be found in the garage. |
||
| ⚫ | |||
| + | |||
| ⚫ | |||
| + | TIP: |
||
| − | *[[Rancher]] - [[Downtown Vice City|Downtown]] or in [[Vice Point]] |
||
| + | * Spawn similar class cars. If the player have trouble finding a particular vehicle, try to drive a vehicle of the same class to make it pop easier. For example, if the player is searching for an Idaho and is having trouble finding it, try to drive around in an Esperanto. Since they are in the same class and the game tends to spawn the same class of vehicle the player is driving, finding the Idaho should be easier. |
||
| + | |||
| + | * A player can scout early then deliver listed imports instantly from their collection if he/she writes down or otherwise remembers all of these listed cars in advance. Should a model spawn during regular game play it can be acquired and stored in any safehouse garage in preparation for the Sunshine Autos purchase. The Hyman Condo is highly recommended since its three garages have a capacity of six cars.<br />Many of the vehicles requested will spawn on the road in front of [[Sunshine Autos]] when you don't yet need them and the underground garages opposite of the Pay n' Spray work well to temporarily save and quickly fill future lists, saving the time and trouble of searching for it when needed. For example, if the player is driving a surplus [[Blista Compact]] (having already saved one on the first list,) while searching for a second list [[Sabre]] and a third list [[Cheetah]] spawns, it's recommended to grab the Cheetah and store it in any nearby garage, preferably right in Sunshine's basement garages, so when it appears on the current list simply deliver it instantly from your collection. Keep these in mind: |
||
| + | |||
| ⚫ | |||
| ⚫ | |||
| + | |||
| ⚫ | |||
| ⚫ | |||
| ⚫ | |||
| ⚫ | |||
| + | *[[Rancher]] - Downtown or in [[Vice Point]]. NOTE: FBI Ranchers does not count so don't bother. |
||
*[[Blista Compact]] - [[Washington Beach]] or [[Ocean Beach]] |
*[[Blista Compact]] - [[Washington Beach]] or [[Ocean Beach]] |
||
| ⚫ | |||
| + | {| align="center" |
||
| − | ==List 2== |
||
| + | |<gallery width="auto" perrow="3" style="font-size:95%; padding:0;" widths="192"> |
||
| ⚫ | |||
| + | |||
| + | Landstalker-GTAVC-front.jpg|'''[[Landstalker]]'''<br/>@ Downtown Dirt Track<br/>(<small>[[:image:Landstalker-GTAVC-rear.jpg|rear]]</small>). |
||
| + | |||
| + | Esperanto-GTAVC-front.jpg|'''[[Esperanto]]'''<br/>@ [[Little Havana]] or [[Little Haiti]]<br/>(<small>[[:image:Esperanto-GTAVC-rear.jpg|rear]]</small>). |
||
| + | |||
| + | Idaho-GTAVC-front.jpg|'''[[Idaho]]'''<br/>@ [[Little Havana]]<br/>(<small>[[:image:Idaho-GTAVC-rear.jpg|rear]]</small>). |
||
| + | |||
| + | Stallion-GTAVC-front.jpg|'''[[Stallion]]'''<br/>@ [[Little Havana]] or [[Downtown]]<br/>(<small>[[:Image:Stallion-GTAVC-rear.jpg|rear]]</small>). |
||
| + | |||
| + | Rancher-GTAVC-front.jpg|'''[[Rancher]]'''<br/>@ [[Vice Point]] or [[Downtown]]<br/>(<small>[[:Image:Rancher-GTAVC-rear.jpg|rear]]</small>). |
||
| + | |||
| + | BlistaCompact-GTAVC-front.jpg|'''[[Blista Compact]]'''<br/>@ [[Washington Beach]] or [[Ocean Beach]]<br/>(<small>[[:Image:BlistaCompact-GTAVC-rear.jpg|rear]]</small>). |
||
| + | |||
| + | </gallery> |
||
| + | |} |
||
| + | |||
| ⚫ | |||
| ⚫ | |||
*[[Sabre]] - [[North Point Mall]] |
*[[Sabre]] - [[North Point Mall]] |
||
*[[Virgo]] - Vice Point. |
*[[Virgo]] - Vice Point. |
||
| − | *[[Sentinel]] - Inside Sunshine Autos, Ground Floor, and all around the [[Vice City |
+ | *[[Sentinel]] - Inside Sunshine Autos, Ground Floor, and all around the [[Vice City (3D Universe)|city]]. |
| − | *[[Stretch]] - In [[Vercetti Estate]], Starfish Island. |
+ | *[[Stretch]] - In [[Vercetti Estate]], [[Starfish Island]]. |
*[[Washington]] - Downtown or Vice Point. |
*[[Washington]] - Downtown or Vice Point. |
||
| − | *[[Admiral]] - Western-most house in |
+ | *[[Admiral]] - Western-most house in Starfish Island. |
| ⚫ | |||
| + | {| align="center" |
||
| − | ==List 3== |
||
| + | |<gallery width="auto" perrow="3" style="font-size:95%; padding:0;" widths="192"> |
||
| ⚫ | |||
| + | |||
| ⚫ | |||
| + | Sabre-GTAVC-front.jpg|'''[[Sabre]]'''<br/>@ [[North Point Mall]]<br/>(<small>[[:Image:Sabre-GTAVC-rear.jpg|rear]]</small>). |
||
| − | *[[Infernus]] - At the Vercetti Estate or [[Ocean Beach]]. |
||
| + | |||
| + | Virgo-GTAVC-front.jpg|'''[[Virgo]]'''<br/>@ [[Vice Point]]<br/>(<small>[[:Image:Virgo-GTAVC-rear.jpg|rear]]</small>). |
||
| + | |||
| + | Sentinel-GTAVC-front.jpg|'''[[Sentinel]]'''<br/>@ [[Sunshine Autos]] & [[Vice City (3D Universe)|Vice City]] everywhere.<br/>(<small>[[:Image:Sentinel-GTAVC-rear.jpg|rear]]</small>). |
||
| + | |||
| + | Stretch-GTAVC-front.jpg|'''[[Stretch]]'''<br/>@ [[Vercetti Estate]], [[Starfish Island]]<br/>(<small>[[:Image:Stretch-GTAVC-rear.jpg|rear]]</small>). |
||
| + | |||
| + | Washington-GTAVC-front.jpg|'''[[Washington]]'''<br/>@ [[Downtown]] or [[Vice Point]]<br/>(<small>[[:Image:Washington-GTAVC-rear.jpg|rear]]</small>). |
||
| + | |||
| + | Admiral-GTAVC-front.jpg|'''[[Admiral]]'''<br/>@ Western-most house in [[Starfish Island]]<br/>(<small>[[:Image:Admiral-GTAVC-rear.jpg|rear]]</small>). |
||
| + | |||
| + | </gallery> |
||
| + | |} |
||
| ⚫ | |||
| ⚫ | |||
| ⚫ | |||
| + | *[[Infernus]] - At the Vercetti Estate or Ocean Beach. At this point of the game, it should be noted it is Lance Vance's special all white version of the car. |
||
*[[Banshee]] - West house in the middle of Starfish Island. |
*[[Banshee]] - West house in the middle of Starfish Island. |
||
| − | *[[Phoenix]] - Starfish Island or Ocean Beach. It is also occasionally parked at Links View Apartment. |
+ | *[[Phoenix]] - Starfish Island or Ocean Beach. It is also occasionally parked at [[Links View Apartment]]. |
*[[Comet]] - [[Leaf Links]]. |
*[[Comet]] - [[Leaf Links]]. |
||
| − | *[[Stinger]] - [[Starfish Island]] or |
+ | *[[Stinger]] - [[Starfish Island]] or Ocean Beach. |
| ⚫ | |||
| + | {| align="center" |
||
| − | ==List 4== |
||
| + | |<gallery width="auto" perrow="3" style="font-size:95%; padding:0;" widths="192"> |
||
| ⚫ | |||
| + | |||
| ⚫ | |||
| + | Cheetah-GTAVC-front.jpg|'''[[Cheetah]]'''<br/>@ [[Starfish Island]] & Marina on [[Ocean Drive]]<br/>(<small>[[:Image:Cheetah-GTAVC-rear.jpg|rear]]</small>). |
||
| ⚫ | |||
| + | |||
| ⚫ | |||
| + | Infernus-GTAVC-front.jpg|'''[[Infernus]]'''<br/>@ [[Vercetti Estate]] or [[Ocean Beach]]<br/>(<small>[[:Image:Infernus-GTAVC-rear.jpg|rear]]</small>). |
||
| + | |||
| + | Banshee-GTAVC-front.jpg|'''[[Banshee]]'''<br/>@ West house in the middle of [[Starfish Island]]<br/>(<small>[[:Image:Banshee-GTAVC-rear.jpg|rear]]</small>). |
||
| + | |||
| + | Phoenix-GTAVC-front.jpg|'''[[Phoenix]]'''<br/>@ [[Starfish Island]] or [[Ocean Beach]]<br/>(<small>[[:Image:Phoenix-GTAVC-rear.jpg|rear]]</small>). |
||
| + | |||
| + | Comet-GTAVC-front.jpg|'''[[Comet]]'''<br/>@ [[Leaf Links]]<br/>(<small>[[:Image:Comet-GTAVC-rear.jpg|rear]]</small>). |
||
| + | |||
| + | Stinger-GTAVC-front.jpg|'''[[Stinger]]'''<br/>@ [[Starfish Island]] or [[Ocean Beach]]<br/>(<small>[[:Image:Stinger-GTAVC-rear.jpg|rear]]</small>). |
||
| + | |||
| + | </gallery> |
||
| + | |} |
||
| + | |||
| ⚫ | |||
| ⚫ | |||
| ⚫ | |||
| ⚫ | |||
| ⚫ | |||
*[[Baggage Handler]] - [[Escobar International Airport]]. |
*[[Baggage Handler]] - [[Escobar International Airport]]. |
||
| − | *[[Mr. Whoopee]] - Cherry Popper's Ice Cream Factory (when bought). |
+ | *[[Mr. Whoopee]] - [[Cherry Popper Ice Cream Company|Cherry Popper's Ice Cream Factory]] (when bought). |
| − | *[[Pizza Boy]] - |
+ | *[[Pizza Boy]] - [[The Well Stacked Pizza Co.]] |
| + | |||
| ⚫ | |||
| + | {| align="center" |
||
| + | |<gallery width="auto" perrow="3" style="font-size:95%; padding:0;" widths="192"> |
||
| + | |||
| + | Voodoo-GTAVC-front.jpg|'''[[Voodoo]]'''<br/>@ [[Little Haiti]]<br/>(<small>[[:Image:Voodoo-GTAVC-rear.jpg|rear]]</small>). |
||
| + | |||
| + | CubanHermes-GTAVC-front.jpg|'''[[Cuban Hermes]]'''<br/>@ [[Little Havana]]<br/>(<small>[[:Image:CubanHermes-GTAVC-rear.jpg|rear]]</small>). |
||
| + | |||
| + | Caddy-GTAVC-front.jpg|'''[[Caddy]]''' ''betterthanwalking''<br/>@ Hidden in a bush near the [[Vice City Lighthouse|Lighthouse]]<br/>(<small>[[:Image:Caddy-GTAVC-rear.jpg|rear]]</small>). |
||
| + | |||
| + | BaggageHandler-GTAVC-front.jpg|'''[[Baggage Handler]]'''<br/>@ [[Escobar International Airport]]<br/>(<small>[[:Image:BaggageHandler-GTAVC-rear.jpg|rear]]</small>). |
||
| + | |||
| + | MrWhoopee-GTAVC-front.jpg|'''[[Mr. Whoopee]]'''<br/>@ [[Cherry Popper Ice Cream Company]]<br/>(<small>[[:Image:MrWhoopee-GTAVC-rear.jpg|rear]]</small>). |
||
| + | |||
| + | PizzaBoy-GTAVC-front.jpg|'''[[Pizza Boy]]'''<br/>@ [[The Well Stacked Pizza Co.]](<small>[[:Image:PizzaBoy-GTAVC-rear.jpg|rear]]</small>). |
||
| + | |||
| + | </gallery> |
||
| + | |} |
||
| + | |||
| + | ==Gallery== |
||
| + | {| align="center" |
||
| + | |<gallery width="auto" perrow="3" style="font-size:95%; padding:0;" widths="192"> |
||
| + | Sunshine Autos Import.jpg|"Delivered like a pro. Complete the list and there will be a bonus for you."<br/><small>Vehicle successfully delivered messages.</small> |
||
| + | Kruton9000-GTAVC.jpg|A [[Kruton 9000]] in [[A+B Auto]]'s Sunshine Autos Import Garage. |
||
| + | PizzaBoy-GTAVC-busy.jpg|"Come back when you're not so busy…"<br/><small>[[Pizza Boy]] delivered too early message.</small> |
||
| + | Sunshine Auto's GTAVC Msg.All cars nice0.png|"All cars, nice, Here's a little something…"<br/><small>List complete award message.</small> |
||
| + | Sunshine Auto's GTAVC Msg.All cars nice1.png|"All cars, nice, Here's a little something…"<br/><small>List complete award message.</small> |
||
| + | Sunshine Auto's GTAVC Msg.All cars nice2.png|"All cars, nice, Here's a little something…"<br/><small>List complete award message.</small> |
||
| + | Sunshine Auto's GTAVC Msg.duplicate no-deal.png|"We got more of these than we can shift. Sorry man, no deal."<br/><small>Duplicate vehicle rejected message.</small> |
||
| + | Sunshine Auto's GTAVC Msg.maximum6500.png|"Sunshine Auto's will now generate revenue up to a maximum of $6500. Make sure you collect it regularly."<br/><small>Asset acquired messages.</small> |
||
| + | Sunshine Auto's GTAVC Msg.maximum9000.png|"Sunshine Auto's will now generate revenue up to a maximum of $9000. Make sure you collect it regularly."<br/><small>Asset acquired messages.</small> |
||
| + | </gallery> |
||
| + | |} |
||
| − | ==Trivia== |
||
| ⚫ | |||
| ⚫ | |||
[[es:Listas de vehículos de Sunshine Autos]] |
[[es:Listas de vehículos de Sunshine Autos]] |
||
[[Category:Missions in GTA Vice City]] |
[[Category:Missions in GTA Vice City]] |
||
Revision as of 16:27, 22 August 2014
"Delivered like a pro. Complete the list and there will be a bonus for you."
and
"All the cars, nice. Here's a little something."
Vehicle successfully delivered messages.
The Sunshine Autos Import Garage is a mission and side mission for the Sunshine Autos asset in Grand Theft Auto: Vice City which is located underground within the A+B Auto garage which is near the Vice Street Racer race selection map, to the right when traveling down the main Sunshine Autos ramp. The garage becomes available for importing vehicles after Sunshine Autos is purchased by the player. The garage will only open when you arrive at the door with a needed car on the current list and the garage becomes inaccessible when all lists have been completed. Four lists to complete of wanted vehicles will be posted to the right of the garage door and each vehicle imported successfully will redline that list. Completing the first list will acquire the asset to progress through the story, award a prize vehicle in the showroom and provide income. Completion of all four lists is required to achieve 100% completion.
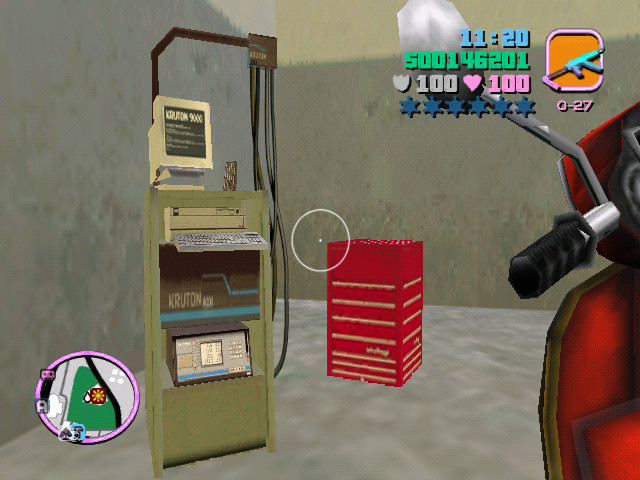

A Kruton 9000 in A+B Autos Sunshine Autos Import Garage.
- Prerequisite: Purchase of the Cherry Popper Ice Cream Factory in order to spawn a Mr. Whoopee. List 4 can be completed only after Cherry Popper is bought - the only asset which depends upon another asset. Fortunately, income from completion of the first three lists can finance the Cherry Popper purchase.
- All vehicles placed into the import garage will vanish when the garage door closes, whether or not they are on the list.
- Nearby are four storage bays with a capacity of eight total vehicles. They are useful to temporarily keep upcoming cars for the next list.
- GTA III difference - the player will not enter in the garage, and will be forever closed.
- A Kruton 9000 computer can be found in the garage.
TIP:
- Spawn similar class cars. If the player have trouble finding a particular vehicle, try to drive a vehicle of the same class to make it pop easier. For example, if the player is searching for an Idaho and is having trouble finding it, try to drive around in an Esperanto. Since they are in the same class and the game tends to spawn the same class of vehicle the player is driving, finding the Idaho should be easier.
- A player can scout early then deliver listed imports instantly from their collection if he/she writes down or otherwise remembers all of these listed cars in advance. Should a model spawn during regular game play it can be acquired and stored in any safehouse garage in preparation for the Sunshine Autos purchase. The Hyman Condo is highly recommended since its three garages have a capacity of six cars.
Many of the vehicles requested will spawn on the road in front of Sunshine Autos when you don't yet need them and the underground garages opposite of the Pay n' Spray work well to temporarily save and quickly fill future lists, saving the time and trouble of searching for it when needed. For example, if the player is driving a surplus Blista Compact (having already saved one on the first list,) while searching for a second list Sabre and a third list Cheetah spawns, it's recommended to grab the Cheetah and store it in any nearby garage, preferably right in Sunshine's basement garages, so when it appears on the current list simply deliver it instantly from your collection. Keep these in mind:
1 Street Cars and SUVs
Reward: A Deluxo will be parked at the bottom floor Sunshine Autos, facing the street. Sunshine Autos will then generate up to $1,500, an asset required to progress through the story.
- Landstalker - There's always one by the dirt track in Downtown, but it will start a side-mission, however, it can be seen around the Bayshore Avenue and Little Haiti.
- Esperanto - Little Havana or Little Haiti.
- Idaho - Little Havana.
- Stallion - Little Havana or Downtown.
- Rancher - Downtown or in Vice Point. NOTE: FBI Ranchers does not count so don't bother.
- Blista Compact - Washington Beach or Ocean Beach
") ") ") |
")
")
")
2 Expensive Cars
Reward: A Sabre Turbo will be parked at the bottom floor of Sunshine Autos, facing the front window of the showroom. Sunshine Autos will generate up to $4,000.
- Sabre - North Point Mall
- Virgo - Vice Point.
- Sentinel - Inside Sunshine Autos, Ground Floor, and all around the city.
- Stretch - In Vercetti Estate, Starfish Island.
- Washington - Downtown or Vice Point.
- Admiral - Western-most house in Starfish Island.
") ") ") ") |
")
")
3 Sport Cars
Reward: A Sandking will be parked on the top floor of Sunshine Autos, facing the streets. Sunshine Autos will generate up to $6,500.
- Cheetah - Marina on Ocean Drive and Starfish Island.
- Infernus - At the Vercetti Estate or Ocean Beach. At this point of the game, it should be noted it is Lance Vance's special all white version of the car.
- Banshee - West house in the middle of Starfish Island.
- Phoenix - Starfish Island or Ocean Beach. It is also occasionally parked at Links View Apartment.
- Comet - Leaf Links.
- Stinger - Starfish Island or Ocean Beach.
") ") ") |
")
")
")
4 Gang Cars and Oddballs
Reward: A Hotring Racer will be parked on the top floor of Sunshine Autos, facing the streets. Sunshine Autos will generate up to $9,000.
- Voodoo - Little Haiti.
- Cuban Hermes - Little Havana.
- Caddy (golf cart) - Hidden in a bush near the Lighthouse in Ocean Beach, and one of the most common cars to see within Leaf Links.
- Baggage Handler - Escobar International Airport.
- Mr. Whoopee - Cherry Popper's Ice Cream Factory (when bought).
- Pizza Boy - The Well Stacked Pizza Co.
") |
")
")
")
")
")
Gallery
"Delivered like a pro. Complete the list and there will be a bonus for you." Vehicle successfully delivered messages. ") A Kruton 9000 in A+B Auto's Sunshine Autos Import Garage. ") "Come back when you're not so busy…" Pizza Boy delivered too early message. ") "All cars, nice, Here's a little something…" List complete award message. ") "All cars, nice, Here's a little something…" List complete award message. ") "All cars, nice, Here's a little something…" List complete award message. ") "We got more of these than we can shift. Sorry man, no deal." Duplicate vehicle rejected message. ") "Sunshine Auto's will now generate revenue up to a maximum of $6500. Make sure you collect it regularly." Asset acquired messages. ") "Sunshine Auto's will now generate revenue up to a maximum of $9000. Make sure you collect it regularly." Asset acquired messages. |