m (clean up, typos fixed: intial → initial) |
Blakewalsh (talk | contribs) Tags: Visual edit apiedit |
||
| (12 intermediate revisions by 8 users not shown) | |||
| Line 1: | Line 1: | ||
[[Image:Crime Rating SA.jpg|right|thumb|200px]] |
[[Image:Crime Rating SA.jpg|right|thumb|200px]] |
||
| − | The '''Criminal Rating''' is a rating level in all games in the [[ |
+ | The '''Criminal Rating''' is a rating level in all games in the [[3D Universe]] based on the criminal activities of the player. In [[Grand Theft Auto: San Andreas]], the criminal rating can be viewed in the Stats section in the pause menu. A new game starts the criminal rating at 0. |
| − | GTA San Andreas did not feature the Media Attention statistic like Vice City did. |
+ | GTA San Andreas did not feature the Media Attention statistic like [[Grand Theft Auto: Vice City|Vice City]] did. |
==Scoring== |
==Scoring== |
||
| Line 60: | Line 60: | ||
The tank's not indestructible, but it is incredibly tough. The main cannon has unlimited ammo, is fully tunable, and by shooting it behind you can boost the otherwise sluggish tank to up to 100 MPH speeds. Shooting it in driving direction will slow you down, though. You don't, however, need to shoot at oncoming cop cars. Just drive into them - they explode on contact. The tank can take at least 20 such collisions. You can shoot the gun at helicopters too, if they fly low enough. The tank can be significantly damaged by colliding with other tanks. Try not to get 6 stars, as then that's exactly what will chase you. Drive the tank into the airport hangar and save game to shake the cops and start the carnage with no wanted level if you want to. If you know when to stop, you can drive the tank back there after you've done some damage, save, and go again. |
The tank's not indestructible, but it is incredibly tough. The main cannon has unlimited ammo, is fully tunable, and by shooting it behind you can boost the otherwise sluggish tank to up to 100 MPH speeds. Shooting it in driving direction will slow you down, though. You don't, however, need to shoot at oncoming cop cars. Just drive into them - they explode on contact. The tank can take at least 20 such collisions. You can shoot the gun at helicopters too, if they fly low enough. The tank can be significantly damaged by colliding with other tanks. Try not to get 6 stars, as then that's exactly what will chase you. Drive the tank into the airport hangar and save game to shake the cops and start the carnage with no wanted level if you want to. If you know when to stop, you can drive the tank back there after you've done some damage, save, and go again. |
||
| + | |||
| + | *I gotta MOFO Tank...In a Bottleneck... |
||
| + | This is related above. Except rather than taking the tank all across the city and then come back, the player takes a tank to a secluded spot and simply guard the entrance or hunt aerial targets. To get a tank, see below (in Tips) or jack one from Area 69. |
||
| + | |||
| + | There a quite a few "secluded spots" or bottlenecks in the game. The best one is Wang's Used Car Show Room. Park and store the tank in Doherty Garage and then save. To start off, drive the tank and then start blasting any targets out there to get the wanted level to 3 stars (where helicopters starts to show up), then drive it to Wang's. There the player has two choices, either back the tank until it enters the lobby/front parking lot, where police has a hard time reaching, guard the entrance and shoot anything moving that tries to enter it (if helicopters starts to show up, back the tank into the lobby to make it disappear) or use the rear ramp to head up to the rear of the showroom, use the space there to hunt down helicopters. This way, the tank can last a fairly long time without seeking replacement and the player can shoot at targets without impunity from police. And if the player hunts helicopters, all his rating points are guaranteed. Lastly, if the player wants to lose his wanted level, all he have to do is park the tank near the rear second story window, and then exit, break the window, jack a vehicle there and enter the nearest Pay'n'Spray, which is also a "checkpoint". |
||
| + | |||
| + | Despite this, eventually, the tank will wear out, especially if the player is hunting helicopters. However, as explained below, jacking another tank from Wang's is pretty easy. This means the player can keep this going for quite a while until he is tired or the CJ is hungry. |
||
| + | |||
| + | *That Other Aircraft Graveyard |
||
| + | Instead of jacking the tank from Area 69 then driving it someplace else, Area 69 itself makes the perfect place for helicopter hunting. The fenced in area is large enough to easily maneuver the Rhino for targeting choppers (which always come in low, making them easy pickings), and the fences very effectively exclude hostile vehicles including military Rhinos. Because there are no hostile vehicles to collide with the Rhino will take basically no damage, but if it does become damaged you can steal a fresh one from the hangers. For extra points you can destroy the two hydras every time they respawn. Once you get bored of hunting helicopters you can simply drive the Rhino the short distance to the Aircraft Graveyard and save the game. |
||
*The Unstoppable Tram |
*The Unstoppable Tram |
||
| Line 72: | Line 82: | ||
*Airstrip Points |
*Airstrip Points |
||
Once you have unlocked the Hunter helicopter and the rest of the air vehicles that spawn at the Verdant Airstrip, hop in the Hunter and fly by with the machine gun to destroy all of the parked aircraft, fly to the end of the runway and return to the hangers and repeat the process. Make sure you stick to the machine gun only, otherwise you will attract a lot of police attention. You will be awarded 30 points for each of the aircraft that spawn there. This works effectively at Las Venturas airport as well. There are plenty of aircraft parked here.You can go to any airport to do this, the best example is Easter Bay Airport, there are many aircrafts parked there you can destroy them all. |
Once you have unlocked the Hunter helicopter and the rest of the air vehicles that spawn at the Verdant Airstrip, hop in the Hunter and fly by with the machine gun to destroy all of the parked aircraft, fly to the end of the runway and return to the hangers and repeat the process. Make sure you stick to the machine gun only, otherwise you will attract a lot of police attention. You will be awarded 30 points for each of the aircraft that spawn there. This works effectively at Las Venturas airport as well. There are plenty of aircraft parked here.You can go to any airport to do this, the best example is Easter Bay Airport, there are many aircrafts parked there you can destroy them all. |
||
| + | ==Ganton- My Home== |
||
| + | In this method, first load yourself with powerful weapons, like AK-47,M4,RPG,Minigun etc. |
||
| + | Then go to ganton and acquire a 2 star wanted level. The go under the ganton bridge. Police will mostly come from the road in front of you. When you see police cars coming take out an assault rifle and shoot the cops inside the car. If some one survives, kill him as soon as he gets out of the car. After you get 3 star or above wanted level, Police Mavericks will come.They will not be able to shoot you when you are under the Ganton bridge. So, when Police Mavericks come, be ready with an RPG or Minigun. When there are no cops under the bridge to shoot you, get out and shoot down the mavericks. When your health gets low, quickly stop fighting and run into the Ganton Safehouse(Johnson House)and save your game. It will refill your health and automatically evade your wanted level. |
||
*Give it to me |
*Give it to me |
||
| Line 86: | Line 99: | ||
* There is no limit to how long a killing spree can go. It can be interesting to make a long one and do a big jump up to your stats, but (unless you use mods or have a stats editor) don't forget that dying can happen at any instant. Don't bite off more than you can chew, set yourself thresholds or time limits. Better to take down a few and get away with it, than to do lots of casualties and die doing more. |
* There is no limit to how long a killing spree can go. It can be interesting to make a long one and do a big jump up to your stats, but (unless you use mods or have a stats editor) don't forget that dying can happen at any instant. Don't bite off more than you can chew, set yourself thresholds or time limits. Better to take down a few and get away with it, than to do lots of casualties and die doing more. |
||
* <p class="MsoNormal">Always take a recruited gang with you this will help you in escaping the police and enemy gang members ''[To recruit a gang, aim at a [http://gta.wikia.com/Grove_Street_Families friendly gang member] press g or h to recruit]'' The number of members you can recruit depends on your respect. |
* <p class="MsoNormal">Always take a recruited gang with you this will help you in escaping the police and enemy gang members ''[To recruit a gang, aim at a [http://gta.wikia.com/Grove_Street_Families friendly gang member] press g or h to recruit]'' The number of members you can recruit depends on your respect. |
||
| + | *If the player wants to use the "I gotta MOFO Tank" method, here is an easy way to get a tank without raiding either Area 69 or the naval base. The trick is to complete the Wang's Used Car Show Room so cars appears in the lobby and of course, the player needs to have access to six wanted star rating (up to "Learning to Fly" mission). Once both are completed, toss a few grenade from the Doherty Garage save point (save first and clean out the garage there too) to start off and get the wanted rating to 2 stars, then beat it to Wang's Cars. From downstairs lobby, aim for the cars and cops with a good assault rifle and kill or blow them up until the wanted rating is at three or four stars. Then beat it upstairs and break the rear end windows. Sprint to the end of the platform and toss grenades or Molotov's down into the entrance ramp there. If helicopters start to show up, either shoot them down with a mini-gun or hide in the nearby Pay'n' Spray to make them disappear. Once the six star wanted level is reached. Head downstairs again. Stand just outside the entrance door and wait until a Rhino appear (This may take awhile. If all appear are Barrack OL's, head into the Pay'n' Spray again to try and make Rhinos appear). Once one appears, use a rifle to get its attention and then lead it onto the door frame, where it can't enter. Shoot the hatch to kill the solider driving it. Once that is done, jack it and use the side ramp and head up to the rear platform. Park it somewhere close by and then enter the second floor lobby, jack a car there and enter the Pay'n' Spray to lose the wanted level. Now the player can drive the Rhino at his leisure and park it in the Doherty Garage. |
||
| − | |||
| − | |||
==Rating== |
==Rating== |
||
| Line 269: | Line 281: | ||
[[Category:Miscellaneous]] |
[[Category:Miscellaneous]] |
||
[[Category:Statistics]] |
[[Category:Statistics]] |
||
| + | [[Category:Features]] |
||
| + | [[Category:Features in GTA San Andreas]] |
||
Revision as of 17:27, 23 August 2015
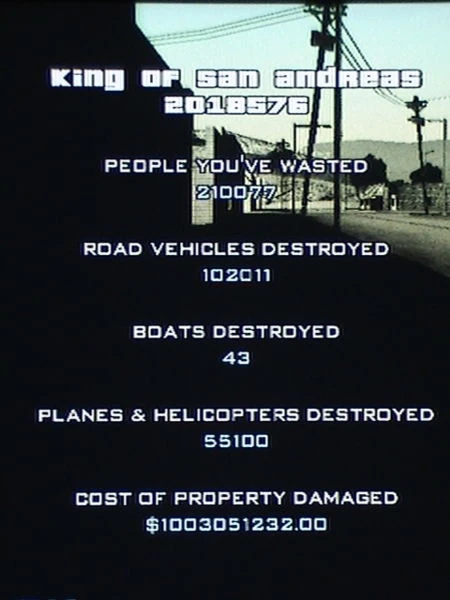
The Criminal Rating is a rating level in all games in the 3D Universe based on the criminal activities of the player. In Grand Theft Auto: San Andreas, the criminal rating can be viewed in the Stats section in the pause menu. A new game starts the criminal rating at 0. GTA San Andreas did not feature the Media Attention statistic like Vice City did.
Scoring
- For each increment of $5000 = 1 (If you spend money, points will go down with it.)
- Getting Busted/Wasted = -3
- For every 0.1% of game completed = 1 (100% completion counts, alone, as 1000 points.)
- Using a cheat = -10
- Killing pedestrians = Linked to the statistics "People killed since last checkpoint" and "Total legitimate kills" (in Stats > Crimes) instead of increasing immediately the rating, going to what the game defines to be a "checkpoint" (Finishing a mission, going to a Pay 'n' Spray, or saving the game) is required to trigger the criminality point increase (and thus your total legitimate kills), with the amount of points obtained depends on the amount of kills this stat gives (for an example, 5 kills on the said statistic will increase by 5 points the rating after going to the Pay'n'spray). Once the point increase has been applied, the game counts this action as a "checkpoint", resetting the stat "Number of people killed since last checkpoint", increasing the "Total legitimate kills" stat by the value obtained before attaining the checkpoint.
- Running over pedestrians, i.e. ramming down someone with a car, will not be counted as a "legitimate kill", although increasing by 1 your "People you've wasted" stat, which is your true total kill count throughout the game.
- Being killed, arrested will reset your "People killed since last checkpoint" stat to 0, thus all kills you've made before dying will not be registered as "legitimate kills".
- Going to a TransFenders is not a checkpoint.
- Destroying ground vehicles = +0 (Empty vehicles don't reward you anything. Destroying ground vehicles with a driver and/or passengers in it grants you points only because you killed the peds inside. Privileged targets are cop cars with 2 cops in it, SWAT trucks and FBI Ranchers with 4 agents each in them. Randomly on the road, you will also find some 4-doors with multiple passengers in them. Shoot them on sight if you want!)
- Destroying aircrafts = +30
- The scoring is not always the same in Hydra. The basic amount of points for taking Hydra down is +30 as in any other aircraft but it varies in case you shot Hydra down from another Hydra. You can get as much as +120 points for taking a single Hydra down if you do it above the sea and then follow the enemy hydra down until it crashes into the water level.
Tips to increase the score
- The storyline missions can do you a great favor as finishing them earn 5 points each, but consider that in almost all of them, you will kill people, earn money (between end-mission money and money you might earn off your victims), destroy lots of vehicles and sometimes aircraft.
- After completing the storyline missions, you should be left with a nice bank account and a solid 8,000 points at the very least. Of course, doing every side-missions will help you climb higher in the criminality ranks.
- Sadly, though, completing everything, even with keeping all the money, won't make you go to the million points. You must know that maxed money alone is worth 199,999 points only in the score, you'll need obviously more to attain the million.
If you wish to increase your criminal rating using other ways, your only solution is to get into a fight with the system and start making a killing spree. Here are a few tips if you want to "start a one-man war".
Methods
- Homelands Method
This method is pretty simple. It consists in choosing a secluded place with narrow access, such as a backstreet, or anywhere far away enough from roads, so you can take out easily any intruder coming in, leaving you with clear shots to aircraft incoming.
Weapons recommended: Minigun, M4, Any shotgun except the sawn-off (in case the intruders come close to you), satchel charges, or molotov cocktails especially if you are fireproof (if the shotgun is ineffective). Escape methods: If you need to get out, I would suggest keeping a fast vehicle (preferably a fast motorbike to get out of your hiding place and rush to the Pay'n'Spray.
Advantages: Natural defense, and possibility to take out intruders quickly
Drawbacks: It happens often, helicopters blasted down can block your way out, if they don't come blasting right next to you.
- My Castle is High
Similar to the Homelands Method, except your main advantage is not in narrow access, but in height itself. Take advantage of your opponents by shooting them from a height.
Weapons recommended: Minigun, M4, grenades or satchel charges to drop on your enemies, sniper rifle (Optional only, but it's a fun and challenging weapon, especially in high wanted level situations)
Escape methods: If you need to get out from a high place, the solution is simple: use a helicopter, the Hydra, a Jetpack, anything that allowed you or helped you to come to your shooting area.
Advantages: Natural defense, possibility to snipe on your intruders quickly as well.
Drawbacks: If you choose an area that's too low, your enemies will have a clear shot at you. On the other hand, if your shooting area is too high, you will have to rely on dropping explosives, or shooting their vehicles.
- Deadly Wind
This method requires you to never stop moving, and to kill all targets from a ground vehicle, using the drive-by method.
Weapons recommended: MP5 packed with lots of ammo.
Vehicles recommended: Any fast bike, the obvious best being the NRG-500.
Advantages: Mobility is a plus when you have to escape, plus this method allows you to escape whenever needed. Not to mention it allows for music!
Drawbacks: Single weapon without the ability to really aim, not to mention that higher levels will mean law enforcement swarming on the roads, and thus much higher chances to fall off your bike, be it because a cop busted you, or because of an obstacle, leaving your opponents with very clear shot at you.
- Deadly Storm
Similar to Deadly Wind, only that the danger for cops come from the air!
Vehicles recommended: Hunter or Hydra, of course. Using a Sea Sparrow is way too dangerous, due to this helicopter's fragility.
Advantages: You have an extremely deadly machine gun at your disposition, not to mention rocket launchers, all with unlimited ammo. Plus, as you're in the air, escaping becomes much easier. Not to mention that if you die, you will be granted with at least 27 points (30 of an aircraft taken down, minus 3 on player's death), although it won't make up for the much higher scores you can attain when you get away.
Drawbacks: At higher wanted levels, enemy Hydras will spawn, and they will shoot rockets to take you down. (There is a way to counter incoming missiles that can only be done while in a Hydra which is by using counter measure to attract heat seeking missiles while you fly away.) Plus, if you get too low, there's chances that enemy will open fire on you from the ground, and repeated fire WILL take you down as well. Not to mention there is no way to get a helicopter or Hydra in a Pay'n'spray, so you'll have to land and run to a save point to cash in your points.
- Hydra Hunter
Do not try to escape from the Hydras surrounding you. Make them your primary target! The easiest way is to take a Hydra (i. e. from your save point in Verdant Meadows) and fly over a military base to attract police attention (Area 69 is just to the south from Verdant Meadows, or there is the Easter Basin Naval Station in San Fierro). Then you only have to fly across the sky, listen to the music and wait for Hydras. Once they appear, start to chase them, with the aiming still on, fly in circles, wait for the finder to become red and fire. The amount of points you get for taking Hydra down varies between +30 and +120. To make sure you get all of the 120 points you have to shoot the enemy Hydra above the sea and then follow it all the way down until it crashes into the water level. Don't lose it from your sight and be sure to stay close when it crashes into the water.
- Sniper Shots
This method is same as the 'My Castle is high' method but this time you're gonna use a Sniper Rifle for this, just take a sniper rifle and get on a high place using a Chopper or the Jetpack, if you got your place then land and start your war. Just try not to attract police attention, or you'll end up having two or three stars. The best target is a car's gas tank, they cause lot of chaos but also attract police attention, you can also kill people with it. Always plan an escape route or you'll end up getting caught, use a car or a jetpack. A chopper is not recommended as it requires a much bigger area to fly. The Minigun is another good weapon for this, as are the Country Rifle and the Rocket Launcher. Choosing a good place is very important, if it's too high then your shots may be inaccurate and if it's too low, you could easily take enemy fire.
- I've got a mother fucking tank!
The title about sums it up. Go to the Area 69 military base. Don't get shot down coming in - it's easiest to enter through the fence on the east side. Right behind said fence are the hangars. They hold three Hydras, but you don't need that - in the mission Vertical Bird, you get your own for keeps. In the last hangar is a Rhino tank. Get in, it's not locked. You'll instantly get 5 stars wanted level, but hey, who cares? You've got a mother fucking tank!
The tank's not indestructible, but it is incredibly tough. The main cannon has unlimited ammo, is fully tunable, and by shooting it behind you can boost the otherwise sluggish tank to up to 100 MPH speeds. Shooting it in driving direction will slow you down, though. You don't, however, need to shoot at oncoming cop cars. Just drive into them - they explode on contact. The tank can take at least 20 such collisions. You can shoot the gun at helicopters too, if they fly low enough. The tank can be significantly damaged by colliding with other tanks. Try not to get 6 stars, as then that's exactly what will chase you. Drive the tank into the airport hangar and save game to shake the cops and start the carnage with no wanted level if you want to. If you know when to stop, you can drive the tank back there after you've done some damage, save, and go again.
- I gotta MOFO Tank...In a Bottleneck...
This is related above. Except rather than taking the tank all across the city and then come back, the player takes a tank to a secluded spot and simply guard the entrance or hunt aerial targets. To get a tank, see below (in Tips) or jack one from Area 69.
There a quite a few "secluded spots" or bottlenecks in the game. The best one is Wang's Used Car Show Room. Park and store the tank in Doherty Garage and then save. To start off, drive the tank and then start blasting any targets out there to get the wanted level to 3 stars (where helicopters starts to show up), then drive it to Wang's. There the player has two choices, either back the tank until it enters the lobby/front parking lot, where police has a hard time reaching, guard the entrance and shoot anything moving that tries to enter it (if helicopters starts to show up, back the tank into the lobby to make it disappear) or use the rear ramp to head up to the rear of the showroom, use the space there to hunt down helicopters. This way, the tank can last a fairly long time without seeking replacement and the player can shoot at targets without impunity from police. And if the player hunts helicopters, all his rating points are guaranteed. Lastly, if the player wants to lose his wanted level, all he have to do is park the tank near the rear second story window, and then exit, break the window, jack a vehicle there and enter the nearest Pay'n'Spray, which is also a "checkpoint".
Despite this, eventually, the tank will wear out, especially if the player is hunting helicopters. However, as explained below, jacking another tank from Wang's is pretty easy. This means the player can keep this going for quite a while until he is tired or the CJ is hungry.
- That Other Aircraft Graveyard
Instead of jacking the tank from Area 69 then driving it someplace else, Area 69 itself makes the perfect place for helicopter hunting. The fenced in area is large enough to easily maneuver the Rhino for targeting choppers (which always come in low, making them easy pickings), and the fences very effectively exclude hostile vehicles including military Rhinos. Because there are no hostile vehicles to collide with the Rhino will take basically no damage, but if it does become damaged you can steal a fresh one from the hangers. For extra points you can destroy the two hydras every time they respawn. Once you get bored of hunting helicopters you can simply drive the Rhino the short distance to the Aircraft Graveyard and save the game.
- The Unstoppable Tram
This is one of the more dangerous methods but very fun. Get Truth's jetpack or spawn one yourself using cheats. Make sure you have plenty of ammo and powerful weapons that can kill people quickly favorably the minigun, M4, or grenades/satchel charges. Head over to San Fierro and hop on the tram that runs through the city. This is most favorable if you have Unlimited Health and Unlimited Ammo cheats on. As a precaution you might want to have the Spawn Jetpack cheat at the ready just in case you fall off. A rocket launcher will have a large amount of area effect and would be most favorable if the explosions it causes you to fly off the tram. The benefits of this method is that you will be harder to hit; being on the move. The cops spawn continuously and you don't have to worry about vehicle corpses getting in the way. The cops that spawn on the sidewalk only get a few seconds to fire as you move out of range quickly. The tram is indestructible and ALWAYS moves at the same speed. Your biggest concern is falling off and the helicopters as the helicopters can shoot while on the move. If you're really really careful and able to keep from firing too close to you, a rocket launcher or lock-on rocket launcher will be very very effective.
- Machine Lock-On Missile Launcher (MLOML)
Get a lock-on missile launcher then go to an elevated area, such as Cranberry Station, and start to launch missiles down onto people until you get a high enough wanted level Police Mavericks come after you. Start to launch 1 missile at each helicopter and if you have enough ammo you can continue shooting pure explosion death on the people below you. If you are on Cranberry station and a train comes you can get on it for a quick getaway albeit with low acceleration. The first few feet from the Kincaid bridge is also a good spot (Near the minigun spawn so if you have a jetpack you can get the minigun for a backup incase you lose your Rocket launcher ammo) The infinite ammo, jetpack, and unlimited health cheats are useful to keep you alive longer.
- Pedestrian Harvest
This method involves using the "vehicle of death" cheat (vehicle invulnerability and instant NPC vehicle explosion upon contact with your vehicle) which is similar to a Rhino's standard abilities, but with higher health. Now go get a Combine Harvester in the country and start mowing down people in the street, Las Venturas is preferable as it has wide streets with lots of pedestrians. If you get a wanted level you can't get busted while inside the Combine and the cheat will keep it from exploding. The only problem is you must lose the cops so you might want to get to a safe house or a pay n' spray quickly after you've killing enough people.
- Airstrip Points
Once you have unlocked the Hunter helicopter and the rest of the air vehicles that spawn at the Verdant Airstrip, hop in the Hunter and fly by with the machine gun to destroy all of the parked aircraft, fly to the end of the runway and return to the hangers and repeat the process. Make sure you stick to the machine gun only, otherwise you will attract a lot of police attention. You will be awarded 30 points for each of the aircraft that spawn there. This works effectively at Las Venturas airport as well. There are plenty of aircraft parked here.You can go to any airport to do this, the best example is Easter Bay Airport, there are many aircrafts parked there you can destroy them all.
Ganton- My Home
In this method, first load yourself with powerful weapons, like AK-47,M4,RPG,Minigun etc. Then go to ganton and acquire a 2 star wanted level. The go under the ganton bridge. Police will mostly come from the road in front of you. When you see police cars coming take out an assault rifle and shoot the cops inside the car. If some one survives, kill him as soon as he gets out of the car. After you get 3 star or above wanted level, Police Mavericks will come.They will not be able to shoot you when you are under the Ganton bridge. So, when Police Mavericks come, be ready with an RPG or Minigun. When there are no cops under the bridge to shoot you, get out and shoot down the mavericks. When your health gets low, quickly stop fighting and run into the Ganton Safehouse(Johnson House)and save your game. It will refill your health and automatically evade your wanted level.
- Give it to me
This method is for PC users only. Just simply download the full crime rating save file, although it's nowhere near as fun as going on the rampage.
Tips
- Wearing Body Armor is essential, but it is strongly advised to complete the Paramedic and Vigilante R3 missions to max out your health and armor levels. The point is, of course, to survive in order to get to a checkpoint.
- Obviously, load yourself up with powerful weaponry. The Minigun will be your best tool as it can be used for multiple purposes, from killing clumps of running pedestrians to destroying aircraft swiftly and easily, if you go for an on-foot method using the unlimited ammo cheat is a slight smart option here though costing you an initial 10 points for using a cheat having unlimited minigun or rocket launcher ammo can be very handy during your rampages.
- Take down aircraft in priority! Each of those will grant you instantly 30 points each without having to "cash them" using the checkpoint method. In case you die during your killing spree, you will have at least the aircraft takedown points. The heli sniping trick might get useful if you're really accurate and don't want to waste Minigun ammo, in case you go for an on-foot method.
- Choose your paths wisely. Plan how you're gonna do the killing spree, make an escape plan, make sure you can respond to any threat or retreat if needed. Whatever you do, try to survive. Don't waste time on health recovery, as spending time in front of a Sprunk dispenser will make you lose than what you'll recover, and most importantly: do NOT go in a fast-food, unless you're fast, because upon exiting, a lot of cops will be waiting for you, guns ready of course.
- A good place to start a killing spree would be in south San Fierro. Lots of people spawn on the streets of Doherty, especially those one block north from the Wang Cars and is an excellent place to do massive kills. It is also the perfect retreat place, as if you are too low on health, all you have to do is to run to the garage, pick a car upstairs and race the few feet separating you from the Pay'n'spray that will make you cash in your points. Even better, there is a Sprunk dispenser near the Cranberry Station to quickly restore your health before starting a new killing spree.
- Optimize your chances of surviving by planning an escape route. Be sure there's always next to you a way for you to escape, be it a fast vehicle, an aircraft, back-alleys, spawn points of body armor or weapons or even bribes, just so you get the few extra protection needed to run your way to a checkpoint, provided you're close to one. Learn the streets, and don't plan a city-scale rampage. Instead, stay around your favorite places, those you know the best. Remember, a checkpoint can be any safehouse, and any Pay'n'Spray.
- Avoid getting surrounded. In the case this happens, and you need at any costs to get out of the place you've been trapped in (such as a back-alley, a rooftop, or anywhere in the likes), try sniping your way out. A good shot in the head or in the gas tanks can gift you an escape route, especially in higher wanted level situations.
- There is no limit to how long a killing spree can go. It can be interesting to make a long one and do a big jump up to your stats, but (unless you use mods or have a stats editor) don't forget that dying can happen at any instant. Don't bite off more than you can chew, set yourself thresholds or time limits. Better to take down a few and get away with it, than to do lots of casualties and die doing more.
Always take a recruited gang with you this will help you in escaping the police and enemy gang members [To recruit a gang, aim at a friendly gang member press g or h to recruit] The number of members you can recruit depends on your respect.
- If the player wants to use the "I gotta MOFO Tank" method, here is an easy way to get a tank without raiding either Area 69 or the naval base. The trick is to complete the Wang's Used Car Show Room so cars appears in the lobby and of course, the player needs to have access to six wanted star rating (up to "Learning to Fly" mission). Once both are completed, toss a few grenade from the Doherty Garage save point (save first and clean out the garage there too) to start off and get the wanted rating to 2 stars, then beat it to Wang's Cars. From downstairs lobby, aim for the cars and cops with a good assault rifle and kill or blow them up until the wanted rating is at three or four stars. Then beat it upstairs and break the rear end windows. Sprint to the end of the platform and toss grenades or Molotov's down into the entrance ramp there. If helicopters start to show up, either shoot them down with a mini-gun or hide in the nearby Pay'n' Spray to make them disappear. Once the six star wanted level is reached. Head downstairs again. Stand just outside the entrance door and wait until a Rhino appear (This may take awhile. If all appear are Barrack OL's, head into the Pay'n' Spray again to try and make Rhinos appear). Once one appears, use a rifle to get its attention and then lead it onto the door frame, where it can't enter. Shoot the hatch to kill the solider driving it. Once that is done, jack it and use the side ramp and head up to the rear platform. Park it somewhere close by and then enter the second floor lobby, jack a car there and enter the Pay'n' Spray to lose the wanted level. Now the player can drive the Rhino at his leisure and park it in the Doherty Garage.
Rating
|
Criminal Rating |
Points |
|---|---|
|
Cheater |
Less than -10,000 |
| Crackhead | -6,000- -10,000 |
| Bitch-Made | -4,000 - -5,999 |
| Off-Brand | -2,000 - -3,999 |
| Scandalous | -500 - -1,999 |
| Playa-Hater | -1 - -499 |
| Vic | 0-19 |
| Square | 20-49 |
| Civilian | 50-74 |
| Rat | 75-99 |
| Snitch | 100-119 |
| Transformer | 150-199 |
| Punk-Ass Bitch | 200-239 |
| Sucka | 240-269 |
| Poot-butt | 270-299 |
| Buster | 300-339 |
| Mark | 340-369 |
| Chump | 370-399 |
| Trick | 400-449 |
| Red-Headed Stepchild | 450-499 |
| Peon | 500-549 |
| Pee-Wee | 550-599 |
| Prankster | 600-609 |
| Fool | 610-649 |
| Street Cat | 650-699 |
| Thug | 700-799 |
| Hustler | 800-999 |
| Playa Partner | 1,000-1,149 |
| Mack | 1,150-1,299 |
| Pimp | 1,300-1,499 |
| Crime Partner | 1,500-1,699 |
| Homeboy | 1,700-1,999 |
| Homie | 2,000-2,099 |
| Road Dawg | 2,100-2,299 |
| Hoodsta | 2,300-2,499 |
| Hard-ass | 2,500-2,749 |
| Banger | 2,750-2,999 |
| Lil' G | 3,000-3,499 |
| Loc | 3,500-3,999 |
| Jacker | 4,000-4,999 |
| Shooter | 5,000-7,499 |
| Foot Soldier | 7,500-9,999 |
| Hoo-Rider | 10,000-19,999 |
| Soldier | 20,000-29,999 |
| Hawg | 30,000-39,999 |
| Gangsta | 40,000-49,999 |
| Ghetto Star | 50,000-64,999 |
| Monster | 65,000-79,999 |
| Big Homie | 80,000-99,999 |
| Boss Hawg | 100,000-149,999 |
| Shot Caller | 150,000-199,999 |
| OG | 200,000-299,999 |
| High Roller | 300,000-399,999 |
| Four-Star General | 375,000-499,999 |
| Godfather | 500,000-999,999 |
| King of San Andreas | 1,000,000+ |