(added 'unused test' trivia) Tags: Visual edit apiedit |
|||
| (11 intermediate revisions by 7 users not shown) | |||
| Line 2: | Line 2: | ||
The '''Driving School''' is an educational establishment in [[Grand Theft Auto: San Andreas]] where the [[Carl Johnson|player]] learns advanced maneuvers and tactics of handling a vehicle. It is located in [[Doherty]], [[San Fierro]], two blocks down from the [[Doherty Garage]] and across the [[Doherty Safehouse]]. It is marked by a red "S". After completing the mission [[Deconstruction]], [[Jethro]] will call and tell about the Driving School. |
The '''Driving School''' is an educational establishment in [[Grand Theft Auto: San Andreas]] where the [[Carl Johnson|player]] learns advanced maneuvers and tactics of handling a vehicle. It is located in [[Doherty]], [[San Fierro]], two blocks down from the [[Doherty Garage]] and across the [[Doherty Safehouse]]. It is marked by a red "S". After completing the mission [[Deconstruction]], [[Jethro]] will call and tell about the Driving School. |
||
| − | Spending more and more time there will increase the player's ability to drive and once the meter is full all cars |
+ | Spending more and more time there will increase the player's ability to drive and once the meter is full, handling for all cars will become better than before. While completing the school in general is quite hard, getting all gold medals is ''extremely hard'' for all players, and most golds are result of a fluke. Challenging points are time limits, and a damage meter. In addition, coming to a complete stop, even if only for an instant, will often end a test prematurely (in particular during the Burn and Lap challenge). |
Passing the school is required to unlock the mission [[Zeroing In]] and the rest of the [[Wang Cars]] [[asset|asset missions]]. However, while necessary for 100% completion of the game, the Wang Cars strand is not mandatory for completing the main storyline of the game. |
Passing the school is required to unlock the mission [[Zeroing In]] and the rest of the [[Wang Cars]] [[asset|asset missions]]. However, while necessary for 100% completion of the game, the Wang Cars strand is not mandatory for completing the main storyline of the game. |
||
| Line 9: | Line 9: | ||
==Lessons== |
==Lessons== |
||
| − | === |
+ | ===The 360 (given vehicle is [[Infernus]])=== |
| − | The player is required to turn 360 degrees without moving the car forward. |
+ | * The player is required to turn 360 degrees without moving the car forward. |
| − | Hold '''''Forward '''''and '''''Reverse''''' together, then press '''''left'''''/'''''right''''' 'til it makes a full circle. |
+ | ** Hold '''''Forward '''''and '''''Reverse''''' together, then press '''''left'''''/'''''right''''' 'til it makes a full circle. |
| ⚫ | |||
| ⚫ | |||
| ⚫ | |||
| ⚫ | |||
| ⚫ | |||
| ⚫ | |||
| ⚫ | |||
| + | * The player is required to drive over a [[Spike Strip]] and maneuver the vehicle through a small curvy section of cones. |
||
| ⚫ | ** Get as much momentum as possible while driving towards the strip then let go of the acceleration after the tires have been destroyed to focus on maneuvering through the cones. Remember that vehicles without tires are easier to control at slower speeds, so try to tap the acceleration as little as possible. |
||
| ⚫ | |||
| + | * The player is required to drive 5 laps, making 180 turns at both ends of a rectangular course. They can choose between driving clockwise or anti-clockwise. |
||
| ⚫ | |||
| ⚫ | |||
| ⚫ | |||
| ⚫ | |||
| − | === |
+ | ===The '90' (given vehicle is Banshee)=== |
| ⚫ | |||
| ⚫ | |||
| ⚫ | |||
| − | === |
+ | === Wheelie Weave (given vehicle is Banshee)=== |
| − | The player |
+ | * The player must use a ramp to go into a double wheelie and move to the designated area while still in the wheelie. |
| ⚫ | |||
| − | === |
+ | === Spin and Go (given vehicle is [[Taxi]])=== |
| − | The player |
+ | * The player must reverse and quickly turn and accelerate towards the ending area without destroying any of the cone boundaries. |
| ⚫ | Get as much momentum as possible while driving towards the strip then let go of the acceleration after the tires have been destroyed to focus on maneuvering through the cones. Remember that vehicles without tires are easier to control at slower speeds, so try to tap the acceleration as little as possible. |
||
| − | === |
+ | === [[PIT maneuver]] (given vehicle is SFPD Police Car)=== |
| ⚫ | |||
| ⚫ | |||
| ⚫ | |||
| − | === |
+ | === Alley Oop (given vehicle is Banshee)=== |
| ⚫ | |||
| ⚫ | |||
| + | ** If on PC, 'Frame Limiter' must be turned on to complete this challenge. |
||
| − | |||
| ⚫ | |||
| ⚫ | |||
| ⚫ | * This is the final driving school test. The player is given 120 seconds to navigate around the city towards Otto's Autos automobile showroom across town and get back to the Driving School without causing any actual damage to the vehicle. Unlike all of the other driving tests, this test takes place on San Fierro's streets instead of the Driving School's test area. This test also contains all of the features of the game on the streets including traffic and pedestrians. The car is also not allowed to stop or the test will be failed. Doing this test under 100 seconds without causing any damage to the car will get you a gold medal. |
||
| − | |||
| ⚫ | |||
| ⚫ | |||
| − | |||
| ⚫ | |||
| − | The player must use a ramp to go into a double wheelie and move to the designated area while still in the wheelie. |
||
| − | |||
| ⚫ | |||
| − | The player must reverse and quickly turn and accelerate towards the ending area without destroying any of the cone boundaries. |
||
| − | |||
| ⚫ | |||
| ⚫ | |||
| − | |||
| ⚫ | |||
| ⚫ | |||
| − | |||
| ⚫ | |||
| ⚫ | This is the final driving school test. The player is given 120 seconds to navigate around the city towards Otto's Autos automobile showroom across town and get back to the Driving School without causing any actual damage to the vehicle. Unlike all of the other driving tests, this test takes place on San Fierro's streets instead of the Driving School's test area. This test also contains all of the features of the game on the streets including traffic and pedestrians. The car is also not allowed to stop or the test will be failed. Doing this test under 100 seconds without causing any damage to the car will get you a gold medal. |
||
==Scoring== |
==Scoring== |
||
| Line 66: | Line 60: | ||
* If you are playing on PC and are having difficulty with the first challenge it is better if you switch the steering control from your keyboard to your mouse giving you the ability to spin your car without going forward and backwards. |
* If you are playing on PC and are having difficulty with the first challenge it is better if you switch the steering control from your keyboard to your mouse giving you the ability to spin your car without going forward and backwards. |
||
* In the Mobile version of GTA San Andreas, the "Spin and Go" exercise is omitted, presumably due to difficulties that may arise from attempting to perform said maneuver with the limited controls on a mobile device. Despite this change, at the beginning of the tests, it still says that there are 12 lessons. |
* In the Mobile version of GTA San Andreas, the "Spin and Go" exercise is omitted, presumably due to difficulties that may arise from attempting to perform said maneuver with the limited controls on a mobile device. Despite this change, at the beginning of the tests, it still says that there are 12 lessons. |
||
| + | * The music which plays during the results screen when you have completed a course is a modified version of [http://westarmusic.sourceaudio.com/#!details?id=6859013 Review the Scores] made by Westar Music, a company which offers royalty free sound effects and music. |
||
| + | * According to the [[Carrec]] file in the paths folder, there is an unused driving school test. |
||
==See also== |
==See also== |
||
| Line 77: | Line 73: | ||
==Video Walkthrough== |
==Video Walkthrough== |
||
| − | |||
| − | |||
[[File:GTA San Andreas - Walkthrough - Mission 52 - Back to School (HD)|thumb|left|554 px]] |
[[File:GTA San Andreas - Walkthrough - Mission 52 - Back to School (HD)|thumb|left|554 px]] |
||
| + | {{Clr}} |
||
| + | ==Navigation== |
||
| + | {{Navboxes |
||
| + | |title= Navigation |
||
| + | |list1= |
||
| + | {{GTA|state=collapsed}} |
||
| + | {{Gtasa missions|state=collapsed}} |
||
| + | }} |
||
[[es:Autoescuela de coches]] |
[[es:Autoescuela de coches]] |
||
Revision as of 06:45, 22 August 2015
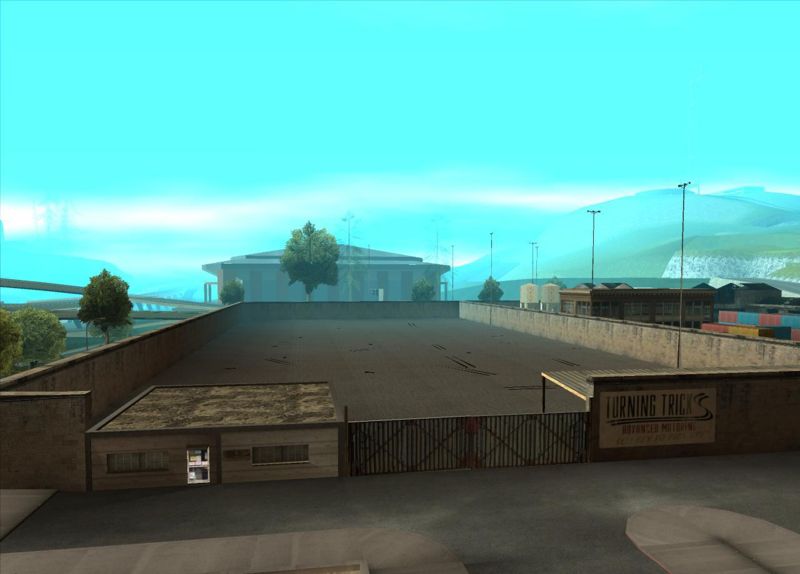
The Driving School in Doherty, San Fierro.
The Driving School is an educational establishment in Grand Theft Auto: San Andreas where the player learns advanced maneuvers and tactics of handling a vehicle. It is located in Doherty, San Fierro, two blocks down from the Doherty Garage and across the Doherty Safehouse. It is marked by a red "S". After completing the mission Deconstruction, Jethro will call and tell about the Driving School.
Spending more and more time there will increase the player's ability to drive and once the meter is full, handling for all cars will become better than before. While completing the school in general is quite hard, getting all gold medals is extremely hard for all players, and most golds are result of a fluke. Challenging points are time limits, and a damage meter. In addition, coming to a complete stop, even if only for an instant, will often end a test prematurely (in particular during the Burn and Lap challenge).
Passing the school is required to unlock the mission Zeroing In and the rest of the Wang Cars asset missions. However, while necessary for 100% completion of the game, the Wang Cars strand is not mandatory for completing the main storyline of the game.
Also, inside the Driving School is where the player could first find Michelle Cannes, one of the six possible girlfriends Carl Johnson can date.
Lessons
The 360 (given vehicle is Infernus)
- The player is required to turn 360 degrees without moving the car forward.
- Hold Forward and Reverse together, then press left/right 'til it makes a full circle.
The 180 (given vehicle is Blista Compact)
- The player is required to drive forward and make a 180 degree U-turn around a cone without hitting it.
- Drive towards the cone, then press and hold the handbrake button while turning left around the cone.
Whip and Terminate (given vehicle is Banshee)
- The player is required to drive forward and make a 90 degree turn around a cone. They can choose between making a left or a right turn.
- Drive towards the turn and, after about half the car has passed the cone, press and hold the handbreak button while turning.
Pop and Control (given vehicle is a SFPD Police Car)
- The player is required to drive over a Spike Strip and maneuver the vehicle through a small curvy section of cones.
- Get as much momentum as possible while driving towards the strip then let go of the acceleration after the tires have been destroyed to focus on maneuvering through the cones. Remember that vehicles without tires are easier to control at slower speeds, so try to tap the acceleration as little as possible.
Burn and Lap (given vehicle is Banshee)
- The player is required to drive 5 laps, making 180 turns at both ends of a rectangular course. They can choose between driving clockwise or anti-clockwise.
- Drive towards the turns and, after about half the car has passed the final cone, press and hold the handbrake button while turning.
Cone Coil (given vehicle is Banshee)
- The player must navigate through sets of cones set up leaving openings on the left and right sides and return to the starting point using a 180' turn.
- If on PC, 'Limit Framerate' must be turned on to complete this challenge.
The '90' (given vehicle is Banshee)
- The player must accelerate and park in between two Banshees parked facing westward and must be facing the same direction as both other cars.
Wheelie Weave (given vehicle is Banshee)
- The player must use a ramp to go into a double wheelie and move to the designated area while still in the wheelie.
Spin and Go (given vehicle is Taxi)
- The player must reverse and quickly turn and accelerate towards the ending area without destroying any of the cone boundaries.
PIT maneuver (given vehicle is SFPD Police Car)
- The Player is required to PIT maneuver the other SFPD Police Car without causing too much damage to the either of the vehicles.
Alley Oop (given vehicle is Banshee)
- The player is required to jump off the ramp at an angle and complete a full barrel roll while jumping over all the vehicles in front of the ramp and land without causing too much damage to the Banshee.
- If on PC, 'Frame Limiter' must be turned on to complete this challenge.
City Slicking (given vehicle is Super GT)
- This is the final driving school test. The player is given 120 seconds to navigate around the city towards Otto's Autos automobile showroom across town and get back to the Driving School without causing any actual damage to the vehicle. Unlike all of the other driving tests, this test takes place on San Fierro's streets instead of the Driving School's test area. This test also contains all of the features of the game on the streets including traffic and pedestrians. The car is also not allowed to stop or the test will be failed. Doing this test under 100 seconds without causing any damage to the car will get you a gold medal.
Scoring
The scoring is based on the position and heading. This is the formula of the scoring:
Final Position + Final Heading - Damage Penalty divided by Position and Heading Score = Final Score
Rewards
The reward for all Bronze is a Super GT, for all Silver a Bullet, and for all Gold a Hotknife with a custom license plate reading "GOLD". These will be parked outside of the school. Ironically, although it is considered the "lesser" of the three car awards, the Super GT is the only one of the three to qualify for the later Exports and Imports mission.
Trivia
- The name 'turning tricks' is slang used for prostitution.
- This is the only one of the four schools in the game with its own separate interior (all the others have their offices in the "exterior world").
- A very strange glitch occurs on the grounds of the driving school. If the player isn't dating Michelle Cannes, then he will find her inside the office, talking to a random pedestrian. If the player enters the office, then exits it and climbs up to the roof of the building, then the pedestrian that was talking to Michelle Cannes in the office will fall from the sky and land on the roof of the office. Although it could be possibly because of the Hidden Interiors Universe.
- If you are playing on PC and are having difficulty with the first challenge it is better if you switch the steering control from your keyboard to your mouse giving you the ability to spin your car without going forward and backwards.
- In the Mobile version of GTA San Andreas, the "Spin and Go" exercise is omitted, presumably due to difficulties that may arise from attempting to perform said maneuver with the limited controls on a mobile device. Despite this change, at the beginning of the tests, it still says that there are 12 lessons.
- The music which plays during the results screen when you have completed a course is a modified version of Review the Scores made by Westar Music, a company which offers royalty free sound effects and music.
- According to the Carrec file in the paths folder, there is an unused driving school test.
See also