Cloudkit01 (talk | contribs) (→Trivia) |
No edit summary |
||
| (53 intermediate revisions by 31 users not shown) | |||
| Line 1: | Line 1: | ||
| + | [[File:QuaryMissions-GTASA.png|thumb|350px]] |
||
| ⚫ | |||
| + | {{Disambiglink|For other uses, see [[Quarry]].}} |
||
| − | There are seven missions which consist primarily of using [[Hunter Quarry|quarry]] machines to accomplish different tasks. |
||
| ⚫ | |||
| − | == |
+ | ==Description== |
| + | The Quarry missions involve a series of seven missions in which [[Carl Johnson]] works for the [[Hunter Quarry]] in [[Bone County]]. The missions can be triggered by walking onto the red marker at the eastern entrance of the quarry. Each mission involves Carl using Quarry machinery to complete jobs around the Quarry and beyond. Once a mission is successfully completed, the next one can be triggered by walking onto the red marker again (should the player fail a mission, it can be restarted at any time by going back to the red marker). Each mission completed rewards the player with money. |
||
| + | Once all seven missions have been completed, the Quarry will become an asset and generate up to [[Money|$]]2,000 in revenue, and the [[Dozer]] and [[Dumper]] will always spawn in the Quarry. The player can replay the Quarry missions at any time, and during replays, the player can choose to abort the mission at any point. |
||
| ⚫ | |||
| + | Completing all Quarry Missions is required for [[100% Completion in GTA San Andreas|100% Completion]]. |
||
| ⚫ | |||
| − | This mission is timed and requires you to push 7 rocks with the [[Dozer|bulldozer]] into red marked areas in order to clear the path. This is relatively easy, although you'll use up most of your time driving around the quarry. Jump in the Dozer and drive forward. Drive into the rock and push it over the side, then head down to the right and push that rock over the side. Keep going around to the right and you'll notice the next rock is below you. Jump off the side and use the directions on the analog stick to keep the Dozer on it's wheels. Push the next rock off and head towards the next one which is to the left. You may have to drop down and go up the small ramp from the bottom level and to the left. Once you've got that, head back along the path and knock the next one off the road. Head up the path to the left and knock the next lower one down, then head along the path, up and to the left and knock the final rock off the end. |
||
| + | ==Missions== |
||
| − | Reward: [[Money|$]]500 |
||
| ⚫ | |||
| + | {| class="wikitable" width="100%" |
||
| + | !Image |
||
| + | !Mission Instruction |
||
| + | !Time Limit |
||
| + | !Mission Description |
||
| + | !Reward |
||
| + | |- |
||
| + | |[[File:QuarryMissions-GTASA-1.png|thumb|center|275px]] |
||
| ⚫ | |||
| + | |3:30 minutes |
||
| + | |Carl is given a [[Dozer]] and has 3 minutes and 30 seconds to push seven rocks off the way to their respective designated locations. The rocks can only be pushed using the Dozer's blade. |
||
| + | |$500 |
||
| + | |} |
||
===Mission 2=== |
===Mission 2=== |
||
| + | {| class="wikitable" width="100%" |
||
| − | |||
| + | !Image |
||
| ⚫ | |||
| + | !Mission Instruction |
||
| − | Again, this mission is timed, and again you need to push items around using the bulldozer. Get in the Dozer and you'll be told of a bomb behind the hut where you start the mission, so drive around to it and use the ramp at the front to push the barrel into the red circle. This can be pretty frustrating as the barrel doesn't exactly stick to the front of the vehicle, but you have more than enough time to do it. Once it's in you'll be told that there's a bomb at the crane so head down the hill (jump if you wish) and get behind the barrel and push it up the two slopes into the red circle. Rather easy that one. After that, drop down to the bottom of the Quarry where you'll need to push another barrel into a close red circle. It's not too difficult providing you approach it from directly behind. The next bomb is close again, just in between the crushers behind you. Push that into the red circle within the generous allotted time. Once it's pushed into the circle, get out of the truck and run like hell as it blows up. |
||
| + | !Time Limit |
||
| − | |||
| + | !Mission Description |
||
| ⚫ | |||
| + | !Reward |
||
| + | |- |
||
| + | |[[File:QuarryMissions-GTASA-2.png|thumb|center|275px]] |
||
| ⚫ | |||
| + | |1:30 minutes |
||
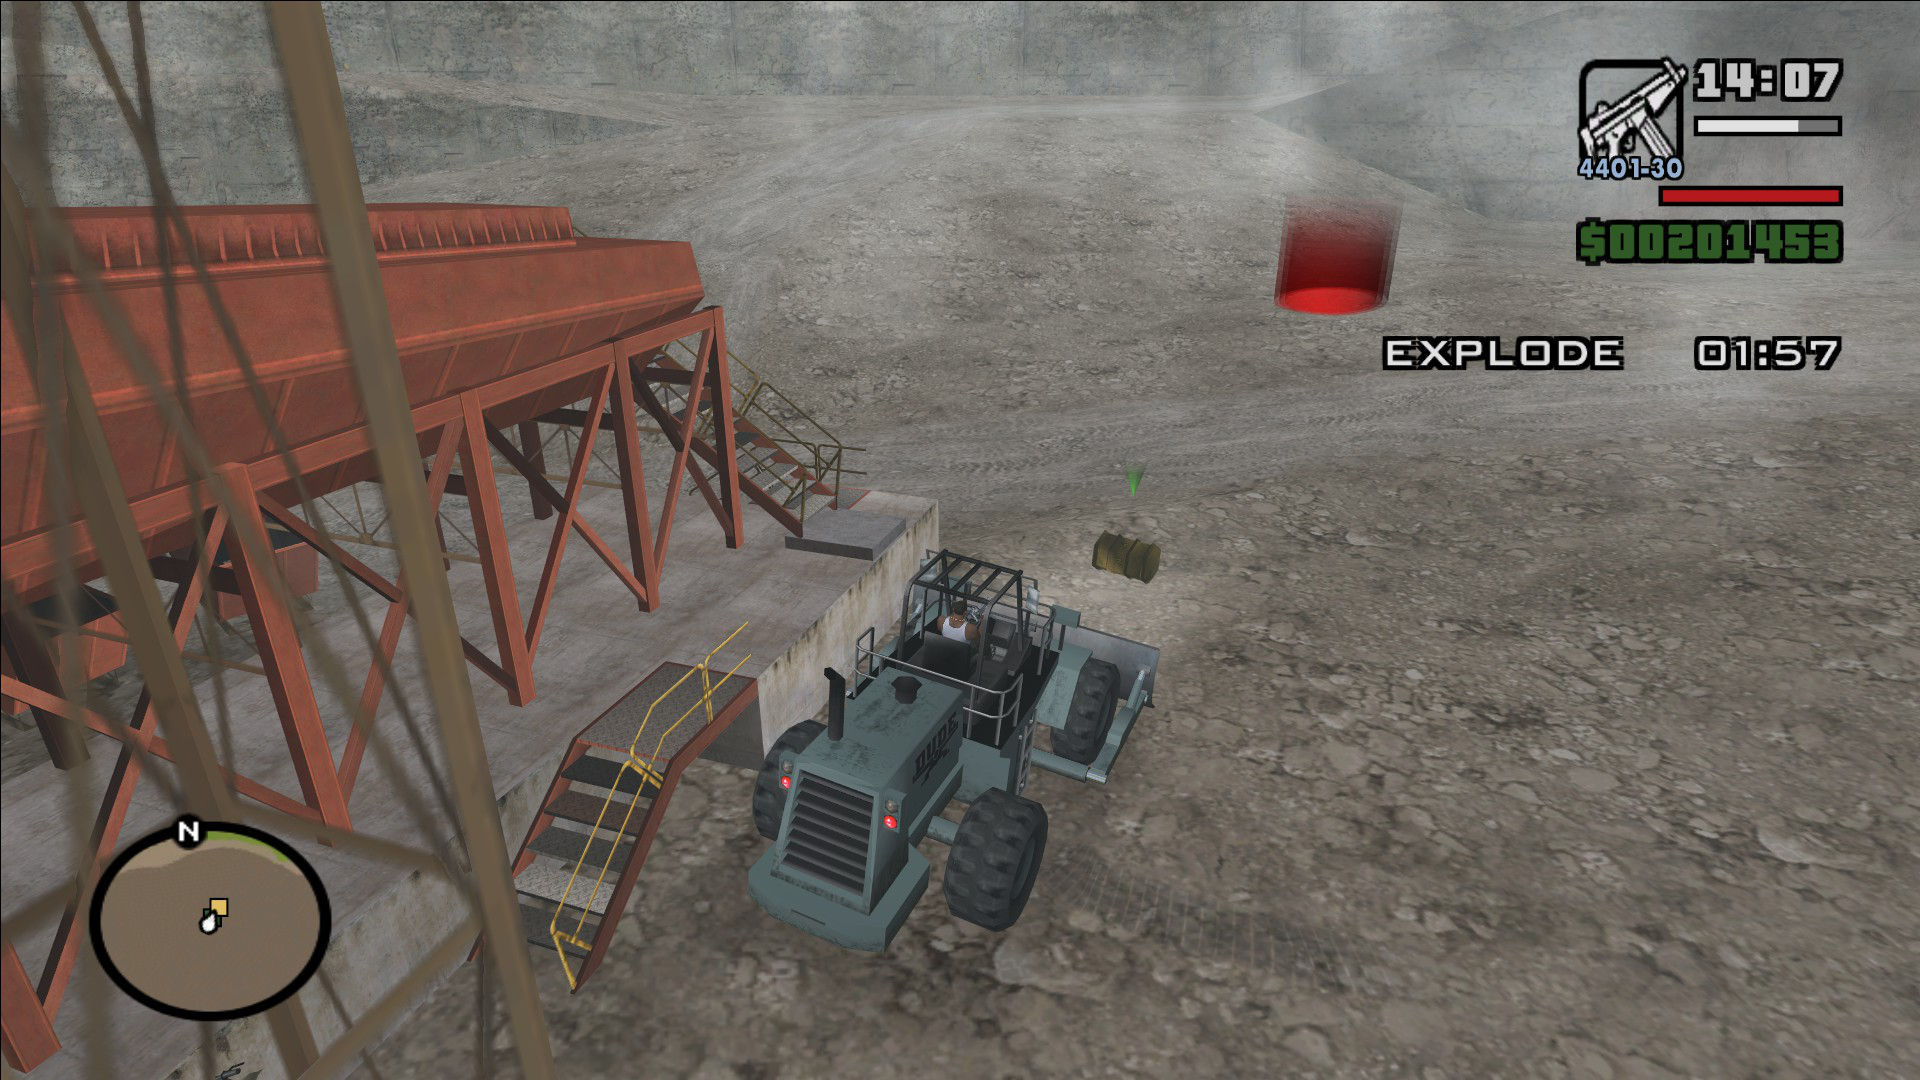
| + | |Carl is given a Dozer and has 1 minute and 30 seconds to push four explosive barrels to safety in their designated locations. Unlike in the previous mission, Carl only needs to push one explosive barrel at a time, after which he has to quickly drive away from the barrel. After one barrel is cleared, another barrel appears. Carl also receives a time bonus for each cleared barrel. |
||
| ⚫ | |||
| + | |} |
||
===Mission 3=== |
===Mission 3=== |
||
| + | {| class="wikitable" width="100%" |
||
| − | |||
| + | !Image |
||
| ⚫ | |||
| + | !Mission Instruction |
||
| − | Another timed mission, although this one isn't as repetitive as before. Jump in the huge [[Dumper]] and make your way around the outside of the Quarry while chasing after the red blip on the radar. If you have a sub machine gun you can just drive by the truck until it goes boom. If not, do it the more fun way and try to blow it up by smashing into it, or even knock it into the water as it passes by through Tierra Robada. Once it's gone it's mission complete. |
||
| + | !Time Limit |
||
| − | |||
| + | !Mission Description |
||
| ⚫ | |||
| + | !Reward |
||
| − | |||
| + | |- |
||
| − | *''Note:'' The driver of the enemy Dumper is one of the few NPCs in the game with the ability to swim. If you knock it into the water during the mission, the driver will exit the vehicle and tread water non-stop. If you dive into the water and join him, he will speak NPC lines to you. |
||
| + | |[[File:QuarryMissions-GTASA-3.png|thumb|center|275px]] |
||
| ⚫ | |||
| + | |8:00 minutes |
||
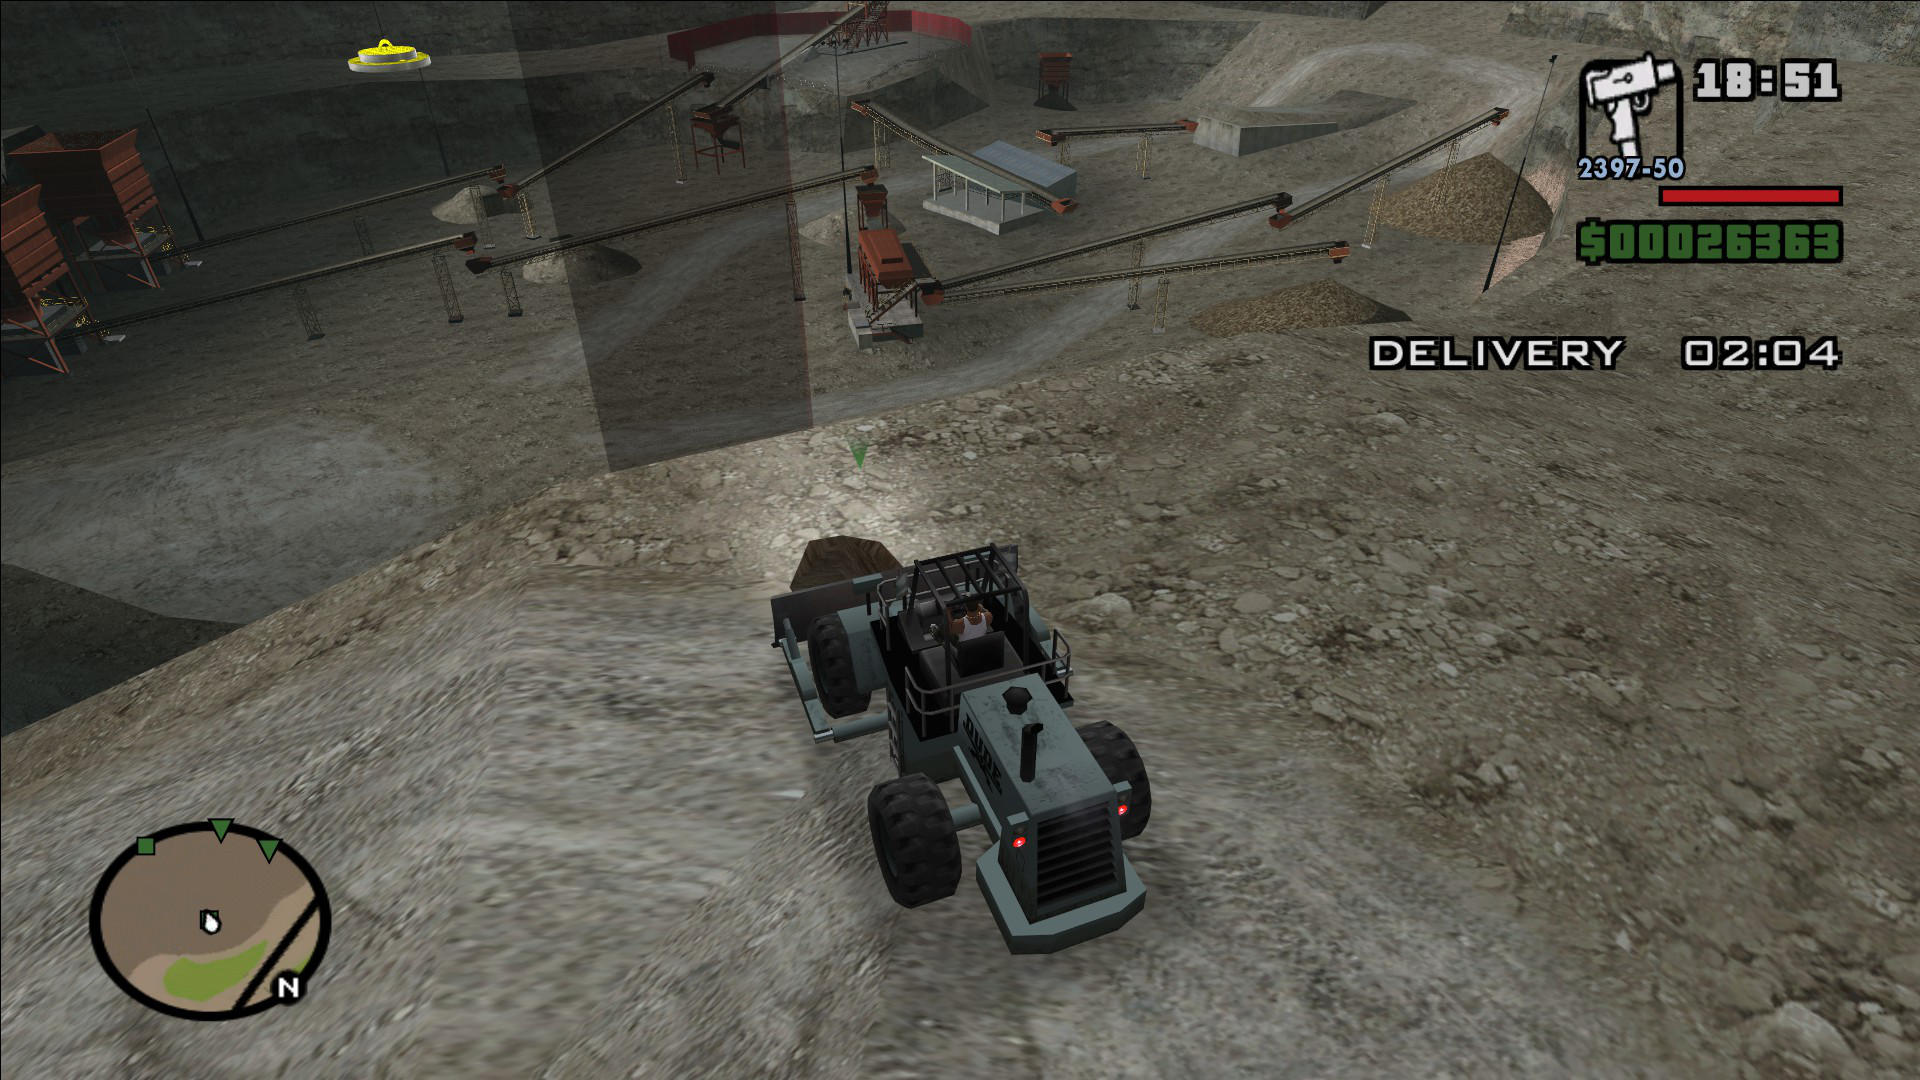
| + | |Carl is given a [[Dumper]] and has 8 minutes to chase and kill the bombers escaping in another Dumper. To kill the bombers, Carl must destroy their Dumper. A faster way to do so is by using a drive-by on the bombers' Dumper. |
||
| ⚫ | |||
| + | |} |
||
===Mission 4=== |
===Mission 4=== |
||
| + | {| class="wikitable" width="100%" |
||
| − | |||
| + | !Image |
||
| ⚫ | |||
| + | !Mission Instruction |
||
| − | You'll never guess that this is another timed mission too. Anyway, grab the Sanchez and make your way towards the blue blip on the radar at the other side of the quarry. Go around it, not through it. When you get there, get in the Dumper and follow the same route back to the Quarry Entrance. Be careful not to crash the Dumper though, as the bodies in the back are initially unable to move but slight crashes or bmps will enable their bodies to move and the bodies aren't very stable and if they fall out it's a mission failure. Once you get back to the quarry entrance, follow the path down to the left and reverse towards the fire when you reach it. Pull back on the right analog stick and the dumper will tip out the bodies onto the fire. Note: the dumper's controls are slightly different from other vehicles: on consoles, the right analog stick, which normally changes the viewing angle, now lifts and lowers the bucket of the dumper; care must be taken in this mission and similar ones that follow not to accidentally dump the load. |
||
| + | !Time Limit |
||
| − | |||
| + | !Mission Description |
||
| ⚫ | |||
| + | !Reward |
||
| + | |- |
||
| + | |[[File:QuarryMissions-GTASA-4.png|thumb|center|275px]] |
||
| ⚫ | |||
| + | |4:00 minutes |
||
| + | |Carl is given a [[Sanchez]] and has 4 minutes to reach the Dumper on the other entrance to the quarry, then dump the bombers' bodies from its loader. The truck must be driven carefully to avoid dislodging the bodies. Once Carl enters the quarry from the main entrance, the bodies must be dumped in the fire that has been set up in the marked area. If any of the bodies fall off the loader before Carl reaches the fire, the mission ends in failure. |
||
| ⚫ | |||
| + | |} |
||
===Mission 5=== |
===Mission 5=== |
||
| + | {| class="wikitable" width="100%" |
||
| − | |||
| + | !Image |
||
| ⚫ | |||
| + | !Mission Instruction |
||
| − | This mission is once again timed, but you also need to ensure you drive carefully as one hard impact or about three soft ones will cause the barrels to explode. Of course, road traffic appears to move quicker and be more aggressive than usual during this mission. Choose your own route to the desert airstrip, the best way is to go to the right, follow the road along and to the left and then North and left again and work your way down to the drop off point. A glitch occurs on this mission where, as you drop the barrels safely (or sometimes when you're just driving), the game will suddenly award you an enormous double insane stunt bonus of thousands of dollars, claiming you flew several thousand feet, when you did no such thing. |
||
| + | !Time Limit |
||
| − | |||
| + | !Mission Description |
||
| ⚫ | |||
| + | !Reward |
||
| + | |- |
||
| + | |[[File:QuarryMissions-GTASA-5.png|thumb|center|275px]] |
||
| ⚫ | |||
| + | |3:00 minutes |
||
| + | |Carl is given a Dumper and has 3 minutes to deliver the explosive barrels in its loader to the airstrip at [[Verdant Meadows Airfield|Verdant Meadows]]. The truck must be driven carefully to avoid dropping any barrel while on the way. Once Carl arrives at the marked area at the end of the airstrip, the barrels must be dropped carefully to prevent explosion. If any of the barrels fall off the loader before Carl reaches the airstrip, the truck will blow up, killing him and resulting in mission failure. |
||
| ⚫ | |||
| + | |} |
||
===Mission 6=== |
===Mission 6=== |
||
| + | {| class="wikitable" width="100%" |
||
| − | |||
| + | !Image |
||
| ⚫ | |||
| + | !Mission Instruction |
||
| − | It's timed again. Get in the bulldozer and make your way towards the train tracks which you'll find by going straight forward and then left and down onto the tracks. From there just drive along the tracks and push all of the barrels with green arrows off the side until the arrow disappears. Keep going along and remove them all before the time runs out. Relatively simple, compared to the mission difficulty progress that happens in the other missions. |
||
| + | !Time Limit |
||
| − | |||
| + | !Mission Description |
||
| ⚫ | |||
| + | !Reward |
||
| + | |- |
||
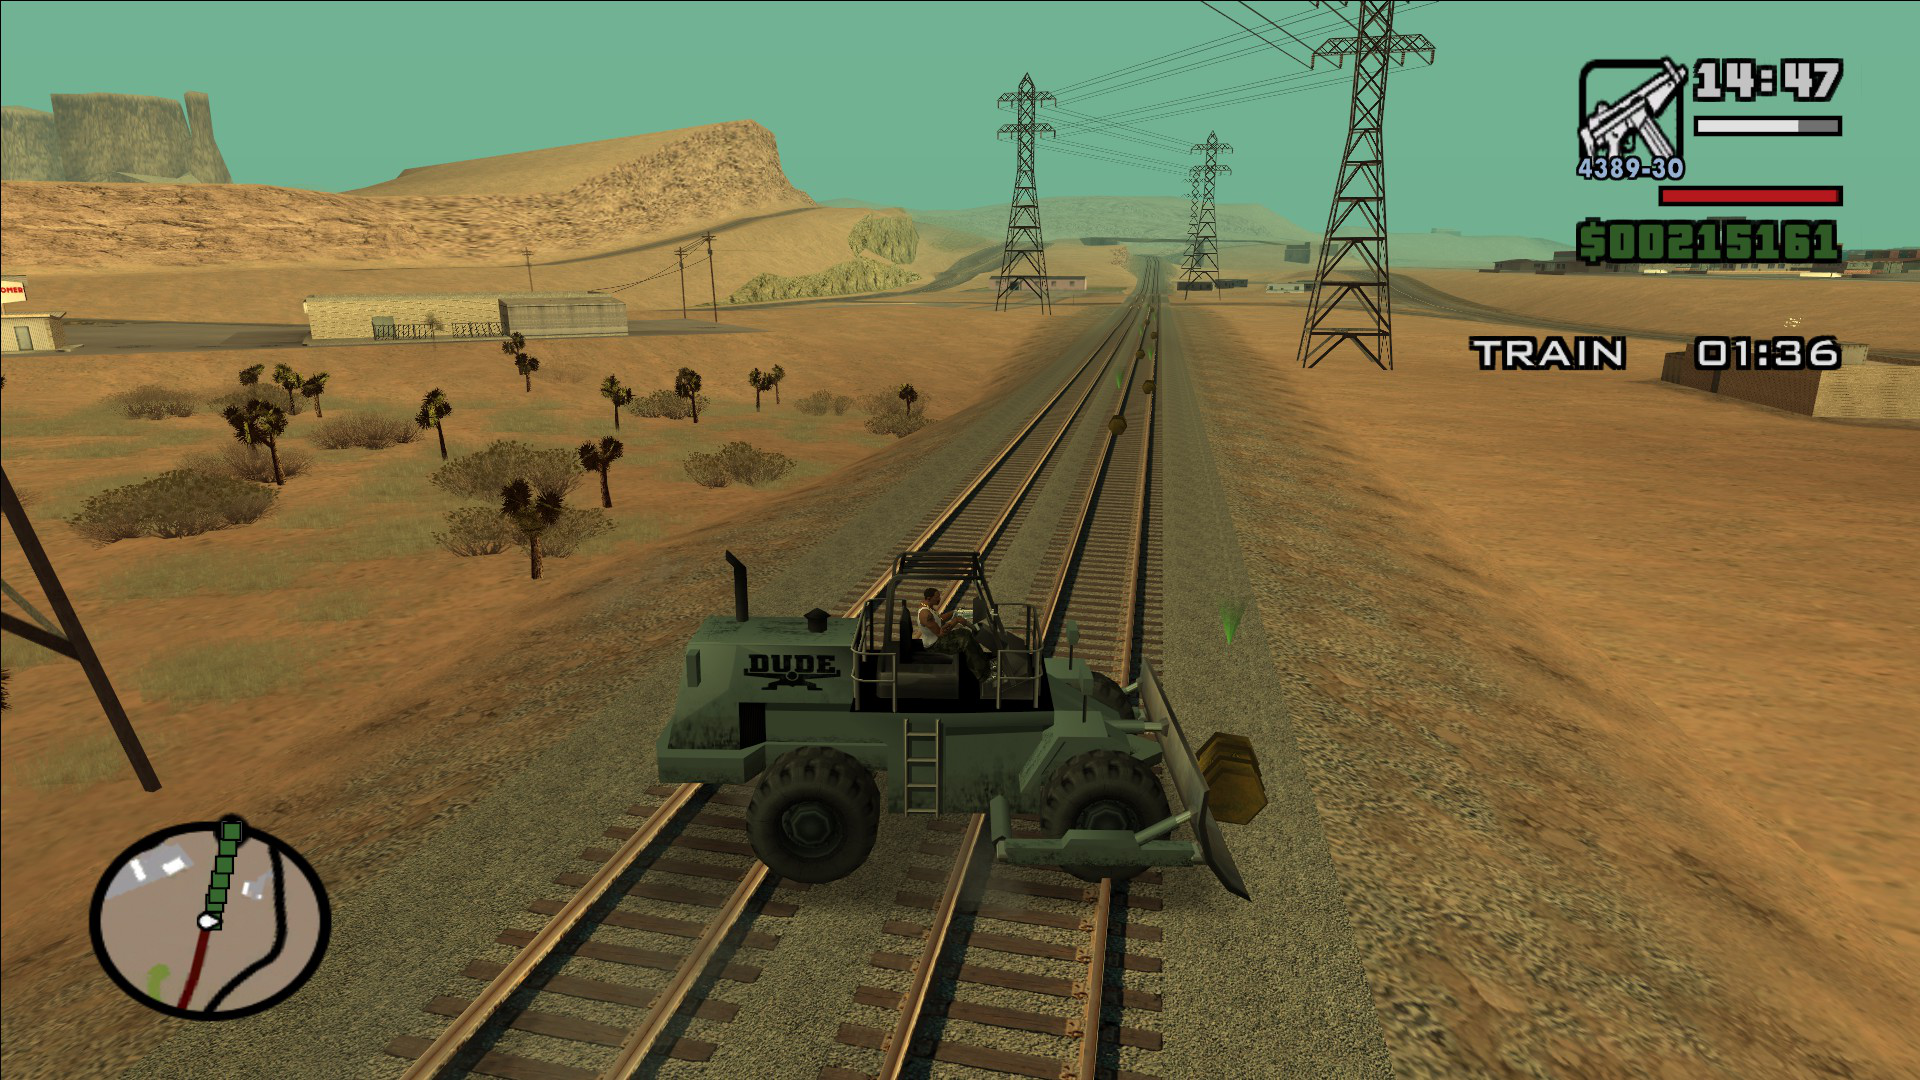
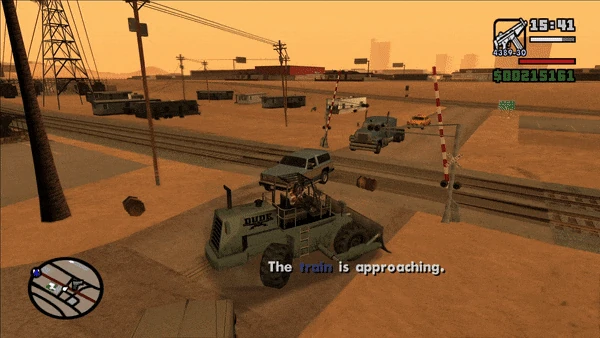
| + | |[[File:QuarryMissions-GTASA-6.png|thumb|center|275px]] |
||
| ⚫ | |||
| + | |3:00 minutes |
||
| + | |Carl is given a Dozer and has 3 minutes to push ten explosive barrels off the railroad. This mission is similar to the first mission in that all objects appear at once. However, there is no designated location for each barrel. Once all barrels are cleared, Carl must get off the railroad immediately as the train is approaching. |
||
| ⚫ | |||
| + | |} |
||
===Mission 7=== |
===Mission 7=== |
||
| + | {| class="wikitable" width="100%" |
||
| − | This is a challenging mission. |
||
| + | !Image |
||
| + | !Mission Instruction |
||
| + | !Time Limit |
||
| + | !Mission Description |
||
| + | !Reward |
||
| + | |- |
||
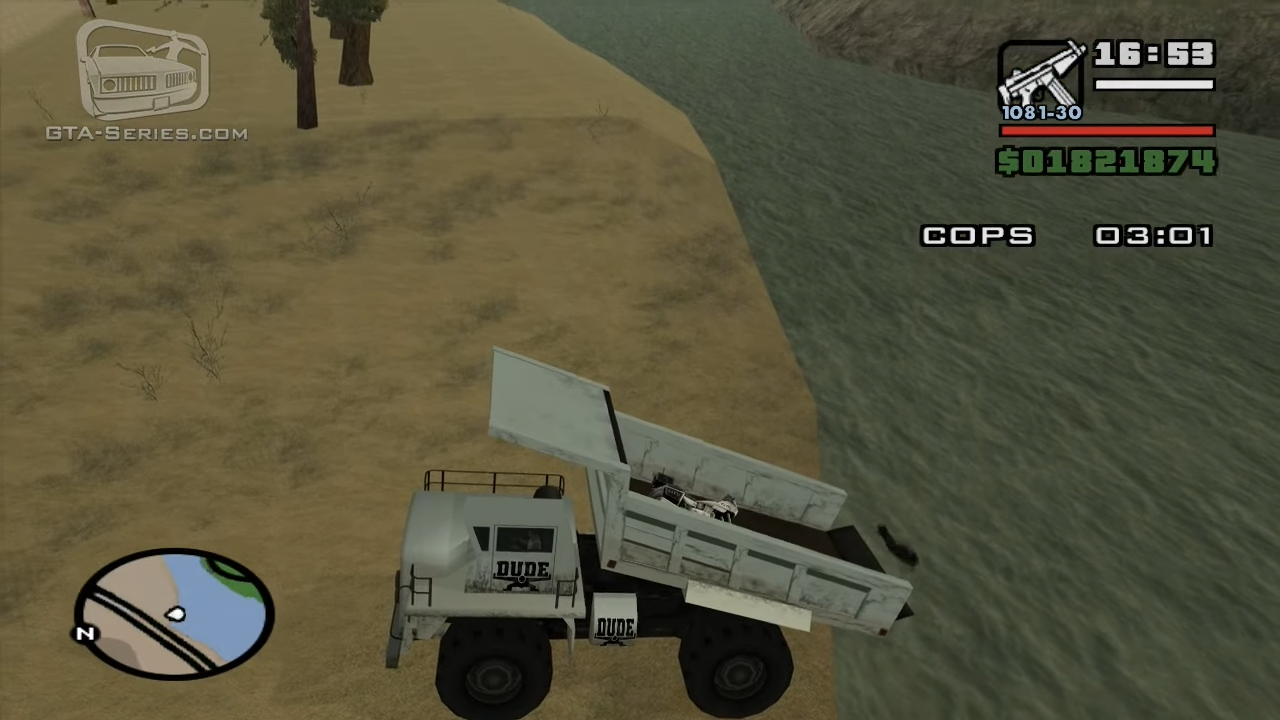
| + | |[[File:QuarryMissions-GTASA-7.png|thumb|center|275px]] |
||
| ⚫ | |||
| + | |8:00 minutes |
||
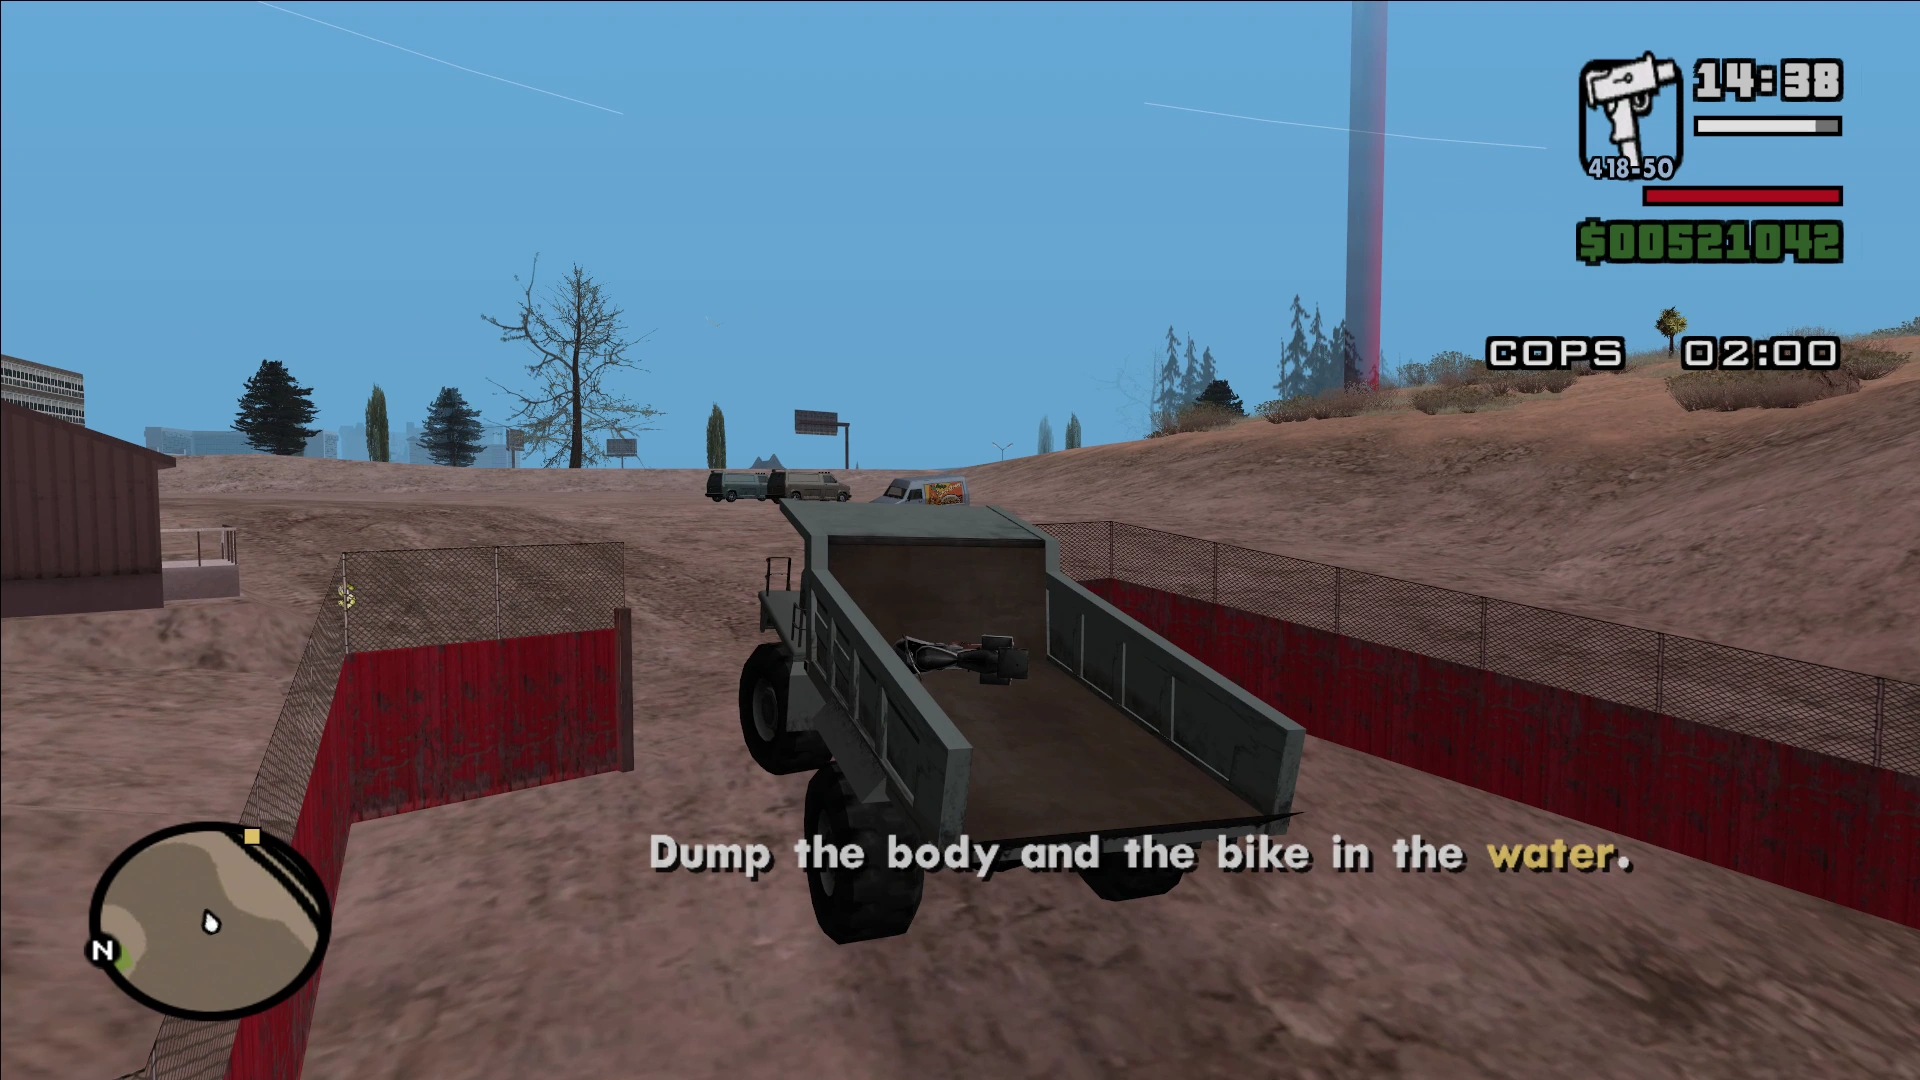
| + | |Carl is given a Sanchez and has 8 minutes to dispose of a dead cop and his motorbike in the quarry. To do so, Carl must reach the Dozer in the quarry, then use it to push the body and the bike wreck to the marked area so they can be picked up by the crane. Then, Carl must get into the crane and load the body and the bike onto the loader on the nearby Dumper. Once loaded, Carl must drive the Dumper carefully to the nearest water body (the river), after which the body and the bike must be dumped into the water. If the load falls onto land and doesn't slide into the water, or the Dumper falls into the water, the mission fails. |
||
| ⚫ | |||
| + | |} |
||
| + | ==Bugs/Glitches== |
||
| ⚫ | |||
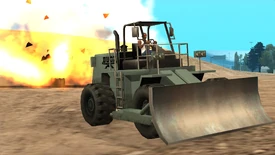
| + | *During the second mission, if the player lets the last barrel roll from a distance where the dozer cannot be affected by the blast, the game will crash. (Unconfirmed on versions different from PC and Mobile) |
||
| − | Grab the Sanchez and use it to jump all of the way to the bottom of the quarry (likely collecting more insane stunt bonuses en route). Once there, get in the Dozer and you'll be told to push the body and bike towards the crane pick up area. Head to the right and get behind the body, then push it down the hill towards the crane. Leave it in the red circle then head across the other side of the area and push the bike towards the same place. Remember to do this gingerly. Any hard movement on the body will either roll the bulldozer over the body. Any hard movement on the motorcycle and you risk having it roll away from you. Once it's there, grab your Sanchez, if you parked it close, and drive up the hill to the crane. Once there, stand in the red circle and push triangle to get in the crane. Spin it around to the left and hold X and manoeuvre the crane to pick up both the body and bike, then hold square to lift up the crane and drop them one by one into the back of the dumper. Sometimes the crane will swing and rock the objects in the air. This is easily dealt with by dropping the object hard on the ground then lifting it up again. It makes it much easier to get in the truck. Also, get the objects in the front of the truck as much as possible. Remember to release the magnet of the crane. Once they're in you'll be told to get into the Dumper and drive to the Quarry Entrance. Carefully make your way up the hill and drive through the gates. From here you'll be told to dump the body and bike into the water. Head to the red circle and reverse up to the water. Remember to have the brake held tight otherwise you'll drive the truck into the water. Pull back on the analog stick to dump the objects into the water. |
||
| + | *During the fifth mission, when the player completes the mission, there is a chance that they might receive a huge insane stunt jump bonus, likely a lot larger than their current (legitimate) record in their stats menu. This can be subverted by raising the truck's bed upward to allow the barrels to re-shift position prior to driving away from the quarry. This must be done extremely carefully such that the barrels do not slide off. The barrels must settle in place. This may take several attempts on the drive between the quarry and the airstrip in order to remove the glitch. |
||
| + | *During the seventh mission, if the player is driving too fast and reaches the river too early, the message warning the player not to dump the Dumper in the river may not appear whilst the Dumper is on land. However, if the Dumper falls into the river, the mission will fail. |
||
| + | *In ''The Definitive Edition'', the $2,000 of revenue will be reset at some point during the day for no reason. |
||
| + | ==Video== |
||
| − | The major challenges with this mission include the fact the dozer does not steer like normal vehicles - turning controls are reversed. And the crane operates differently from the one players likely are most familiar with by this point from [[Exports and Imports]], making it difficult to line up the magnet to pick up the body and bike and place them accurately within the dumper. This can be made even more difficult if the player left the dozer parked too close to the crane drop-off point- always take a moment to back the dozer up after dropping off the second item in the red circle. The second major challenge is successfully crossing the freeway without collisions knocking the contents of the Dumper out (or the Dumper being caught in an explosion). |
||
| + | [[File:GTA San Andreas - Quarry Missions|centre|thumb|330x330px]] |
||
| − | |||
| − | Tip: to save a few seconds on your time, before attempting Mission 7, head to the crane. The crane can be entered and moved. Move the magnet into the main area of the quarry - if you remember where the drop-off point was in previous attempts, try and move the magnet right above. When you start the mission, the crane magnet will be more or less over where the bike and body are to be picked up, making it quicker to do so. Similarly, if an attempt fails, before trying again be sure to realign the crane as before. Depending on your skill or lack thereof with a crane, this step could save as much as 30 seconds to a minute. |
||
| − | |||
| ⚫ | |||
| − | All Quarry Missions have been completed. Hunter Quarry has now been Acquired as an [[Asset]]. The dumper truck and bulldozer will now always be available at the quarry. |
||
==Trivia== |
==Trivia== |
||
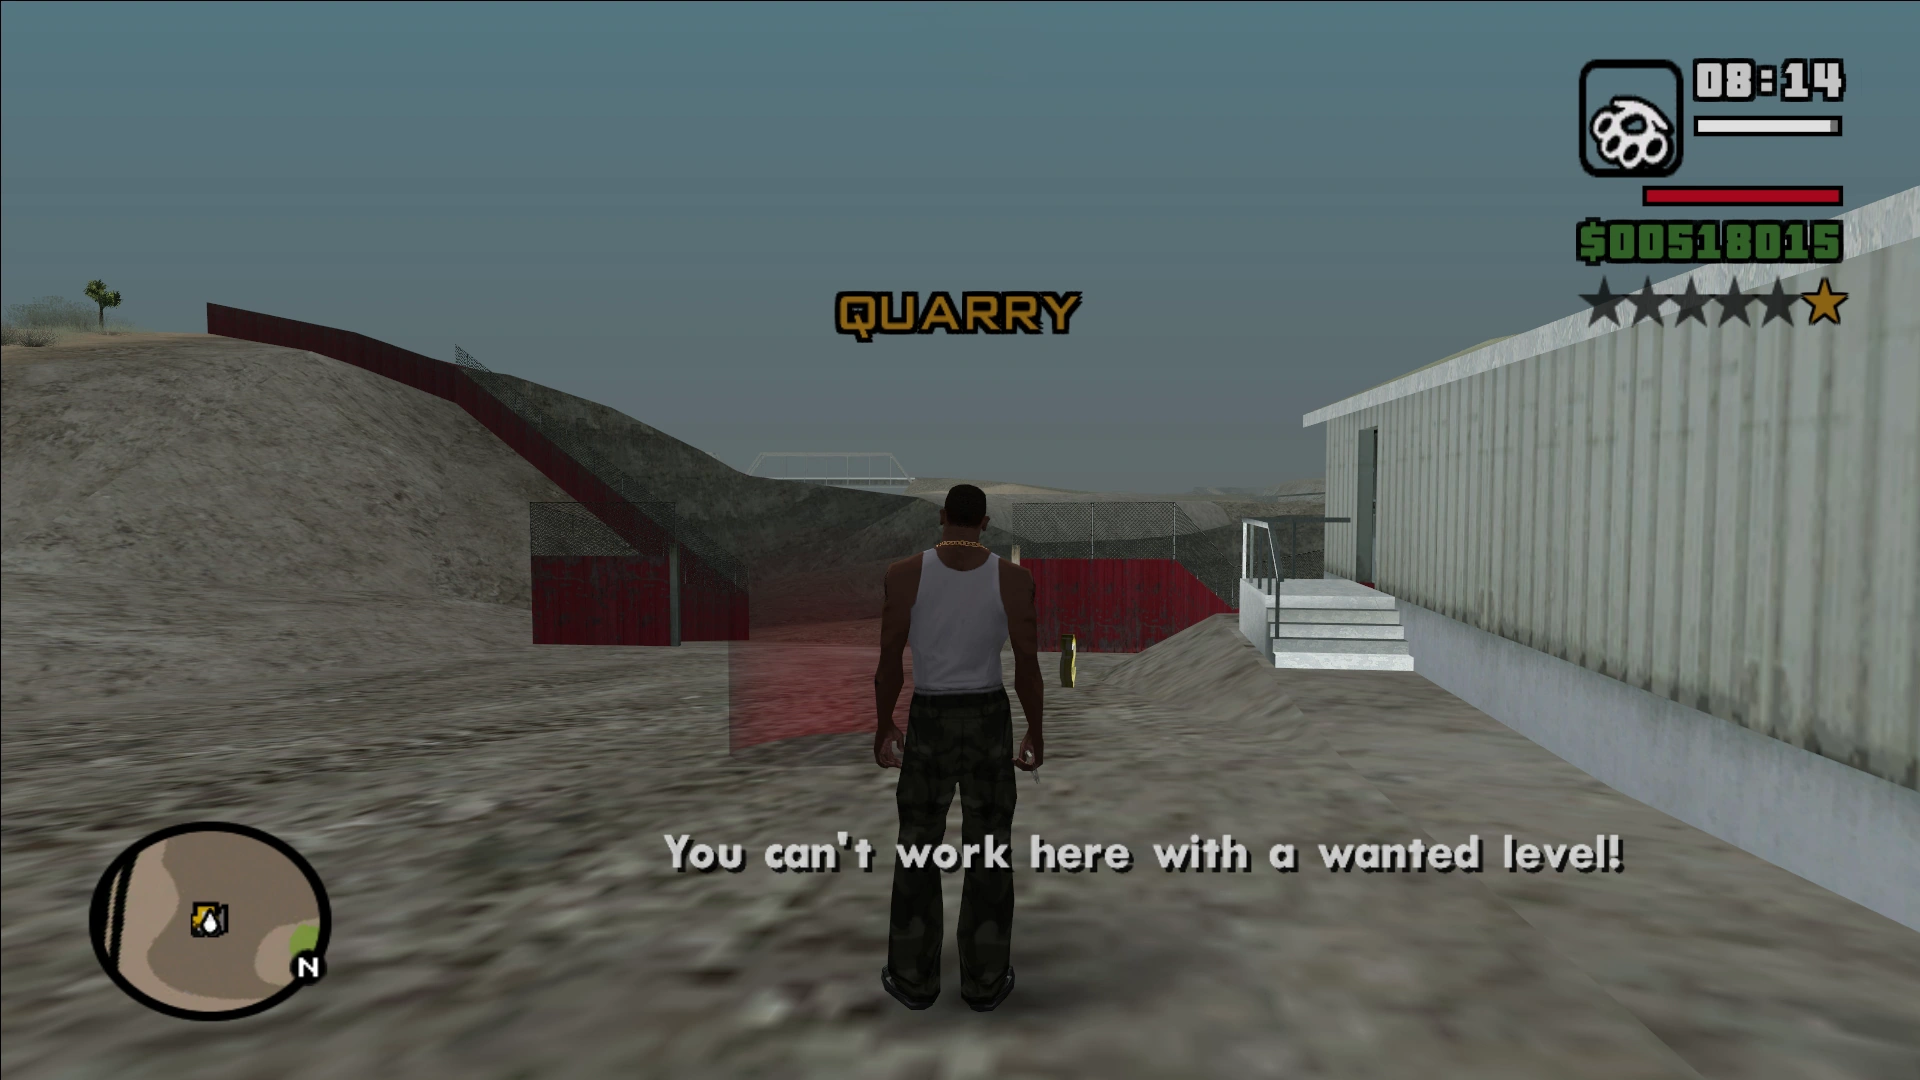
| + | *None of these missions can be started if the player has a [[Wanted Level in 3D Universe|wanted level]].<ref>[[File:QuarryMissions-GTASA-WantedLevel.png|thumb|275px|left]]{{clr}}</ref> |
||
| + | *During the sixth mission, once the railway line has been cleared, the train will pass extremely quickly, at a much higher speed than in regular gameplay.<ref>[[File:QuarryMissions-GTASA-TrainSpeed.gif|thumb|275px|left]]{{clr}}</ref> |
||
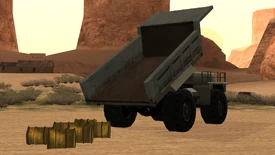
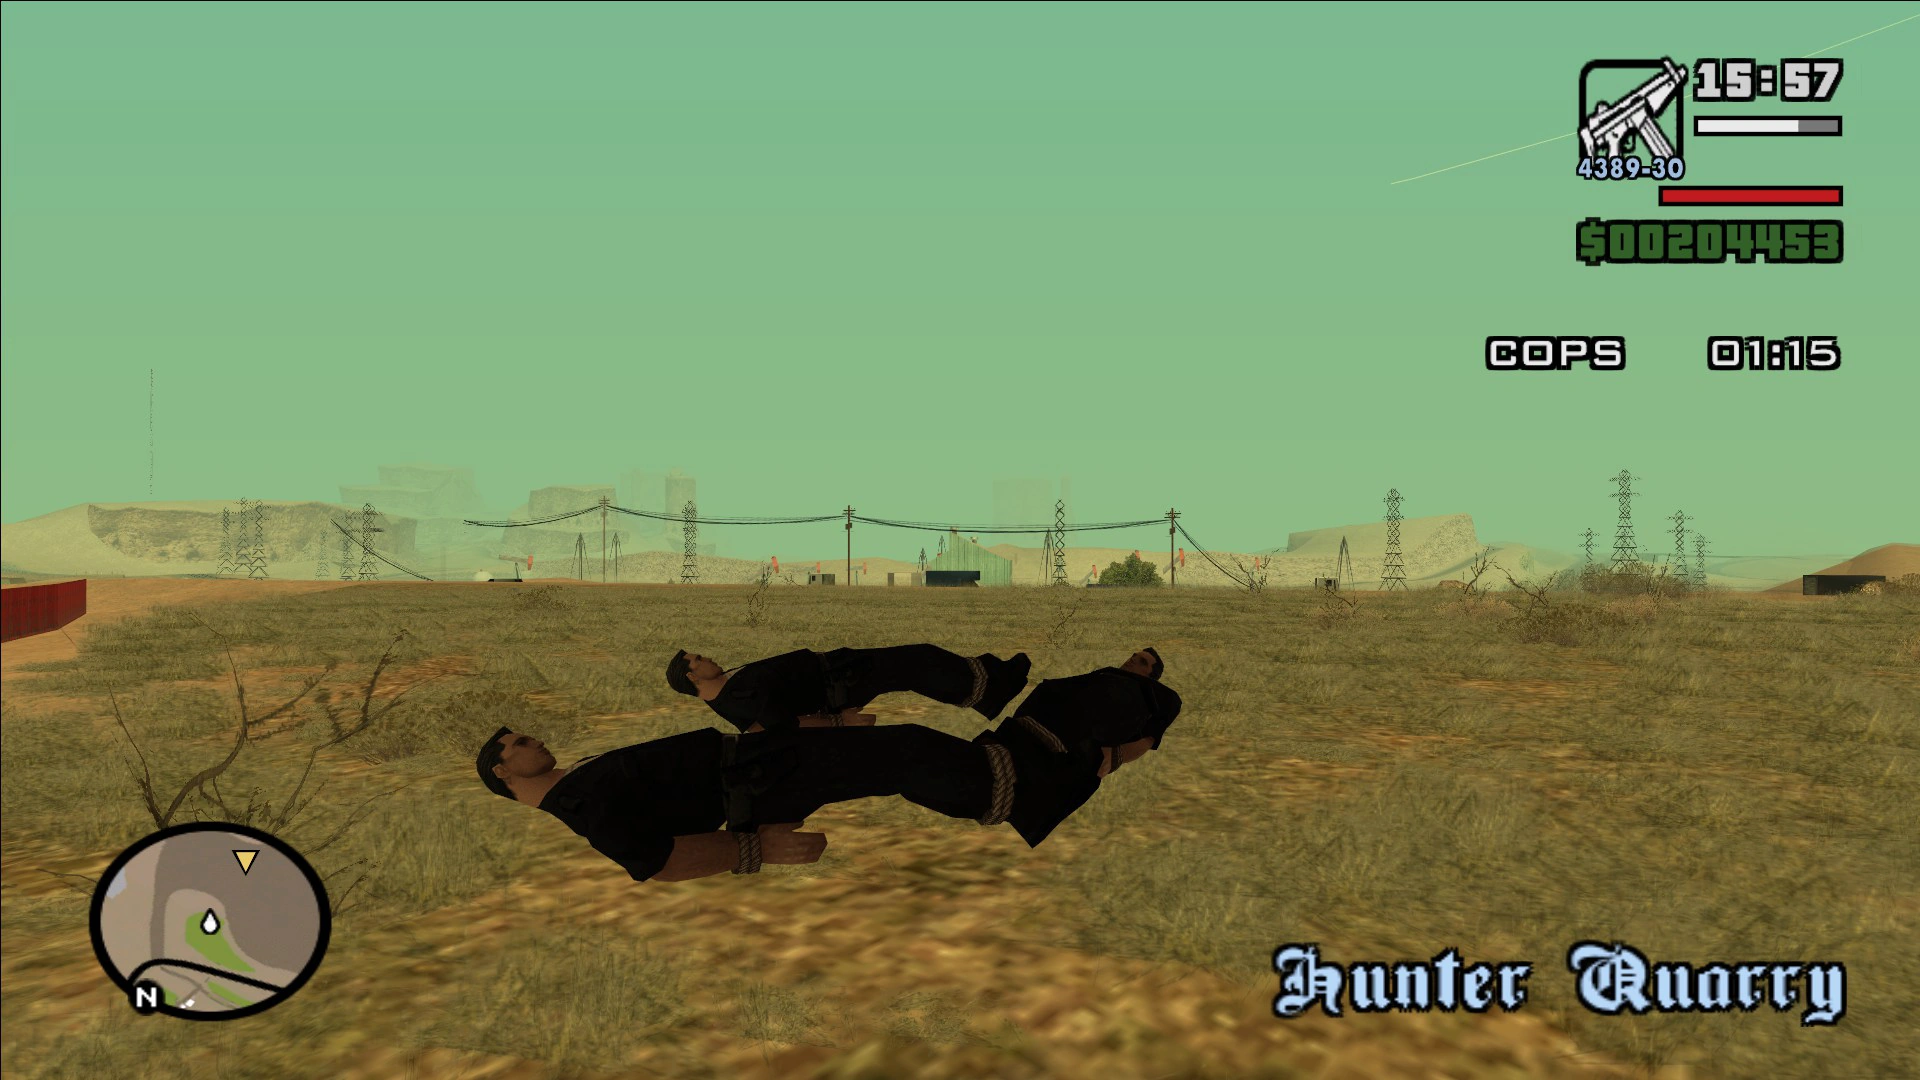
| + | *The bodies encountered in the fourth and seventh missions appear to be of [[Los Santos Police Department (3D Universe)|Los Santos Police]] officers.<ref>[[File:QuarryMissions-GTASA-TiedUpCops.png|thumb|275px|left]]{{clr}}</ref> |
||
| + | *If the player fails the fourth or seventh mission by running out of time, the red text will say that the cops have arrived. However, the player won't receive any wanted level. |
||
| + | *The PlayStation 3 mobile port version has a very hindering aspect compared to other versions: the time on several missions is reduced by several minutes, making the last mission nearly impossible, as controlling the crane is very hard and takes up the very limited and precious time allotted to the player. |
||
| + | ==References== |
||
| − | *During [[Quarry Missions#Mission 6|Mission 6]] the train that goes over the tracks travels at an extreme speed, faster than the train can actually ever go in-game. |
||
| + | {{reflist}} |
||
| + | [[es:Misiones de minero]] |
||
| − | *Models of the bodies in Mission 4 and Mission 7 are the same as Los Santos policemen. |
||
| + | [[pl:Misje w kamieniołomie]] |
||
| ⚫ | |||
| + | [[ru:Карьерные миссии]] |
||
[[Category:Missions in GTA San Andreas]] |
[[Category:Missions in GTA San Andreas]] |
||
| ⚫ | |||
[[Category:Asset Missions]] |
[[Category:Asset Missions]] |
||
| + | [[Category:Assets in GTA San Andreas]] |
||
Latest revision as of 19:06, 10 April 2024

For other uses, see Quarry.
The Quarry Missions are a series of Asset Missions in Grand Theft Auto: San Andreas.
Description
The Quarry missions involve a series of seven missions in which Carl Johnson works for the Hunter Quarry in Bone County. The missions can be triggered by walking onto the red marker at the eastern entrance of the quarry. Each mission involves Carl using Quarry machinery to complete jobs around the Quarry and beyond. Once a mission is successfully completed, the next one can be triggered by walking onto the red marker again (should the player fail a mission, it can be restarted at any time by going back to the red marker). Each mission completed rewards the player with money.
Once all seven missions have been completed, the Quarry will become an asset and generate up to $2,000 in revenue, and the Dozer and Dumper will always spawn in the Quarry. The player can replay the Quarry missions at any time, and during replays, the player can choose to abort the mission at any point.
Completing all Quarry Missions is required for 100% Completion.
Missions
Mission 1
| Image | Mission Instruction | Time Limit | Mission Description | Reward |
|---|---|---|---|---|
| "Use the bulldozer to clear the paths before the next delivery arrives." | 3:30 minutes | Carl is given a Dozer and has 3 minutes and 30 seconds to push seven rocks off the way to their respective designated locations. The rocks can only be pushed using the Dozer's blade. | $500 |

Mission 2
| Image | Mission Instruction | Time Limit | Mission Description | Reward |
|---|---|---|---|---|
| "Bombs have been planted by a rival organization. Use the bulldozer to push the bombs to safe area markers." | 1:30 minutes | Carl is given a Dozer and has 1 minute and 30 seconds to push four explosive barrels to safety in their designated locations. Unlike in the previous mission, Carl only needs to push one explosive barrel at a time, after which he has to quickly drive away from the barrel. After one barrel is cleared, another barrel appears. Carl also receives a time bonus for each cleared barrel. | $1,000 |
Mission 3
| Image | Mission Instruction | Time Limit | Mission Description | Reward |
|---|---|---|---|---|
| "The bombers are escaping in a dumper. Use this dumper to destroy it before they reach their destination." | 8:00 minutes | Carl is given a Dumper and has 8 minutes to chase and kill the bombers escaping in another Dumper. To kill the bombers, Carl must destroy their Dumper. A faster way to do so is by using a drive-by on the bombers' Dumper. | $2,000 |
Mission 4
| Image | Mission Instruction | Time Limit | Mission Description | Reward |
|---|---|---|---|---|
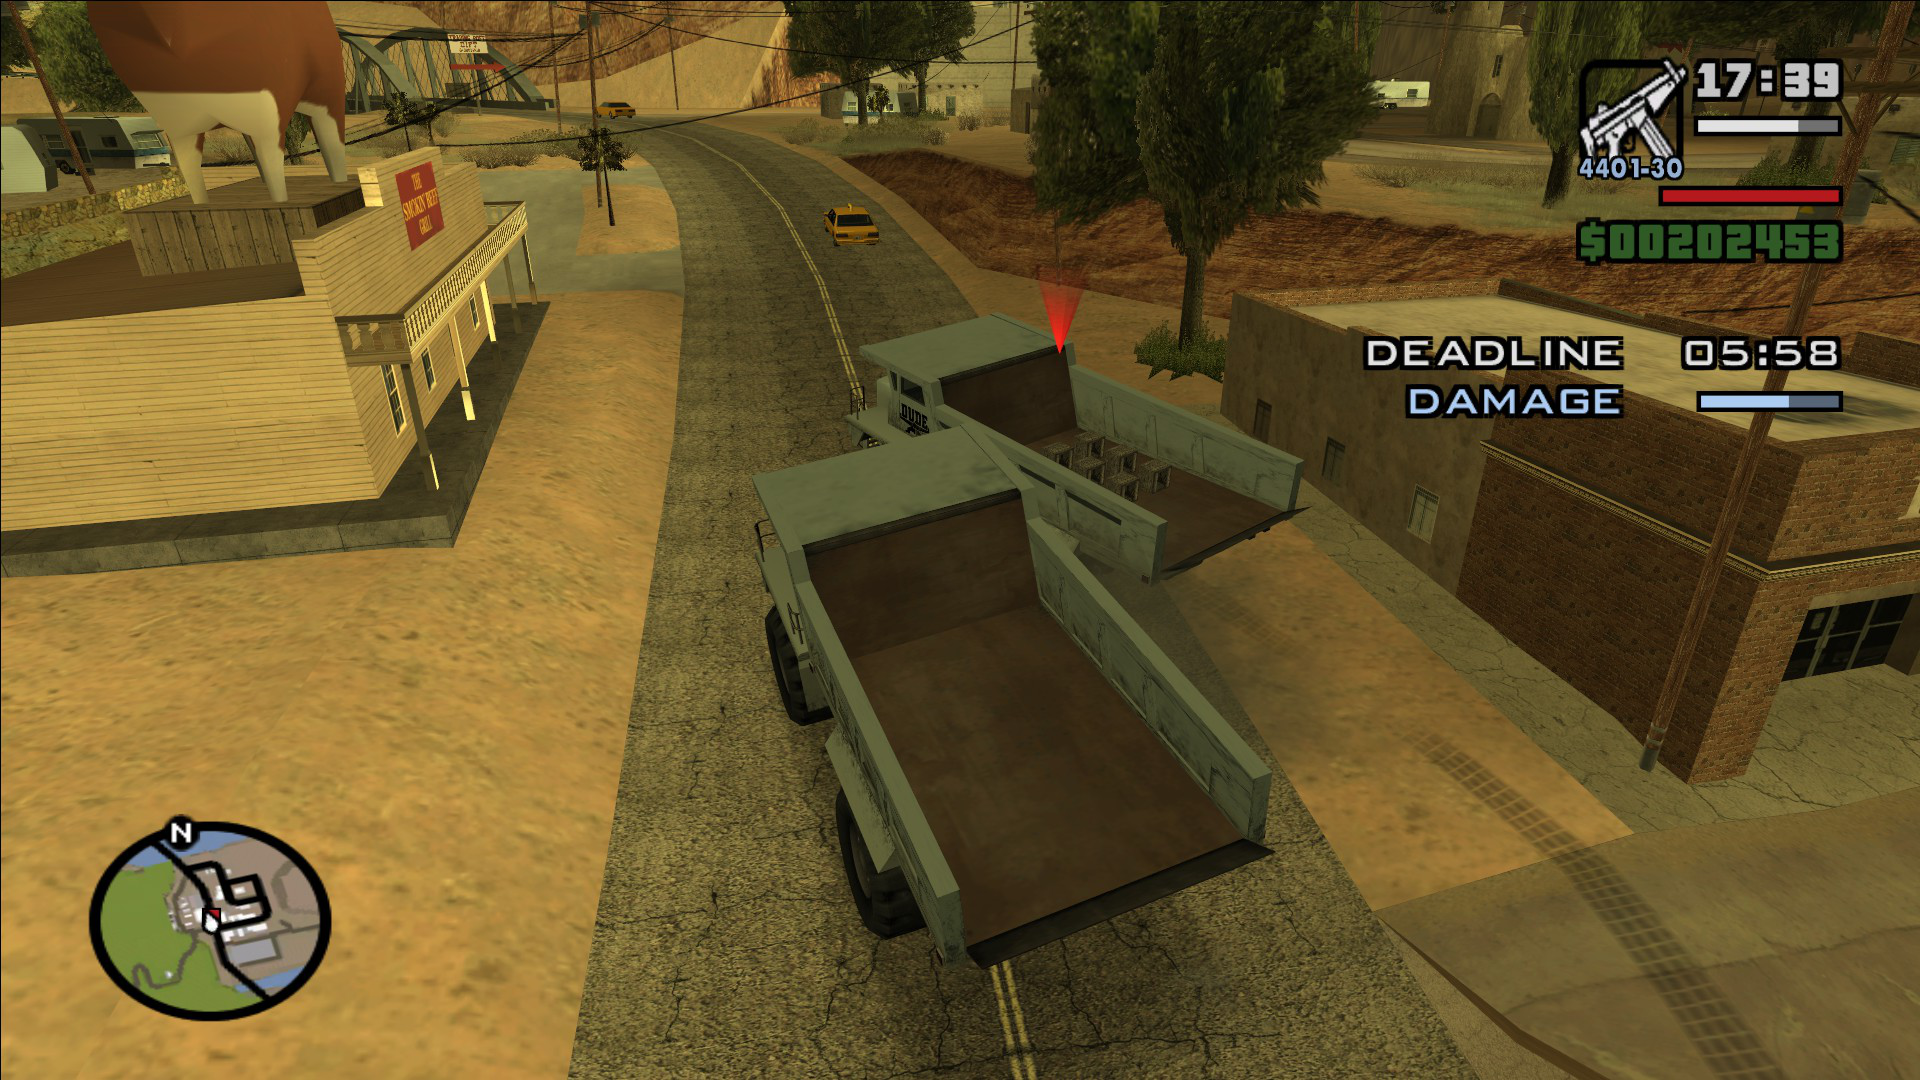
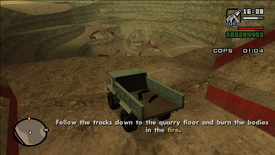
| "The bombers have been caught. Their bodies are loaded on a dumper at the quarry's other entrance. Dump them before the cops come snooping." | 4:00 minutes | Carl is given a Sanchez and has 4 minutes to reach the Dumper on the other entrance to the quarry, then dump the bombers' bodies from its loader. The truck must be driven carefully to avoid dislodging the bodies. Once Carl enters the quarry from the main entrance, the bodies must be dumped in the fire that has been set up in the marked area. If any of the bodies fall off the loader before Carl reaches the fire, the mission ends in failure. | $3,000 |

Mission 5
| Image | Mission Instruction | Time Limit | Mission Description | Reward |
|---|---|---|---|---|
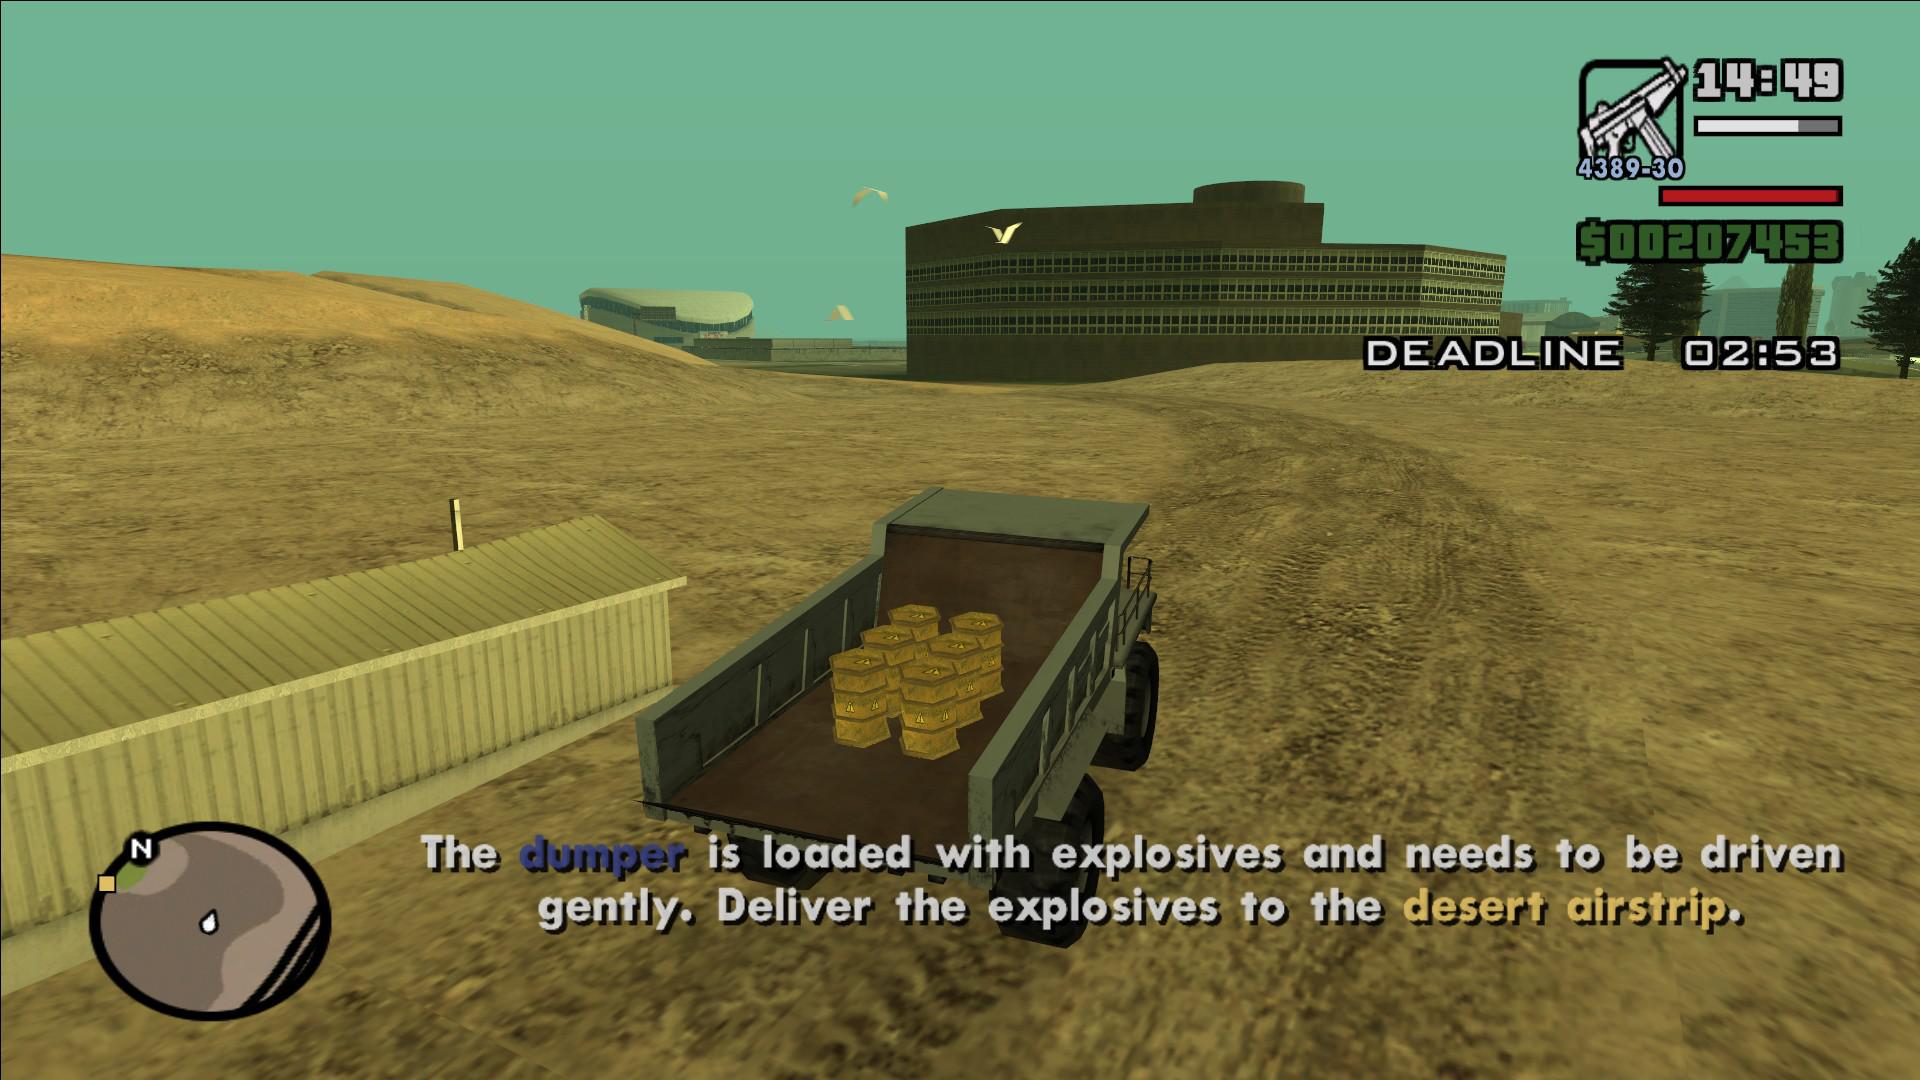
| "The dumper is loaded with explosives and needs to be driven gently. Deliver the explosives to the desert airstrip." | 3:00 minutes | Carl is given a Dumper and has 3 minutes to deliver the explosive barrels in its loader to the airstrip at Verdant Meadows. The truck must be driven carefully to avoid dropping any barrel while on the way. Once Carl arrives at the marked area at the end of the airstrip, the barrels must be dropped carefully to prevent explosion. If any of the barrels fall off the loader before Carl reaches the airstrip, the truck will blow up, killing him and resulting in mission failure. | $5,000 |
Mission 6
| Image | Mission Instruction | Time Limit | Mission Description | Reward |
|---|---|---|---|---|
| "A dumper has spilled its load of explosives along the train tracks. Use the bulldozer to clear them before the next train passes." | 3:00 minutes | Carl is given a Dozer and has 3 minutes to push ten explosive barrels off the railroad. This mission is similar to the first mission in that all objects appear at once. However, there is no designated location for each barrel. Once all barrels are cleared, Carl must get off the railroad immediately as the train is approaching. | $7,500 |

Mission 7
| Image | Mission Instruction | Time Limit | Mission Description | Reward |
|---|---|---|---|---|
| "A cop has been killed. Use the bulldozer in the quarry to get rid of the body before more cops come snooping." | 8:00 minutes | Carl is given a Sanchez and has 8 minutes to dispose of a dead cop and his motorbike in the quarry. To do so, Carl must reach the Dozer in the quarry, then use it to push the body and the bike wreck to the marked area so they can be picked up by the crane. Then, Carl must get into the crane and load the body and the bike onto the loader on the nearby Dumper. Once loaded, Carl must drive the Dumper carefully to the nearest water body (the river), after which the body and the bike must be dumped into the water. If the load falls onto land and doesn't slide into the water, or the Dumper falls into the water, the mission fails. | $10,000 |

Bugs/Glitches
- During the second mission, if the player lets the last barrel roll from a distance where the dozer cannot be affected by the blast, the game will crash. (Unconfirmed on versions different from PC and Mobile)
- During the fifth mission, when the player completes the mission, there is a chance that they might receive a huge insane stunt jump bonus, likely a lot larger than their current (legitimate) record in their stats menu. This can be subverted by raising the truck's bed upward to allow the barrels to re-shift position prior to driving away from the quarry. This must be done extremely carefully such that the barrels do not slide off. The barrels must settle in place. This may take several attempts on the drive between the quarry and the airstrip in order to remove the glitch.
- During the seventh mission, if the player is driving too fast and reaches the river too early, the message warning the player not to dump the Dumper in the river may not appear whilst the Dumper is on land. However, if the Dumper falls into the river, the mission will fail.
- In The Definitive Edition, the $2,000 of revenue will be reset at some point during the day for no reason.
Video

Trivia
- None of these missions can be started if the player has a wanted level.[1]
- During the sixth mission, once the railway line has been cleared, the train will pass extremely quickly, at a much higher speed than in regular gameplay.[2]
- The bodies encountered in the fourth and seventh missions appear to be of Los Santos Police officers.[3]
- If the player fails the fourth or seventh mission by running out of time, the red text will say that the cops have arrived. However, the player won't receive any wanted level.
- The PlayStation 3 mobile port version has a very hindering aspect compared to other versions: the time on several missions is reduced by several minutes, making the last mission nearly impossible, as controlling the crane is very hard and takes up the very limited and precious time allotted to the player.