No edit summary |
(26-50 and gallery formatting for multiple platforms.) Tag: sourceedit |
||
| (22 intermediate revisions by 10 users not shown) | |||
| Line 1: | Line 1: | ||
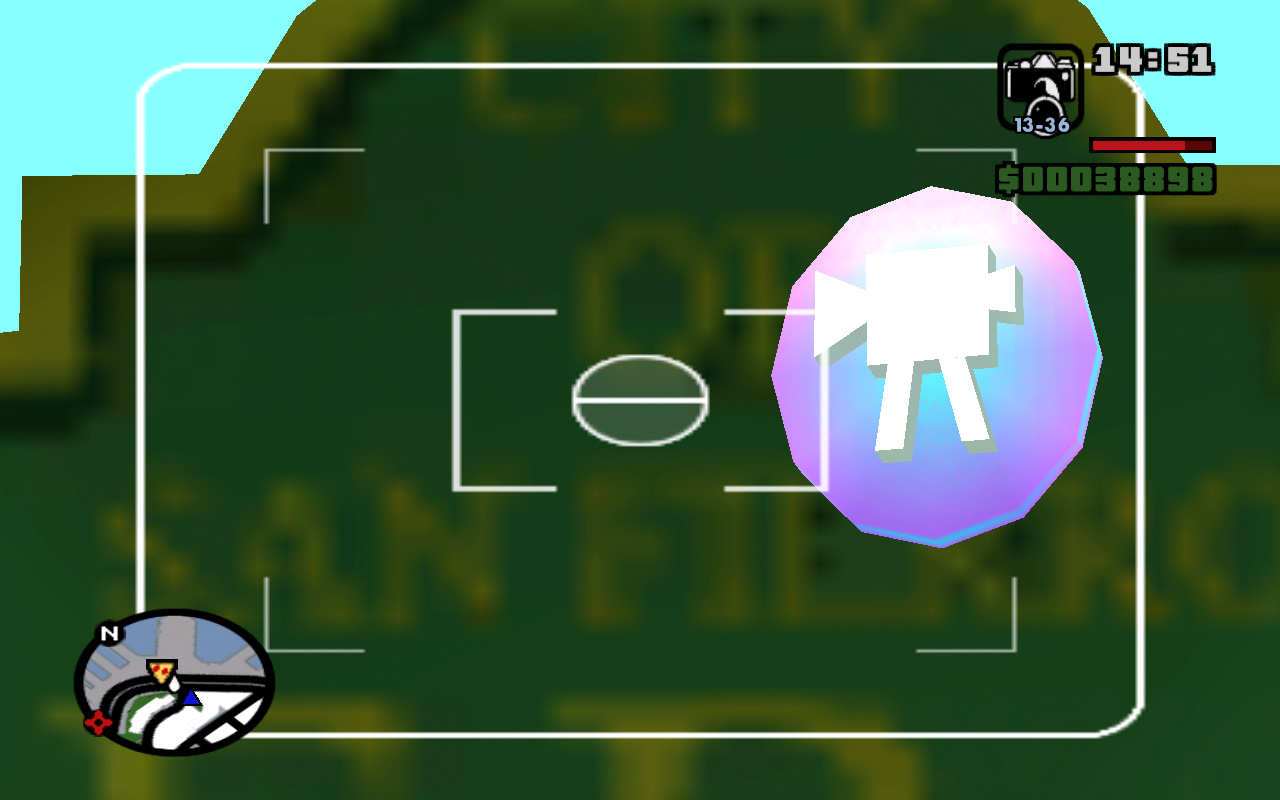
[[File:Snapshot-GTASA.jpg|thumb|250px|A snapshot icon as seen through the viewfinder of a [[Camera|camera]].]] |
[[File:Snapshot-GTASA.jpg|thumb|250px|A snapshot icon as seen through the viewfinder of a [[Camera|camera]].]] |
||
| + | '''Snapshots '''are a type of [[Collectibles|collectible]] in [[Grand Theft Auto: San Andreas]]. As their names imply, they are obtained using the [[Camera]]. |
||
| − | '''Snapshots''' are a type of [[collectibles]] in [[Grand Theft Auto: San Andreas]]. As its name implies, they are obtained using the [[Camera]]. Snapshots exist only in [[San Fierro]], [[State of San Andreas|San Andreas]], and each appears as a rotating circular camera icon above a particularly interesting scenic spot. Snapshots are similar to [[Hidden Packages]], [[Horseshoes]], and [[Oysters]] in that completing all 50 grants the player a significant reward. The reward for capturing all 50 snapshots is 4 [[Weapons|weapon]] spawns becoming available at the [[Doherty Garage]], namely the [[Micro Uzi]], [[Grenade]]s, [[Shotgun]], and [[Sniper Rifle]], and $100,100. |
||
| + | ==Descripiton== |
||
| + | Snapshots exist only in [[San Fierro (3D Universe)|San Fierro]], [[San Andreas (3D Universe)|San Andreas]], and each appears as a rotating circular camera icon above a particularly interesting scenic spot. |
||
| − | [[File:Gta_sa_2012-09-17_20-18-28-15.png|thumb|250px|The message screen when all snapshots are taken.]] |
||
| − | To successfully capture a snapshot, the snapshot icon ''must'' be within the camera viewfinder. Sometimes zooming is required to capture a more distant icon. The point of interest above which the icon sits is ''not'' required to be in the viewfinder, simply the icon itself. |
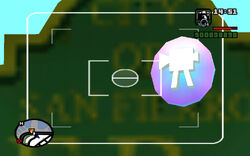
+ | To successfully capture a snapshot, the snapshot icon ''must'' be within the camera viewfinder. Sometimes zooming is required to capture a more distant icon. The point of interest above which the icon sits is ''not'' required to be in the viewfinder, simply the icon itself. [[File:Snapshot_glow.png|thumb|250px|The glow that marks the location of a snapshot at night.]] |
| + | The snapshot icon itself will not be visible to the player unless he is looking at it through the camera's viewfinder. In normal 3rd person view, the player will be able to see a white glow where the snapshot should be, and this is particularly noticeable at night. |
||
| + | The photograph can be saved, if desired, by taking the photo using the save mode on the [[camera]], however the snapshot icon will not appear in the photograph (unless the shot is composed so the snapshot doesn't successfully register). |
||
| − | There is a glitch involving one of the Foster Valley snapshot icons; it is located on top of a building and is visible if [[CJ]] reaches the top of a nearby building (via [[jetpack]] or helicopter). It should be visible from a nearby hill as well, but isn't. However, if you stand on the hill immediately to the west of the building, zoom in on the roof and take a picture, it counts as a snapshot, even though the icon isn't visible. |
||
| − | Most of the snapshot icons can be photographed |
+ | Most of the snapshot icons can be easily photographed as soon as San Fierro is opened, with the exception of one on the [[Garver Bridge]] that can't be seen until the bridge opens for crossing, but it is still possible to capture this snapshot before the bridge opens by using a boat to go under it. Another snapshot icon is located within the [[Easter Basin Naval Station]]. Accessing the area and getting too close to the icon will trigger a 5-star [[wanted level]], so the player can keep their distance in a boat and still get close enough to take it without attaining a wanted level. |
| + | |||
| + | ==Reward== |
||
| + | Snapshots are one of four collectibles along with [[Tags]], [[Horseshoes]], and [[Oysters]], and as with the others, completing all 50 grants the player a significant reward. The reward for each snapshot correctly taken is $100, making a total of $5,000 for collecting the set. The reward for capturing all 50 snapshots is 4 [[weapon]] spawns becoming available at the [[Doherty Garage]]; namely the [[Micro Uzi]], [[Grenade]]s, [[Pump Action Shotgun]], and [[Sniper Rifle]], and the player will be awarded a bonus of $100,000. |
||
==Locations== |
==Locations== |
||
| ⚫ | |||
| + | {{clr}} |
||
| + | <gallery position=center widths=120 columns=5 captionposition=below captionalign=center hideaddbutton=true> |
||
| + | Snapshots_GTASA_Location_001.jpg|01 |
||
| + | Snapshots_GTASA_Location_002.jpg|02 |
||
| + | Snapshots_GTASA_Location_003.jpg|03 |
||
| + | Snapshots_GTASA_Location_004.jpg|04 |
||
| + | Snapshots_GTASA_Location_005.jpg|05 |
||
| + | Snapshots_GTASA_Location_006.jpg|06 |
||
| + | Snapshots_GTASA_Location_007.jpg|07 |
||
| + | Snapshots_GTASA_Location_008.jpg|08 |
||
| + | Snapshots_GTASA_Location_009.jpg|09 |
||
| + | Snapshots_GTASA_Location_010.jpg|10 |
||
| + | Snapshots_GTASA_Location_011.jpg|11 |
||
| + | Snapshots_GTASA_Location_012.jpg|12 |
||
| + | Snapshots_GTASA_Location_013.jpg|13 |
||
| + | Snapshots_GTASA_Location_014.jpg|14 |
||
| + | Snapshots_GTASA_Location_015.jpg|15 |
||
| + | Snapshots_GTASA_Location_016.jpg|16 |
||
| + | Snapshots_GTASA_Location_017.jpg|17 |
||
| + | Snapshots_GTASA_Location_018.jpg|18 |
||
| + | Snapshots_GTASA_Location_019.jpg|19 |
||
| + | Snapshots_GTASA_Location_020.jpg|20 |
||
| + | Snapshots_GTASA_Location_021.jpg|21 |
||
| + | Snapshots_GTASA_Location_022.jpg|22 |
||
| + | Snapshots_GTASA_Location_023.jpg|23 |
||
| + | Snapshots_GTASA_Location_024.jpg|24 |
||
| + | Snapshots_GTASA_Location_025.jpg|25 |
||
| + | Snapshots_GTASA_Location_026.jpg|26 |
||
| + | Snapshots_GTASA_Location_027.jpg|27 |
||
| + | Snapshots_GTASA_Location_028.jpg|28 |
||
| + | Snapshots_GTASA_Location_029.jpg|29 |
||
| + | Snapshots_GTASA_Location_030.jpg|30 |
||
| + | Snapshots_GTASA_Location_031.jpg|31 |
||
| + | Snapshots_GTASA_Location_032.jpg|32 |
||
| + | Snapshots_GTASA_Location_033.jpg|33 |
||
| + | Snapshots_GTASA_Location_034.jpg|34 |
||
| + | Snapshots_GTASA_Location_035.jpg|35 |
||
| + | Snapshots_GTASA_Location_036.jpg|36 |
||
| + | Snapshots_GTASA_Location_037.jpg|37 |
||
| + | Snapshots_GTASA_Location_038.jpg|38 |
||
| + | Snapshots_GTASA_Location_039.jpg|39 |
||
| + | Snapshots_GTASA_Location_040.jpg|40 |
||
| + | Snapshots_GTASA_Location_041.jpg|41 |
||
| + | Snapshots_GTASA_Location_042.jpg|42 |
||
| + | Snapshots_GTASA_Location_043.jpg|43 |
||
| + | Snapshots_GTASA_Location_044.jpg|44 |
||
| + | Snapshots_GTASA_Location_045.jpg|45 |
||
| + | Snapshots_GTASA_Location_046.jpg|46 |
||
| + | Snapshots_GTASA_Location_047.jpg|47 |
||
| + | Snapshots_GTASA_Location_048.jpg|48 |
||
| + | Snapshots_GTASA_Location_049.jpg|49 |
||
| + | Snapshots_GTASA_Location_050.jpg|50 |
||
| + | </gallery> |
||
| ⚫ | |||
| − | |||
| − | * [[Easter Bay International Airport]] (4) |
||
| − | * [[Foster Valley]] (2) |
||
| − | * [[Missionary Hill]] (2) |
||
| − | * [[Avispa Country Club]] (2) |
||
| − | * [[Ocean Flats]] (1) |
||
| − | * [[Hashbury]] (3) |
||
| − | * [[Garcia]] (2) |
||
| − | * [[Doherty]] (2) |
||
| − | * [[Easter Basin]] (4) |
||
| − | * [[San Fierro City Hall|City Hall]] (2) |
||
| − | * [[Queens]] (3) |
||
| − | * [[King's]] (3) |
||
| − | * [[Downtown San Fierro|Downtown]] (3) |
||
| − | * [[Financial]] (3) |
||
| − | * [[Calton Heights]] (2) |
||
| − | * [[Juniper Hill]] (1) |
||
| − | * [[Chinatown, San Fierro|Chinatown]] (1) |
||
| − | * [[Palisades]] (1) |
||
| − | * [[Paradiso]] (1) |
||
| − | * [[Juniper Hollow]] (1) |
||
| − | * [[Gant Bridge]] (1) |
||
| − | * [[San Fierro Bay]] (1) |
||
| − | * [[Esplanade North]] (3) |
||
| − | * [[Esplanade East]] (1) |
||
| − | * [[Garver Bridge]] (1) |
||
==Video Walkthrough== |
==Video Walkthrough== |
||
| ⚫ | |||
| − | <center> |
||
| + | |||
| ⚫ | |||
| + | ==Bugs/Glitches== |
||
| − | </center> |
||
| + | *There is a minor glitch involving the snapshot icons; sometimes, CJ can be too far away for the icon to be visible but it will register as a snapshot if the camera viewfinder is zoomed in enough and pointing towards the general location of the icon. |
||
| + | *It is possible to catch a glimpse of the icon without the need of a camera if the player speeds towards one, it will be visible for a second before disappearing. |
||
==See Also== |
==See Also== |
||
* [[Collectibles]] |
* [[Collectibles]] |
||
* [[Tags]] |
* [[Tags]] |
||
| + | * [[Horseshoes]] |
||
| + | {{GTASA}} |
||
{{collectibles}} |
{{collectibles}} |
||
Revision as of 00:39, 8 March 2015
A snapshot icon as seen through the viewfinder of a camera.
Snapshots are a type of collectible in Grand Theft Auto: San Andreas. As their names imply, they are obtained using the Camera.
Descripiton
Snapshots exist only in San Fierro, San Andreas, and each appears as a rotating circular camera icon above a particularly interesting scenic spot.
To successfully capture a snapshot, the snapshot icon must be within the camera viewfinder. Sometimes zooming is required to capture a more distant icon. The point of interest above which the icon sits is not required to be in the viewfinder, simply the icon itself.

The glow that marks the location of a snapshot at night.
The snapshot icon itself will not be visible to the player unless he is looking at it through the camera's viewfinder. In normal 3rd person view, the player will be able to see a white glow where the snapshot should be, and this is particularly noticeable at night.
The photograph can be saved, if desired, by taking the photo using the save mode on the camera, however the snapshot icon will not appear in the photograph (unless the shot is composed so the snapshot doesn't successfully register).
Most of the snapshot icons can be easily photographed as soon as San Fierro is opened, with the exception of one on the Garver Bridge that can't be seen until the bridge opens for crossing, but it is still possible to capture this snapshot before the bridge opens by using a boat to go under it. Another snapshot icon is located within the Easter Basin Naval Station. Accessing the area and getting too close to the icon will trigger a 5-star wanted level, so the player can keep their distance in a boat and still get close enough to take it without attaining a wanted level.
Reward
Snapshots are one of four collectibles along with Tags, Horseshoes, and Oysters, and as with the others, completing all 50 grants the player a significant reward. The reward for each snapshot correctly taken is $100, making a total of $5,000 for collecting the set. The reward for capturing all 50 snapshots is 4 weapon spawns becoming available at the Doherty Garage; namely the Micro Uzi, Grenades, Pump Action Shotgun, and Sniper Rifle, and the player will be awarded a bonus of $100,000.
Locations
Snapshots' locations
")
")
")
")
")
")
")
")
")
")
")
")
")
")
")
")
")
")
")
")
")
")
")
")
")
")
")
")
")
")
")
")
")
")
")
")
")
")
")
")
")
")
")
")
")
")
")
")
")
")
Video Walkthrough
Bugs/Glitches
- There is a minor glitch involving the snapshot icons; sometimes, CJ can be too far away for the icon to be visible but it will register as a snapshot if the camera viewfinder is zoomed in enough and pointing towards the general location of the icon.
- It is possible to catch a glimpse of the icon without the need of a camera if the player speeds towards one, it will be visible for a second before disappearing.
See Also
| Grand Theft Auto: San Andreas | |
|---|---|
| Locations | State of San Andreas (Los Santos | San Fierro | Las Venturas | Red County | Flint County | Whetstone | Tierra Robada | Bone County) |
| Characters | Carl "CJ" Johnson | Sean "Sweet" Johnson | Kendl Johnson | Melvin "Big Smoke" Harris | Lance "Ryder" Wilson | Cesar Vialpando | Frank Tenpenny | Wu Zi Mu | Mike Toreno | Ken Rosenberg |
| Content | Missions | Vehicles | Weapons | Assets | Characters | Clothing | Tattoo Parlors | Radio Stations | Gang Warfare |
| Information | 100% Completion | Achievements/Trophies | Weapon Stats | Player's Stats | Cheats | Trailers | Artworks |