m (Adding missing 'px' suffix to video pixel width) |
No edit summary |
||
| (78 intermediate revisions by 49 users not shown) | |||
| Line 1: | Line 1: | ||
| ⚫ | |||
| − | {{cleanup}} |
||
| ⚫ | |||
| ⚫ | |||
| + | |image = TunnelofDeath-Mission-GTAIV.png |
||
| − | |game=IV |
||
| + | |||
| ⚫ | |||
| + | |game = {{games|IV=y}} |
||
| − | |caption=Police convoy being blocked by Niko |
||
| + | |type = IV |
||
| − | |for=Derrick McReary |
||
| + | |for = {{For|game=IV|derrick}} |
||
| ⚫ | |||
| − | |location= |
+ | |location = [[Acter Park]], [[Acter]], [[State of Alderney|Alderney]] |
| ⚫ | |||
| − | |reward=$7,500 |
||
| + | |fail = [[Wasted]]<br>[[Busted]]<br>[[Packie]] dies<br>[[Packie]] is abandoned<br>[[Police Stockade]] destroyed<br>[[Presidente|Getaway vehicle]] destroyed<br>[[Aiden O'Malley|Aiden]] dies before reaching [[Leftwood]]<br>[[Aiden O'Malley|Aiden]] escapes (when Packie tells Niko to kill Aiden) |
||
| ⚫ | |||
| − | | |
+ | |reward = [[Money|$7,500]] |
| ⚫ | |||
| − | |fail=Player Character Death<br>Packie killed<br>Police stockade destroyed<br>Aiden killed before end of mission |
||
| + | |unlockedby = [[Babysitting]] |
||
| + | |todo = *Get the '''<span style="color:#396464">truck.</span>''' |
||
| + | *Block off the '''<span style="color:#C6BF8A">Booth Tunnel.</span>''' |
||
| + | *Steal the '''<span style="color:#396464">Stockade.</span>''' |
||
| ⚫ | |||
| ⚫ | |||
| + | *Take Aiden to the '''<span style="color:#C6BF8A">cliffs.</span>''' |
||
| + | *Kill '''<span style="color:#884548">Aiden.</span>''' |
||
}} |
}} |
||
| ⚫ | |||
| ⚫ | |||
| + | ==Description== |
||
| ⚫ | |||
| ⚫ | Derrick is high on cocaine when Niko arrives. He tells Niko that he heard [[Aiden O'Malley]] is being transported to the [[Alderney State Correctional Facility]], and since Aiden has the impression that Derrick is the reason why he's incarcerated, he chooses to rat him out. Therefore, Derrick decides that this is a good opportunity to get rid of him. |
||
| ⚫ | Soon, [[Patrick McReary|Packie]] calls Niko on the details. Aiden is heavily guarded by a [[Liberty City Police Department (HD Universe)|LCPD]] escort. He left a [[Biff]] with a [[Rocket Launcher]] off [[Applewhite Street|Applewhite]] in [[Alderney City]]. He wants Niko to use the truck to block one end of the [[Booth Tunnel]] while Packie blocks the other end. |
||
| ⚫ | |||
| ⚫ | |||
| ⚫ | |||
| ⚫ | |||
| ⚫ | Niko then blocks the tunnel and stops the convoy and Packie comes from the rear and blocks that way, and [[Mitch (Tunnel of Death)|one of the policemen]] gets out and asks Niko to move the truck. Niko and Packie launch a surprise attack on the convoy, killing all of the cops. After all the cops are dead, Niko and Packie steal the [[Police Stockade]] containing Aiden. |
||
| ⚫ | Soon, [[Patrick McReary|Packie]] calls Niko on the details. Aiden is heavily guarded by a [[ |
||
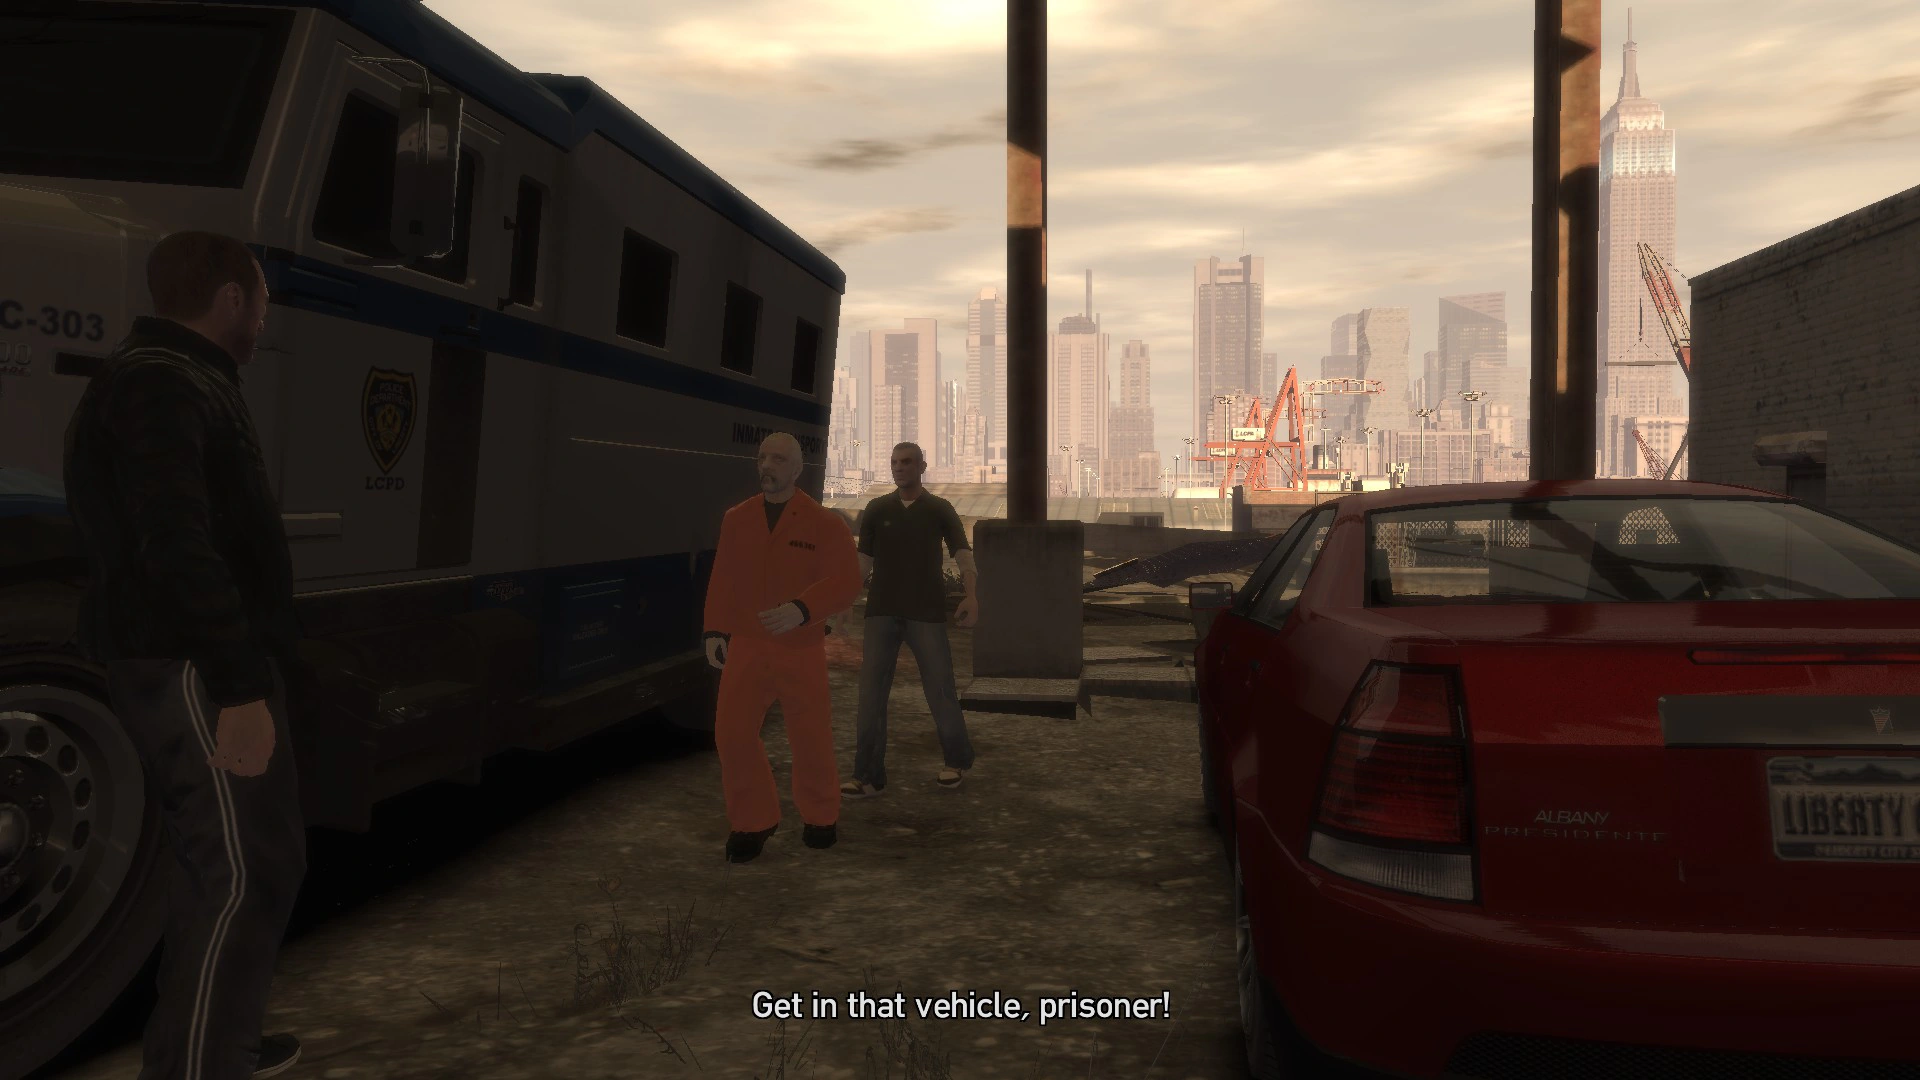
| + | [[File:TunnelOfDeath-GTAIV-VehicleTransfer.png|thumb|Transfer to a [[Presidente]].]] |
||
| ⚫ | |||
| ⚫ | |||
| ⚫ | |||
| ⚫ | Once there, Packie reveals that his elder brother Derrick sent them to free Aiden so that Niko can kill him. Aiden is shocked and says that Derrick has always been the rat. Packie leaves, then Niko shoots Aiden who then falls into the water as blood gushes on the ocean. Niko then calls Derrick to tell him Aiden is dead. |
||
| ⚫ | Niko then blocks the tunnel and stops the convoy and Packie comes from the rear and blocks that way, and [[Mitch (Tunnel of Death)|one of the policemen]] |
||
| ⚫ | |||
| ⚫ | |||
| ⚫ | |||
| ⚫ | |||
| ⚫ | |||
| + | *Park the truck across the two markers to block the tunnel. |
||
| + | *Steal the Stockade ''(after taking out all the cops)''. |
||
| + | *Lose your wanted level. |
||
| + | *Ditch the truck at the quiet location. |
||
| ⚫ | |||
| ⚫ | |||
| + | ==Aftermath== |
||
| ⚫ | |||
| + | ===[[Weazel News]] (Radio)=== |
||
| + | ''"An escaped felon is on the loose and police say it's Aiden O'Malley. O'Malley was being transported from a [[Varsity Heights Police Station|police station]] in Algonquin where he was giving evidence. He was being taken back to the Alderney State Correctional Facility. The convoy was ambushed by two trucks while going through the Booth Tunnel. O'Malley is a white male in his mid 40's. Although American-born, he speaks with an Irish brogue. He was assisted by two accomplices; one was American but the other had a foreign accent."'' |
||
| + | After killing Aiden O'Malley: |
||
| ⚫ | |||
| + | ''"Police have recovered the body of Aiden O'Malley, the suspected former terrorist who was busted out of a prison van on the booth tunnel. At the time, it was presumed that he had been sprung by friends. Now it seems he was freed in order to be silenced. We'll stay with this story."'' |
||
| − | ==Mission objectives== |
||
| ⚫ | |||
| ⚫ | |||
| ⚫ | |||
| − | *Take out all the cops |
||
| − | *Steal the Stockade |
||
| ⚫ | |||
| ⚫ | |||
| ⚫ | |||
| ⚫ | |||
| + | ===[[Liberty Tree]] Newspaper=== |
||
| ⚫ | |||
| + | ''"An audacious prison escape, like something you might see on a [[Weazel]] Network show, occurred ninety seven feet under the surface of the [[West River]] earlier. A convoy carrying convicted felon, [[Aiden O'Malley]], was ambushed by two trucks. O'Malley was being taken from a [[Varsity Heights Police Station|police station]] in [[Algonquin]] back to the [[Alderney State Correctional Facility]]. Two men used the trucks to block the convoy from the front and the back in the middle of the [[Booth Tunnel]] while they freed O'Malley. O'Malley, 48, who is American born but spent much of his adult life in [[Ireland]], was serving a twenty-year for his involvement in a string of robberies."'' |
||
| + | ''"O'Malley was returning from a deposition in which he gave evidence implicating his accomplices in the carrying-out of those robberies. Police were particularly interested in his testimony relating to [[Bucky Sligo]], who recently died. Now authorities are concerned that all of his testimony may have been used somehow to facilitate his escape. Police warn that O'Malley and his cohorts are armed and considered very dangerous."'' |
||
| − | <center> |
||
| + | |||
| ⚫ | |||
| + | <small>(some missions after Tunnel of Death)</small><br /> |
||
| − | </center> |
||
| + | ''"Police have confirmed reports that a body they recovered was identified as [[Aiden O'Malley]] - the convict and possible one-time terrorist who was sprung from a prison van recently in a violent attack. At the time, it was presumed that O'Malley had friends in criminally high places. Now it seems he was freed so he could be silenced, or punished for past crimes. Police have no leads on what might have been behind the need to silence or kill Mr. O'Malley, 48. O'Malley was born and raised in [[Dukes]] but spent much of his adult life in [[Ireland]] and [[United Kingdom|Britain]], where he was thought to have links with several paramilitary and terrorist groups. Some experts claim that, since the ending of the Troubles, several former activists have returned to [[Liberty City (HD Universe)|Liberty City]] and are engaged in the settling of old scores, while also getting involved in new forms of crime including drug dealing."'' |
||
| + | |||
| + | ==Enemies== |
||
| + | *[[Liberty City Police Department (HD Universe)|LCPD]] |
||
| + | *[[National Office of Security Enforcement|NOOSE]] [[Tactical Response Unit|TRU]] |
||
| + | *[[Aiden O'Malley]] |
||
| + | *[[Mitch (GTA IV)|Mitch]] |
||
| + | *[[Jeff The Cop|Jeff]] |
||
| ⚫ | |||
| − | The reward for completing this mission is [[$]]7,500. The mission [[Blood Brothers]] is unlocked upon completion. |
||
==Deaths== |
==Deaths== |
||
| − | *[[Mitch (Tunnel of Death)|Mitch]] - Killed by Niko |
+ | *[[Mitch (Tunnel of Death)|Mitch]] - Killed by [[Niko Bellic|Niko]] and [[Patrick McReary|Packie]] during the ambush. |
| − | *[[ |
+ | *[[Jeff The Cop|Jeff]] - Killed by [[Niko Bellic|Niko]] and [[Patrick McReary|Packie]] during the ambush. |
| + | *Many [[National Office of Security Enforcement|NOOSE]] [[Tactical Response Unit|TRU]] officers and [[Liberty City Police Department (HD Universe)|LCPD]] officers - Killed by [[Niko Bellic|Niko]] and [[Patrick McReary|Packie]] in order to get in the [[Police Stockade|Stockade]] with Aiden. |
||
| + | *[[Aiden O'Malley]] - Killed by Niko under [[Derrick McReary|Derrick]] and [[Patrick McReary|Packie]]'s orders. |
||
| + | |||
| ⚫ | |||
| + | *[[Money|$]]7,500 |
||
| + | *The mission [[Blood Brothers]] is unlocked. |
||
| + | |||
| + | ==Gallery== |
||
| + | <gallery position="center" spacing="small" widths="270px"> |
||
| + | AidenOMalley-GTAIV-Corpse.png|[[Aiden O'Malley]]'s corpse. |
||
| + | TunnelOfDeath-GTAIV-Aiden&Packie.png|[[Patrick McReary]] and [[Aiden O'Malley]] in the back of the [[Enforcer]]. |
||
| + | </gallery> |
||
| + | |||
| ⚫ | |||
| ⚫ | |||
==Trivia== |
==Trivia== |
||
| − | * |
+ | *Packie will have different dialogue at the cliffs during sunset. |
| − | *If O'Malley is killed by a [[Molotov]], he will roll around screaming for a few seconds. When the game changes to the cutscene, he will stop burning, stand up again |
+ | *If O'Malley is killed by a [[Molotov]], he will roll around screaming for a few seconds. When the game changes to the cutscene, he will stop burning, stand up again and collapse dead on the ground. |
| ⚫ | |||
| − | *In this mission, along with [[Knowing Me, Knowing You]] the player can hear Niko's voice through the phone, when he is talking to Packie. |
||
| + | *Despite the convoy being guarded by the LCPD once it reaches the tunnel, in the cutscene where Packie is waiting for the convoy to leave the precinct, [[Alderney State Police|ASP]] troopers are seen escorting it. This is a developer oversight. |
||
| ⚫ | |||
| + | *The LCPD personnel are different depending on the platform. In the console releases of the game, the convoy is escorted by fit officers, while on the PC version of the game, it is escorted by overweight officers. This was most likely done as the scripted dialogue from officers in this sequence was provided by the voice actors for Officers [[Officer 1214|1214]] and [[Joey (GTA IV)|Joey]], the game's overweight officers. |
||
*If the radio station in the truck is changed before Packie calls, it returns to default once the conversation cutscene finishes. |
*If the radio station in the truck is changed before Packie calls, it returns to default once the conversation cutscene finishes. |
||
| − | *Packie is seen listening to [[Liberty Rock Radio]] |
+ | *Packie is seen listening to [[Liberty Rock Radio]] on the phone when the player can see him, which is his favorite station. |
| + | *The [[NOOSE Patriot]] escorting the [[Police Stockade]] is completely bulletproof and can be stolen by the player and parked within the parking space of one of the [[Safehouses in GTA IV|Safehouses]], with the [[Alderney Safehouse]] being the closest. |
||
| − | *While Niko is talking to Derrick in the initial cutscene, a [[Flying Rat]] can be seen in the background if |
+ | *While Niko is talking to Derrick in the initial cutscene, a [[Flying Rat]] can be seen in the background (if the player has not killed it yet). |
| − | *The sirens on the [[Police Cruiser |
+ | *The sirens on the [[Police Cruiser]], [[Police Patrol]] and [[NOOSE Patriot]] in this mission will stay on when the player exits them instead of the lights staying on and the sirens staying off. To do this, get in a Police car or Noose Patriot and turn on the sirens, then exit. This may be just a bug or a glitch, they will lose this feature if saved in a parking spot. |
| − | *This is a similar mission to [[Off Route]] in [[The Lost and Damned|The Lost and Damned.]] |
||
| + | *This mission is probably the only time the [[Police Stockade]] becomes available to the player as the ones in [[Three Leaf Clover]] were locked and inaccessible. |
||
| + | **There is a way for the player to keep the Stockade. Kill Packie just before entering the Stockade. This fails the mission but does not introduce a cutscene. The player may then drive the vehicle to their safehouse of choice, ideally [[Playboy X's Penthouse|Playboy X's Loft]] or the [[Middle Park East Safehouse]], as these areas are low-crime, and there is no risk of police officers stealing the Stockade to transport criminals, unlike other parking spaces. |
||
| + | *This mission bears a very close similarity to the [[Introduction (GTA III)|introduction cutscene]] of the original ''[[Grand Theft Auto III]]'', as both deal with police convoys being ambushed (while one takes place on the [[Callahan Bridge]], and another at the [[Booth Tunnel]]) and prisoners released by force. Police convoys both consist of an armored truck and a police cruiser. |
||
| + | *If the player pauses the game during the cutscene when Niko and Packie are talking on the phone in their trucks, the character arrow on the map will show Packie's position in Algonquin rather than Niko's. |
||
| + | *Despite Packie's incessant [[Pump Shotgun]] fire, his shells do not do damage to his targets, even at point blank range. |
||
| − | ==See |
+ | ==See Also== |
*[[Tunnel of Death/Walkthrough|Walkthrough]] |
*[[Tunnel of Death/Walkthrough|Walkthrough]] |
||
| − | == |
+ | ==Navigation== |
| + | {{Navboxes |
||
| − | *[http://www.youtube.com/watch?v=iAxJvWxGDKo Tunnel of Death mission on YouTube by GTAmissions - PC version] |
||
| + | |title= Navigation |
||
| − | |||
| + | |list1= |
||
| − | |||
| + | {{GTA|state=collapsed}} |
||
| + | {{Gtaiv missions|state=collapsed}} |
||
| + | }} |
||
[[de:Tunnel of Death]] |
[[de:Tunnel of Death]] |
||
[[es:Tunnel of Death]] |
[[es:Tunnel of Death]] |
||
[[pl:Tunnel of Death]] |
[[pl:Tunnel of Death]] |
||
| + | [[ru:Tunnel of Death]] |
||
[[Category:Missions in GTA IV]] |
[[Category:Missions in GTA IV]] |
||
| − | [[Category:Missions]] |
||
Latest revision as of 17:45, 1 April 2024
Tunnel of Death is a mission in Grand Theft Auto IV given to protagonist Niko Bellic by Irish gangster Derrick McReary from the public park in Acter, Alderney.
Description
Derrick is high on cocaine when Niko arrives. He tells Niko that he heard Aiden O'Malley is being transported to the Alderney State Correctional Facility, and since Aiden has the impression that Derrick is the reason why he's incarcerated, he chooses to rat him out. Therefore, Derrick decides that this is a good opportunity to get rid of him.
Soon, Packie calls Niko on the details. Aiden is heavily guarded by a LCPD escort. He left a Biff with a Rocket Launcher off Applewhite in Alderney City. He wants Niko to use the truck to block one end of the Booth Tunnel while Packie blocks the other end.
Niko calls Packie once he is in the truck. Packie explains that they cannot kill Aiden on the spot because the police will go straight to Derrick, so they must make it look like a prison break.
Niko then blocks the tunnel and stops the convoy and Packie comes from the rear and blocks that way, and one of the policemen gets out and asks Niko to move the truck. Niko and Packie launch a surprise attack on the convoy, killing all of the cops. After all the cops are dead, Niko and Packie steal the Police Stockade containing Aiden.

Transfer to a Presidente.
Niko drives the truck to Port Tudor to abandon it as he escapes the police. Niko, Packie, and Aiden change transport to a nearby parked Presidente and drive to the cliffs in Leftwood.
Aiden is very happy that he is free from police custody and asks who sent them to rescue him. Niko and Packie do not reveal who until they arrive at the cliffs.
Once there, Packie reveals that his elder brother Derrick sent them to free Aiden so that Niko can kill him. Aiden is shocked and says that Derrick has always been the rat. Packie leaves, then Niko shoots Aiden who then falls into the water as blood gushes on the ocean. Niko then calls Derrick to tell him Aiden is dead.
Mission Objectives
In order to complete the mission the player must:
- Get in the truck.
- Cordon off the Booth Tunnel.
- Park the truck across the two markers to block the tunnel.
- Steal the Stockade (after taking out all the cops).
- Lose your wanted level.
- Ditch the truck at the quiet location.
- Take Aiden to the cliffs.
- Kill Aiden.
Aftermath
Weazel News (Radio)
"An escaped felon is on the loose and police say it's Aiden O'Malley. O'Malley was being transported from a police station in Algonquin where he was giving evidence. He was being taken back to the Alderney State Correctional Facility. The convoy was ambushed by two trucks while going through the Booth Tunnel. O'Malley is a white male in his mid 40's. Although American-born, he speaks with an Irish brogue. He was assisted by two accomplices; one was American but the other had a foreign accent."
After killing Aiden O'Malley:
"Police have recovered the body of Aiden O'Malley, the suspected former terrorist who was busted out of a prison van on the booth tunnel. At the time, it was presumed that he had been sprung by friends. Now it seems he was freed in order to be silenced. We'll stay with this story."
Liberty Tree Newspaper
"An audacious prison escape, like something you might see on a Weazel Network show, occurred ninety seven feet under the surface of the West River earlier. A convoy carrying convicted felon, Aiden O'Malley, was ambushed by two trucks. O'Malley was being taken from a police station in Algonquin back to the Alderney State Correctional Facility. Two men used the trucks to block the convoy from the front and the back in the middle of the Booth Tunnel while they freed O'Malley. O'Malley, 48, who is American born but spent much of his adult life in Ireland, was serving a twenty-year for his involvement in a string of robberies."
"O'Malley was returning from a deposition in which he gave evidence implicating his accomplices in the carrying-out of those robberies. Police were particularly interested in his testimony relating to Bucky Sligo, who recently died. Now authorities are concerned that all of his testimony may have been used somehow to facilitate his escape. Police warn that O'Malley and his cohorts are armed and considered very dangerous."
(some missions after Tunnel of Death)
"Police have confirmed reports that a body they recovered was identified as Aiden O'Malley - the convict and possible one-time terrorist who was sprung from a prison van recently in a violent attack. At the time, it was presumed that O'Malley had friends in criminally high places. Now it seems he was freed so he could be silenced, or punished for past crimes. Police have no leads on what might have been behind the need to silence or kill Mr. O'Malley, 48. O'Malley was born and raised in Dukes but spent much of his adult life in Ireland and Britain, where he was thought to have links with several paramilitary and terrorist groups. Some experts claim that, since the ending of the Troubles, several former activists have returned to Liberty City and are engaged in the settling of old scores, while also getting involved in new forms of crime including drug dealing."
Enemies
Deaths
- Mitch - Killed by Niko and Packie during the ambush.
- Jeff - Killed by Niko and Packie during the ambush.
- Many NOOSE TRU officers and LCPD officers - Killed by Niko and Packie in order to get in the Stockade with Aiden.
- Aiden O'Malley - Killed by Niko under Derrick and Packie's orders.
Reward
- $7,500
- The mission Blood Brothers is unlocked.
Gallery
")
")
Video Walkthrough

Trivia
- Packie will have different dialogue at the cliffs during sunset.
- If O'Malley is killed by a Molotov, he will roll around screaming for a few seconds. When the game changes to the cutscene, he will stop burning, stand up again and collapse dead on the ground.
- Even though Packie calls and says the truck is on Applewhite Street, it's actually really on Mahesh Avenue.
- Despite the convoy being guarded by the LCPD once it reaches the tunnel, in the cutscene where Packie is waiting for the convoy to leave the precinct, ASP troopers are seen escorting it. This is a developer oversight.
- The LCPD personnel are different depending on the platform. In the console releases of the game, the convoy is escorted by fit officers, while on the PC version of the game, it is escorted by overweight officers. This was most likely done as the scripted dialogue from officers in this sequence was provided by the voice actors for Officers 1214 and Joey, the game's overweight officers.
- If the radio station in the truck is changed before Packie calls, it returns to default once the conversation cutscene finishes.
- Packie is seen listening to Liberty Rock Radio on the phone when the player can see him, which is his favorite station.
- The NOOSE Patriot escorting the Police Stockade is completely bulletproof and can be stolen by the player and parked within the parking space of one of the Safehouses, with the Alderney Safehouse being the closest.
- While Niko is talking to Derrick in the initial cutscene, a Flying Rat can be seen in the background (if the player has not killed it yet).
- The sirens on the Police Cruiser, Police Patrol and NOOSE Patriot in this mission will stay on when the player exits them instead of the lights staying on and the sirens staying off. To do this, get in a Police car or Noose Patriot and turn on the sirens, then exit. This may be just a bug or a glitch, they will lose this feature if saved in a parking spot.
- This mission is probably the only time the Police Stockade becomes available to the player as the ones in Three Leaf Clover were locked and inaccessible.
- There is a way for the player to keep the Stockade. Kill Packie just before entering the Stockade. This fails the mission but does not introduce a cutscene. The player may then drive the vehicle to their safehouse of choice, ideally Playboy X's Loft or the Middle Park East Safehouse, as these areas are low-crime, and there is no risk of police officers stealing the Stockade to transport criminals, unlike other parking spaces.
- This mission bears a very close similarity to the introduction cutscene of the original Grand Theft Auto III, as both deal with police convoys being ambushed (while one takes place on the Callahan Bridge, and another at the Booth Tunnel) and prisoners released by force. Police convoys both consist of an armored truck and a police cruiser.
- If the player pauses the game during the cutscene when Niko and Packie are talking on the phone in their trucks, the character arrow on the map will show Packie's position in Algonquin rather than Niko's.
- Despite Packie's incessant Pump Shotgun fire, his shells do not do damage to his targets, even at point blank range.